Yamaha F01 Owner's Manual
Yamaha F01 Manual
 |
View all Yamaha F01 manuals
Add to My Manuals
Save this manual to your list of manuals |
Yamaha F01 manual content summary:
- Yamaha F01 | Owner's Manual - Page 1
information on assembling the keyboard stand, refer to the instructions at the end of this manual. IMPORTANT - Check your power supply - Make de su área. El selector de tensión se ajusta a 240V cuando la unidad sale de fábrica. Para cambiar el ajuste, emplee un FR destornillador de cabeza "recta" - Yamaha F01 | Owner's Manual - Page 2
user to the presence of important operating and maintenance (servicing) instructions in the literature accompanying the product. The lightning fl CHANGE: The information contained in this manual is believed to be correct at the time of printing. However, Yamaha reserves the right to change or modify - Yamaha F01 | Owner's Manual - Page 3
Service Division, 6600 Orangethorpe Ave, Buena Park, CA90620 The above statements apply ONLY to those products distributed by Yamaha Corporation of America or its subsidiaries. * This applies only to products distributed by YAMAHA CORPORATION OF AMERICA. (class B) (F01) (F11) IMPORTANT - Yamaha F01 | Owner's Manual - Page 4
the AC outlet. Then have the instrument inspected by qualified Yamaha service personnel. • Never insert or remove an electric plug with wet AC outlet you are using is easily accessible. If some trouble or malfunction occurs, immediately turn off the power switch and F11/F01 Owner's Manual (1)B-12 1/2 - Yamaha F01 | Owner's Manual - Page 5
qualified Yamaha service personnel. not rest your weight on, or Yamaha cannot be held responsible for damage caused by improper use or modifications to the instrument, or data that is lost or destroyed. Always turn the power off when the instrument is not in use. (1)B-12 2/2 F11/F01 Owner's Manual - Yamaha F01 | Owner's Manual - Page 6
ENGLISH About this Owner's Manual Thank you for purchasing the Yamaha Digital Piano F11/F01! We recommend that you read this manual carefully so that you can fully take advantage of the advanced and convenient functions of the F11/F01. We also recommend that you keep this manual in a safe and handy - Yamaha F01 | Owner's Manual - Page 7
Accessories Accessories • Owner's Manual This manual contains complete instructions for operating your F11/F01. • Quick Operation Guide • Bench • AC Power Cord Tuning Unlike an acoustic piano, the instrument does not need to be tuned. It always stays perfectly in tune. Transporting If you move to - Yamaha F01 | Owner's Manual - Page 8
digital piano The instrument combines true piano sound in a modern, attractive cabinet that evokes the beauty of a real acoustic grand piano weight of the key and hammer, and the characteristic weight gradations piano. Internet Direct Connection (IDC) (F11) Yamaha provides a special streaming service - Yamaha F01 | Owner's Manual - Page 9
(F11 32 Splitting the Keyboard Range and Playing Two Different Voices (Split mode 32 Using the Metronome 34 Selecting various digital F11 58 Message List (F01 59 Troubleshooting 60 Keyboard Stand Assembly 61 50 Piano Preset Songs (Classic & Jazz) List 64 Preset Voice List 66 Voice Demo - Yamaha F01 | Owner's Manual - Page 10
). Doing so may damage the data. 4 [PRESET 1]/[PRESET 2] lamp ........ p. 19 When this is lit, you can listen to the 50 piano preset songs (Classic & Jazz). 10 F11/F01 Owner's Manual 5 [USB] lamp p. 22 When this is lit, you can listen to songs contained in USB flash memory. 6 [USB] access lamp - Yamaha F01 | Owner's Manual - Page 11
the device. N [LAN] port (F11 p. 52 By directly connecting the F11 to the Internet, you can use the special streaming service on the Yamaha website that enables you to automatically play of the song numbers from "50 Piano Preset Songs (Classic & Jazz)" Parameter value F11/F01 Owner's Manual 11 - Yamaha F01 | Owner's Manual - Page 12
(F11) The Piano Preset Songs (Classic & Jazz) (page 19) [USB Listening to songs in USB flash memory (page 22), saving your recorded performances to USB flash memory (page 41) [INTERNET] (F11 Listening to the songs on the internet using the streaming service F11) The Moving Key feature on the F11 - Yamaha F01 | Owner's Manual - Page 13
Before Using the F11/F01 Before Using the F11/F01 Key Cover To open the key cover: 1. To open the cover, insert your fingers in the indenta- tions on catching fingers (yours or others, and especially those of children) in folding portion or between the cover and main unit. F11/F01 Owner's Manual 13 - Yamaha F01 | Owner's Manual - Page 14
ENGLISH Before Using the F11/F01 Music Rest The music rest is attached to the inside of the key cover. To position the music rest for use: Pull the music rest on the cover down and toward yourself. To replace the music rest: Lift the music rest up and against the cover. 14 F11/F01 Owner's Manual - Yamaha F01 | Owner's Manual - Page 15
F11/F01 Connecting the Power Cord (F11) Carefully read the following instructions AC outlet. Make sure your F11 meets the voltage requirement for Make sure your F11 is rated for F11. If the supplied cord is lost or damaged and needs to be replaced, contact your Yamaha provided with the F11. If the plug - Yamaha F01 | Owner's Manual - Page 16
the F11/F01 Connecting the Power Cord (F01) Carefully read the following instructions and warnings F01. If the supplied cord is lost or damaged and needs to be replaced, contact your Yamaha dealer. The use of an inappropriate replacement can pose a fire and shock hazard! 16 F11/F01 Owner's Manual - Yamaha F01 | Owner's Manual - Page 17
lights. To turn off the power, press the [POWER] switch again. Power indicator Before Using the F11/F01 [POWER] switch ENGLISH CAUTION Never interrupt the power supply while the instrument is loading data from a USB and the AUX IN input level using the [VOLUME] control. F11/F01 Owner's Manual 17 - Yamaha F01 | Owner's Manual - Page 18
pressing A-1 on the keyboard (also see Quick Operation Guide). Press the [-/NO] or[+/YES] button to return to the original display. A-1 For instructions about how to update the instrument to the latest version, refer to the Yamaha website: http://www.music.yamaha.com/idc 18 F11/F01 Owner's Manual - Yamaha F01 | Owner's Manual - Page 19
and play only the selected song. TERMINOLOGY On the F11/F01, performance data is called a "Song". This includes voice demonstration tunes and 50 piano preset songs (Classic & Jazz). NOTE You cannot select the [PRESET 1] and [PRESET 2] lamps while voice demo song playback is in use (page 29) or the - Yamaha F01 | Owner's Manual - Page 20
number 4. The songs that match that category will play sequentially. For a list of the 50 piano preset songs (Classic & Jazz), see page 64. Scene Titles: Classic - Home Party - Morning . NOTE The data of the 50 piano preset songs is not transmitted via the MIDI connectors. 20 F11/F01 Owner's Manual - Yamaha F01 | Owner's Manual - Page 21
piano preset songs (page 19), songs in USB flash memory (page 22), or songs on the Internet using the streaming service ] button (Quick operation guide). The current part setting best part for each song is selected automatically (Normal setting). "ON" appears on the display. F11/F01 Owner's Manual 21 - Yamaha F01 | Owner's Manual - Page 22
which you've recorded and saved. 001-600 (F11): Select the number of the desired USB song, that above) have been saved on the instrument. 001-400(F01): Select a number of USB song, that which you' cannot turn on the [USB] lamp while the voice demo song playback is in use (page 29) or the - Yamaha F01 | Owner's Manual - Page 23
F11). Refer to page 28. TIP Normal setting: ON (using the specially created G. PIANO 1 Voice of the instrument) To switch the specially created G. PIANO 1 Voice of the instrument to the conventional XG Piano available MIDI sequence data is provided in SMF Format 0. F11/F01 Owner's Manual 23 - Yamaha F01 | Owner's Manual - Page 24
the "1+2" setting is best used with only the piano voice. Default setting is "ALL." (ALL) Part 1 Part 2 Part 3 Piano voices (1+2) Other voices key while holding the [BGM] button (also see Quick Operation Guide). Keep in mind that songs recorded on other devices may use F11/F01 Owner's Manual - Yamaha F01 | Owner's Manual - Page 25
or mouse cannot be used. • The instrument does not necessarily support all commercially available USB storage devices. Yamaha cannot guarantee operation of USB storage devices that you purchase. Before to the USB storage device, make sure to disable write-protect. F11/F01 Owner's Manual 25 - Yamaha F01 | Owner's Manual - Page 26
floppy disks can be used. about once a month. Ask your Yamaha dealer about the availability of proper headcleaning disks. ■ Inserting/Removing Floppy errors. • To maintain the disk drive in optimum working order Yamaha recommends that you use a commerciallyavailable dry-type head cleaning disk to - Yamaha F01 | Owner's Manual - Page 27
cannot select the [INTERNET] lamp while voice demo song playback is in use (page 29) or the [REC] button is on (page 38). NOTE The LED displays shown in this owner's manual are for instructional purposes only and may appear somewhat different from those on your instrument. F11/F01 Owner's Manual 27 - Yamaha F01 | Owner's Manual - Page 28
G. PIANO 1 Voice of the instrument to the conventional XG Piano Voices of the same type, turn the function OFF. NOTE This setting will not affect the voice you play on the keyboard. The keyboard voice used is the specially created G. PIANO 1 Voice of the instrument. 28 F11/F01 Owner's Manual - Yamaha F01 | Owner's Manual - Page 29
NOTE You cannot adjust the tempo of voice demo songs. The default tempo "---" of the selected voice demo song is automatically set and fixed during playback. NOTE Press the current voice button during the voice demo song playback to restart playback from the top of the song. F11/F01 Owner's Manual 29 - Yamaha F01 | Owner's Manual - Page 30
immediately stops (damps) any sustained notes. When you select the G. PIANO 1 or G. PIANO 1 VARIATION voice on the F11/F01, pressing the damper pedal activates the instrument's special "Sustain Samples" to continue to sound for as long as the sostenuto pedal is depressed. 30 F11/F01 Owner's Manual - Yamaha F01 | Owner's Manual - Page 31
an octave. While holding down the [METRONOME] button, press one of the A4-D5 keys (see Quick Operation Guide). The current Octave Shift setting appears on the display while both controls are held. A4 -1 Voice 1 A#4 0 the default Voice 2 Reverb Depth value for the voice. F11/F01 Owner's Manual 31 - Yamaha F01 | Owner's Manual - Page 32
F11) Some of the current voice settings can be saved in the internal memory of the instrument. The data is maintained even when the power is turned off. Operation Press the [G. PIANO 1] button while holding the [REC] button (see Quick Operation Guide Normal setting: F#2 32 F11/F01 Owner's Manual - Yamaha F01 | Owner's Manual - Page 33
mode. While holding down the [BGM] button, press one of the C0-D0 keys (see Quick Operation Guide). The current range setting appears on the display while both controls are held. C0 for the left Voice C#0 normal setting of Damper pedal range is "for the right Voice". F11/F01 Owner's Manual 33 - Yamaha F01 | Owner's Manual - Page 34
down the [METRONOME] button, press one of the A-1-F#0 keys (see Quick Operation Guide). The current metronome volume setting appears on the display while both controls are held. Adjusting the tempo of certain songs in the 50 Piano Preset Songs. TIP Normal setting: 0 34 F11/F01 Owner's Manual - Yamaha F01 | Owner's Manual - Page 35
digital reverb effects for adding extra depth and expression to the sound, and creating a realistic acoustic ambience. Operation Selecting Reverb Type Press one of the G#6-C7 keys while holding the [METRONOME] button (see Quick Operation Guide when the G. PIANO 1 or 2 Quick Operation Guide). The - Yamaha F01 | Owner's Manual - Page 36
is useful when you play the F11/F01 along with other instruments or CD music. For the key assignment, refer to the Quick Operation Guide. Operation You can also use the a second. TIP Setting range: F11: 414.8Hz - 466.8Hz F01: 427.0Hz - 453.0Hz TIP Normal setting: 440.0Hz 36 F11/F01 Owner's Manual - Yamaha F01 | Owner's Manual - Page 37
A6-A7 keys while holding the [BGM] button (see Quick Operation Guide). The current touch type setting appears on the display while both controls produce maximum loudness. TIP This setting does not change the weight of the keyboard. TIP Normal setting: MEDIUM TIP The touch F11/F01 Owner's Manual 37 - Yamaha F01 | Owner's Manual - Page 38
the F11/F01 keyboard can be an effective practice aid. The F11/F01's Song Recorder allows the recording of one User song. Recording vs. Please be careful not to erase important data. NOTE A voice demo and a 50 Piano Preset Song (Classic & Jazz) cannot be played while the F11/F01 Owner's Manual - Yamaha F01 | Owner's Manual - Page 39
• Dual Reverb Type • Split mode voices • Split balance • Split Octave Shift • Split Reverb Type NOTE On the F01, the [PLAY/STOP] and [REC] button indicators will begin to flash when the recorder memory is almost full. data NOTE You cannot re-record in the middle of a song. F11/F01 Owner's Manual 39 - Yamaha F01 | Owner's Manual - Page 40
] button. NOTE You cannot start playback while voice demo song playback is in use or the unit is song for two pianos, then playing the other part while the recorded part plays back. TIP F11 can move F01, tempo cannot be adjusted during playback. TIP Normal setting: 120 40 F11/F01 Owner's Manual - Yamaha F01 | Owner's Manual - Page 41
to USB Flash Memory Saving Your Recorded Performance to USB Flash Memory The built-in song recorder on the F11/F01 allows you to record one User song, which you can then save to a USB flash memory device is 100 (U00-U99). NOTE The user song is saved as SMF Format 0. F11/F01 Owner's Manual 41 - Yamaha F01 | Owner's Manual - Page 42
a router. For the latest services and the specific instructions on connecting (as well as information on compatible devices etc.), refer to the Yamaha website: http://music.yamaha.com/homekeyboard Use a computer to devices (such as computer, musical instrument, etc.). 42 F11/F01 Owner's Manual - Yamaha F01 | Owner's Manual - Page 43
ENGLISH Internet Direct Connection (IDC) (F11) Connection example 2: Connecting by cable (using a modem with router) ADSL modem Router capability addition to the modem or an access point, this connection requires a router. NOTE The F11 is encrypted in WEP format only. F11/F01 Owner's Manual 43 - Yamaha F01 | Owner's Manual - Page 44
see "Listening to the Songs on Internet (F11)" on page 27. If you are using a wireless LAN (using a USB wireless LAN adaptor): You need to make Internet settings on the instrument. For instructions on making Internet settings, see "About the Internet Settings" on page 45. 44 F11/F01 Owner's Manual - Yamaha F01 | Owner's Manual - Page 45
voice demo song playback is in use (page 29) or the unit is in BGM mode (page 12) or when the [REC] button is on (page 38) or user song playback is active (page 40). NOTE You can create the Internet setting files (named "config.n21") on the special Yamaha webpage. F11/F01 Owner's Manual - Yamaha F01 | Owner's Manual - Page 46
display when you select [INTERNET] lamp with the [BGM] button. For instructions on streaming, see "Listening to the Songs on Internet (F11)" on page 27. NOTE If loading is not successfully completed, an "Err : Medium Field strength: Strong No wireless LAN is used. 46 F11/F01 Owner's Manual - Yamaha F01 | Owner's Manual - Page 47
KEY] button while holding down the [BGM] button. NOTE The export mode cannot be engaged while voice demo song playback is in use (page 29) or the unit is in BGM mode (page 12) or check the description for the error code on the Yamaha website: http://music.yamaha.com/idc F11/F01 Owner's Manual 47 - Yamaha F01 | Owner's Manual - Page 48
the factory-programmed settings for all Internet settings. Yamaha recommends you that you back up the Internet settings before initializing. See "Data Backup (F11)" on page 55 for details. NOTE The server ON (available) OFF (no settings) OFF (no settings) ENGLISH 48 F11/F01 Owner's Manual - Yamaha F01 | Owner's Manual - Page 49
conventional telephone line and a computer. It converts the digital signals from the computer to analog audio for sending , and vice versa. A communications business that offers Internet connection services. In order to connect to the Internet, it is necessary to router. F11/F01 Owner's Manual 49 - Yamaha F01 | Owner's Manual - Page 50
services. Short for "website," this refers to the group of web pages that are opened Site together. For example, the collection of web pages whose addresses begin with "http://www.yamaha.com/" is referred to as the Yamaha wireless connection with digital consumer electronic Ethernet Converter - Yamaha F01 | Owner's Manual - Page 51
AUX OUT jacks are connected to an external audio system, first turn on the power to the F11/F01, then to the external audio system. Reverse this order when you turn the power off. Digital Piano Stereo R LL R AUX OUT AUX OUT phone plug (standard) audio cable AUX IN phone plug (standard) NOTE - Yamaha F01 | Owner's Manual - Page 52
service on the Yamaha website for playing back songs in a variety of musical genres as background music on the instrument. Before connecting the instrument to the Internet, be sure to read "Internet Direct Connection (IDC) (F11)" on page 42. Connecting to a Computer By connecting the F11/F01 - Yamaha F01 | Owner's Manual - Page 53
Digital see Quick Operation Guide). F11: In Dual F11. TIP Setting range: 1-16, OFF (not transmitted) Normal setting: 1 NOTE Voice Demo/50 piano preset song data and recorder playback data are not transmitted via MIDI. TIP Setting range: ALL, 1&2(F01), 1-16 Normal setting: ALL F11/F01 Owner's Manual - Yamaha F01 | Owner's Manual - Page 54
key while holding the [BGM] button (see Quick Operation Guide). TIP For information on control change messages that can be used with the F11/F01, refer to the MIDI Data Format on Data List. You can download the Data List from the Yamaha website (page 6). TIP Setting range: ON/OFF Normal setting - Yamaha F01 | Owner's Manual - Page 55
the Pitch • Character Code • Internet Settings • Channel (for streaming service) • Cookies Initializing the data Turn off the power to the instrument Up Data to USB Flash Memory For maximum data security Yamaha recommends that you save your important data to a USB step 2. F11/F01 Owner's Manual 55 - Yamaha F01 | Owner's Manual - Page 56
1 Engage the Backup mode. Make sure that the USB flash memory device containing the restore data "F11.bup" is connected to the instrument, then press the [REC] button while holding the [VARIATION] button Exit from the Restore mode. Press the [-/NO] or [+/YES] button. 56 F11/F01 Owner's Manual - Yamaha F01 | Owner's Manual - Page 57
that came with Musicsoft Downloader. NOTE You can download Musicsoft Downloader without charge from the Yamaha website. CAUTION Do not turn off the power to the instrument or unplug the instrument Downloader. NOTE The backup data file is automatically named "F01.bup." F11/F01 Owner's Manual 57 - Yamaha F01 | Owner's Manual - Page 58
F11) ENGLISH Message List (F11) In this chart, the comments are divided into three different parts: The initial sentence explains the meaning of the message, while the "•" mark indicates the underlying problem nearest Yamaha dealer or nearest Yamaha dealer message is a three-digit number (001-052), - Yamaha F01 | Owner's Manual - Page 59
List (F01) Message List (F01) In this chart, the comments are divided into three different parts: The initial sentence explains the meaning of the message, while the "•" mark indicates the underlying problem and the . Indicates that the media is protected. ENGLISH F11/F01 Owner's Manual 59 - Yamaha F01 | Owner's Manual - Page 60
Troubleshooting Troubleshooting Problem piano. This is normal, and is no cause for concern. The USB flash memory device cannot be nor- The particular USB flash memory device is not supported confirmed by Yamaha (page 25). • Disconnect the device and connect it to the instrument again. (F11) The cover - Yamaha F01 | Owner's Manual - Page 61
ENGLISH Keyboard Stand Assembly Keyboard Stand Assembly The illustrations here are taken from the F11. CAUTION • Be careful not to confuse parts, and be sure to install all parts in may damage the projections of the rear panel (center), allowing it to fall or be damaged. F11/F01 Owner's Manual 61 - Yamaha F01 | Owner's Manual - Page 62
, or a gap on the top surface of rear panels (center, left, and right). 1 2 1 2 Edges must be flush. Do not allow 3 3 a gap. 62 F11/F01 Owner's Manual Voltage Selector Before connecting the AC power cord, check the setting of the voltage selector which is provided in some areas. To set the - Yamaha F01 | Owner's Manual - Page 63
After completing the assembly, please check the following. • Are there any parts left over? ➝ Review the assembly procedure and correct any errors. • Is the instrument clear of doors and other movable injury. Key cover Hold here. Do not hold here. Keyboard Stand Assembly F11/F01 Owner's Manual 63 - Yamaha F01 | Owner's Manual - Page 64
Mood Music Fantasy Baroque and Pre-romantic Music Pre-romantic (Chopin) Post-romantic Modern French 50 Piano Preset Songs (Classic & Jazz) List 50 Piano Preset Songs (Classic & Jazz) List [PRESET 1] (Classic) Scene No. 1 2 3 may not be exactly the same as the original. 64 F11/F01 Owner's Manual - Yamaha F01 | Owner's Manual - Page 65
ENGLISH 50 Piano Preset Songs (Classic & Jazz) List [PRESET 2] (Jazz) Scene No. 14 15 16 17 18 19 20 21 22 23 Home Party Daytime Afternoon each scene. Some of the preset songs have been edited for length or arrangement, and may not be exactly the same as the original. F11/F01 Owner's Manual 65 - Yamaha F01 | Owner's Manual - Page 66
voice with a piano or electric piano in the DUAL mode. Vibraphone played with relatively soft mallets. The tone becomes more metallic the harder you play. Warm and natural-sounding nylon guitar. Enjoy the very subtle sample that is produced when the keys are released. 66 F11/F01 Owner's Manual - Yamaha F01 | Owner's Manual - Page 67
Name Title Composer G. PIANO 1 "Eintritt" Waldszenen Op.82 R. Schumann HARPSI. Gavotte J.S. Bach The voice demonstration pieces listed above are short rearranged excerpts the original compositions. All other songs are original (©2005 Yamaha Corporation). ENGLISH F11/F01 Owner's Manual 67 - Yamaha F01 | Owner's Manual - Page 68
Piano Preset Songs (Classic & Jazz 19 50 Piano Preset Songs (Classic & Jazz) List 64 A Accessories 7 ALL (display 19, 22 AWM Dynamic Stereo Sampling 8 B Backup (F11 55 Backup (F01 57 BGM mode 12 BGM OFF mode 12 C Channel (Internet) (F11 F11 P Part (F01 24 Part (Moving Key) (F11 21 Pedals - Yamaha F01 | Owner's Manual - Page 69
36 U [USB 12, 22 USB song 22 USB Storage Device 25 User Song 41 Uxx (display 22 V Variation 30 Version Number (F11 18 Voice 2 Reverb Depth (F11 31 Voice Demo 29 Voice Demo Song List 67 Voice Demonstration Tunes 29 Voice Settings 32 Volume 17 Index F11/F01 Owner's Manual 69 ENGLISH - Yamaha F01 | Owner's Manual - Page 70
Change Send & Receive Normal setting (factory default) ON (AUTO) ON G. PIANO 1 OFF OFF OFF BASS Preset for each voice Preset for each voice Preset for each voice Preset for each voice MEDIUM OFF F11: 7 F01: 5 0 (no accent) 120 0 440Hz Preset for each voice combination Preset - Yamaha F01 | Owner's Manual - Page 71
recibe el MSB/LSB de banco. Voice Name G. PIANO 1 VARIATION G. PIANO 2 VARIATION E.PIANO 1 VARIATION E.PIANO 2 VARIATION HARPSI. VARIATION ORGAN 1 VARIATION ORGAN 2 20 0 122 17 0 123 17 0 122 49 0 125 50 0 122 12 0 122 25 0 122 33 0 122 34 F11/F01 Owner's Manual 71 - Yamaha F01 | Owner's Manual - Page 72
Main Amplifiers Speakers Dimensions (W × D × H) Dimensions with keyboard stand stabilizers (W × D × H) Weight Accessories F11 F01 NW (Natural Wood Manual, Quick Operation Guide, Bench, AC Power Cord * Specifications and descriptions in this owner's manual are for information purposes only. Yamaha - Yamaha F01 | Owner's Manual - Page 73
fichas técnicas y avisos de copyright de diecisiete (17) de las 50 melodías predefinidas para piano (clásica y jazz) de este instrumento: Alfie Theme from the Paramount Picture ALFIE Words by Hal David Estate Of Lorenz Hart International Copyright Secured All Rights Reserved F11/F01 Owner's Manual 73 - Yamaha F01 | Owner's Manual - Page 74
pertorie les titres, auteurs et avis de droits d'auteur de trois (3) morceaux parmi les 50 morceaux de piano présélectionnés (Classic & Jazz) sur l'instrument : * A continuación se incluyen los títulos, prohibida toda copia, interpretación o difusión pública no autorizada. 74 F11/F01 Owner's Manual - Yamaha F01 | Owner's Manual - Page 75
MEMO F11/F01 Owner's Manual 75 - Yamaha F01 | Owner's Manual - Page 76
to the presence of important operating and maintenance (servicing) instructions in the literature accompanying the product. IMPORTANT SAFETY INSTRUCTIONS 1 Read these instructions. 2 Keep these instructions. 3 Heed all warnings. 4 Follow all instructions. 5 Do not use this apparatus near water - Yamaha F01 | Owner's Manual - Page 77
Yamaha Yamaha Yamaha 2160 SWEDEN Yamaha Scandinavia AB lial av Yamaha Scandinavia AB OF CHINA Yamaha Music & INDONESIA PT. Yamaha Music Indonesia (Distributor) PT. Nusantik Gedung Yamaha Music Center, Jalan Jend. Gatot Subroto Kav. 4, Jakarta 12930, Indonesia Tel: 21-520-2577 KOREA Yamaha Yamaha Yamaha - Yamaha F01 | Owner's Manual - Page 78
Yamaha Home Keyboards Home Page (English only) http://music.yamaha.com/homekeyboard Yamaha Manual Library http://www.yamaha.co.jp/manual/ U.R.G., Pro Audio & Digital Musical Instrument Division, Yamaha Corporation © 2007 Yamaha Corporation WK23540 709APAP5,2-02B0 Printed in China
-
 1
1 -
 2
2 -
 3
3 -
 4
4 -
 5
5 -
 6
6 -
 7
7 -
8
-
9
-
10
-
11
-
12
-
13
-
14
-
15
-
16
-
17
-
18
-
19
-
20
-
21
-
22
-
23
-
24
-
25
-
26
-
27
-
28
-
29
-
30
-
31
-
32
-
33
-
34
-
35
-
36
-
37
-
38
-
39
-
40
-
41
-
42
-
43
-
44
-
45
-
46
-
47
-
48
-
49
-
50
-
51
-
52
-
53
-
54
-
55
-
56
-
57
-
58
-
59
-
60
-
61
-
62
-
63
-
64
-
65
-
66
-
67
-
68
-
69
-
70
-
71
-
72
-
73
-
74
-
75
-
76
-
77
-
78
 |
 |

ES
FR
DE
EN
Owner's Manual
Bedienungsanleitung
Mode d'emploi
Manual de instrucciones
ESPAÑOL
FRANÇAIS
DEUTSCH
ENGLISH
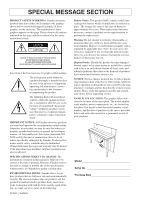
For information on assembling the keyboard stand, refer to the instructions at the end of this manual.
IMPORTANT
– Check your power supply –
Make sure that your local AC mains voltage matches the voltage specified on the name plate on the bottom panel. In some areas a voltage selector may be
provided on the rear of the main keyboard unit near the power cord. Make sure that the voltage selector is set for the voltage in your area. The voltage selector is set
at 240V when the unit is initially shipped. To change the setting use a "minus" screwdriver to rotate the selector dial so that the correct voltage appears next to the
pointer on the panel.
Weitere Informationen über die Montage des Keyboard-Ständers erhalten Sie in den Anweisungen am Ende dieses Handbuchs.
WICHTIG
—Überprüfung der Stromversorgung—
Vergewissern Sie sich vor dem Anschließen an das Stromnetz, daß die örtliche Netzspannung den Betriebsspannungswerten auf dem Typenschild an der Unterseite
des Instruments entspricht. In bestimmten Regionen ist auf der Rückseite des Instruments in der Nähe des Netzkabels ein Spannungswähler angebracht. Falls
vorhanden, muß der Spannungswähler auf die örtliche Netzspannung eingestellt werden. Der Spannungswähler wurde werkseitig auf 240 V voreingestellt. Zum
Verstellen drehen Sie den Spannungsregler mit einem Schlitzschraubendreher, bis der Zeiger auf den korrekten Spannungswert weist.
Pour obtenir les détails sur l'assemblage du pupitre du clavier, reportez-vous aux instructions figurant à la fin de ce manuel.
IMPORTANT
—Contrôler la source d'alimentation—
Vérifiez que la tension spécifiée sur le panneau inférieur correspond à la tension du secteur. Dans certaines régions, l’instrument peut être équipé d’un sélecteur de
tension à l’arrière de l’unité principale, à côté du cordon d'alimentation. Vérifiez que ce sélecteur est bien réglé en fonction de la tension secteur de votre région. Le
sélecteur de tension est réglé sur 240 V au depart d'usine. Pour modifier ce réglage, utilisez un tournevis à lame plate pour tourner le sélecteur afin de mettre
l'indication correspondant à la tension de votre région vis à vis du repère triangulaire situé sur le panneau.
Para información sobre el montaje del soporte del teclado, consulte las instrucciones al final de este manual.
IMPORTANTE
—Verifique la alimentación de corriente—
Asegúrese de que tensión de alimentación de CA de su área corresponde con la tensión especificada en la placa de características del panel inferior. Es posible
que en algunas zonas se suministre un selector de tensión en la parte posterior de la unidad principal, junto al cable de alimentación. Asegúrese de que el selector
de tensión esté ajustado a la tensión de su área. El selector de tensión se ajusta a 240V cuando la unidad sale de fábrica. Para cambiar el ajuste, emplee un
destornillador de cabeza "recta" para girar el selector de modo que aparezca la tensión correcta al lado del indicador del panel.