Yamaha F01 Owner's Manual - Page 32
Saving the Voice Settings (F11), Splitting the Keyboard Range and Playing Two Different Voices (
 |
View all Yamaha F01 manuals
Add to My Manuals
Save this manual to your list of manuals |
Page 32 highlights
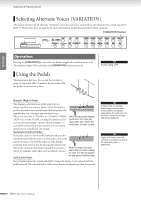
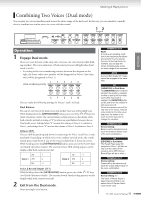
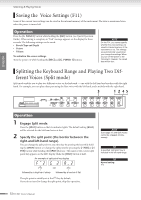
Selecting & Playing Voices Saving the Voice Settings (F11) Some of the current voice settings can be saved in the internal memory of the instrument. The data is maintained even when the power is turned off. Operation Press the [G. PIANO 1] button while holding the [REC] button (see Quick Operation Guide). When saving is complete, an "End" message appears on the display for three seconds. The following settings can be saved: • Reverb Type and Depth • Octave • Volume To initialize the voice settings Turn the power on while holding the [REC] and [G. PIANO 1] buttons. NOTE On the F01, you cannot specify whether the voice settings are saved in internal memory of the instrument or not. The settings are automatically saved when you change the settings. When you turn off the power to the instrument, however, the saved data will be lost. Splitting the Keyboard Range and Playing Two Dif- ferent Voices (Split mode) Split mode enables you to play two different voices on the keyboard - one with the left hand and another with the right hand. For example, you can play a bass part using the Bass voice with the left hand, and a melody with the right hand. 3 1 2 45 ENGLISH Operation 1 Engage Split mode. Press the [SPLIT] button so that its indicator lights. The default setting (BASS) will be selected for the left-hand voice at first. 2 Specify the split point (the border between the right-and left-hand range). You can change the split point to any other key by pressing the key while holding the [SPLIT] button (or change the split point by pressing the [-/NO] or [+/ YES] button while holding the [SPLIT] button). The name of the current split point key appears on the LED display while the [SPLIT] button is held. An example of split-point key display (F#2) (G2) (Ab2) followed by a high bar if sharp followed by a low bar if flat The split point is initially set at the F#2 key by default. If you do not need to change the split point, skip this operation. NOTE Dual (page 31) and Split modes cannot be engaged simultaneously. TIP A specified "split point" key is included in the left-hand range. TIP Normal setting: F#2 32 F11/F01 Owner's Manual
-
 1
1 -
2
-
3
-
4
-
5
-
6
-
7
-
8
-
9
-
10
-
11
-
12
-
13
-
14
-
15
-
16
-
17
-
18
-
19
-
20
-
21
-
22
-
23
-
24
-
25
-
26
-
 27
27 -
 28
28 -
 29
29 -
 30
30 -
 31
31 -
 32
32 -
 33
33 -
 34
34 -
 35
35 -
 36
36 -
 37
37 -
38
-
39
-
40
-
41
-
42
-
43
-
44
-
45
-
46
-
47
-
48
-
49
-
50
-
51
-
52
-
53
-
54
-
55
-
56
-
57
-
58
-
59
-
60
-
61
-
62
-
63
-
64
-
65
-
66
-
67
-
68
-
69
-
70
-
71
-
72
-
73
-
74
-
75
-
76
-
77
-
78
 |
 |
