Yamaha MCR E810 Owner's Manual - Page 23
Setting the System, Step 1: Turn on the power and select the DVD input, Step 2: Adjust the clock
 |
UPC - 027108104751
View all Yamaha MCR E810 manuals
Add to My Manuals
Save this manual to your list of manuals |
Page 23 highlights
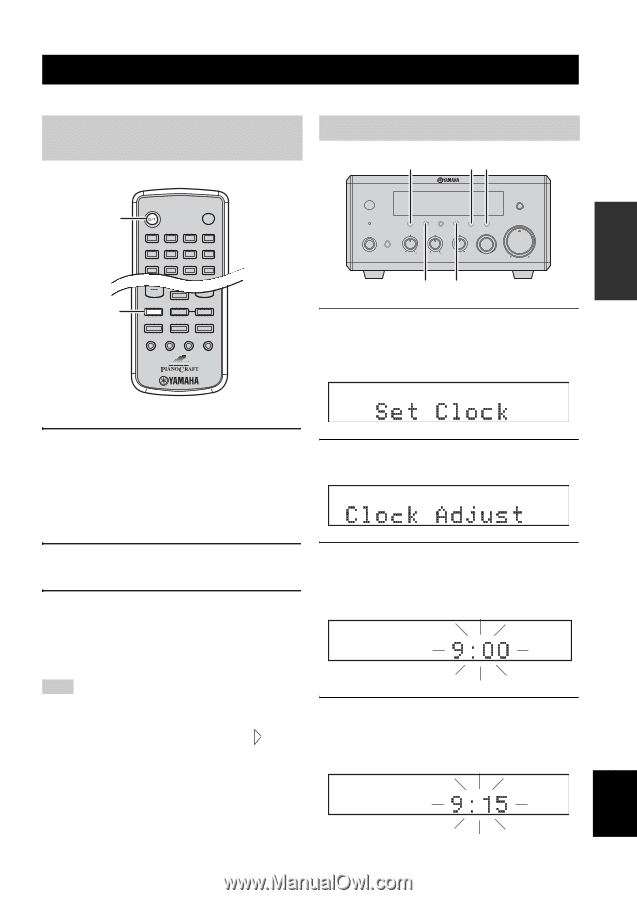
PREPARATION SETTING THE SYSTEM Setting the System Before starting playback operation, follow the procedure below to configure the system settings. Step 1: Turn on the power and select the DVD input Step 2: Adjust the clock DISPLAY HOUR MIN STANDBY/ON DVD/CD STANDBY/ON POWER TV 1 2 3 4 5 6 7 8 SCAN DIMMER 9 0 SRLEEPEEAPT AB DVD/CD TUNER BAND TAPE/MD AUX/TV DOCK SUBTITLE ANGLE ZOOM AUDIO NATURAL SOUND STEREO RECEIVER RX-E810 PURE DIRECT TIMER STANDBY/ON PHONES DISPLAY MEMORY AUTO/MAN'L PRESET/BAND PRESET/TUNING BASS TIME ADJ TIMER TREBLE HOUR BALANCE MIN INPUT L R VOLUME MIN MAX TIME ADJ PRESET/BAND 1 Press DISPLAY on the front panel of the receiver. "Clock Time" appears in the front panel display for a few seconds, and then "Set Clock" appears. 1 Turn on your TV and then press STANDBY/ ON to turn on the receiver. If the DVD player is connected to the receiver with the system control cable, the DVD player turns on automatically. Otherwise, press STANDBY/ON on the front panel of the DVD player to turn on it. The front panel display of each component lights up. 2 Press TIME ADJ for about two seconds to enter the clock setting mode. 2 Press DVD/CD to select "DVD/CD" as an input source. 3 On your TV, select the input to which the DVD player is connected (EXT1, AV1, etc.). For details, refer to the manual supplied with your TV. The default screen appears on the TV screen. 3 To set the hour setting ahead, press HOUR repeatedly. To set the hour setting backward, press HOUR repeatedly while holding down PRESET/BAND. Note If the picture is distorted on your TV, the color system (NTSC and PAL) setting of the DVD player may not match your TV. To switch the color system setting in such case, press and then AUDIO while the disc tray is open. 4 To set the minute setting ahead, press MIN repeatedly. To set the minute setting backward, press MIN repeatedly while holding down PRESET/BAND. English 19 En
-
 1
1 -
2
-
3
-
4
-
5
-
6
-
7
-
8
-
9
-
10
-
11
-
12
-
13
-
14
-
15
-
16
-
17
-
 18
18 -
 19
19 -
 20
20 -
 21
21 -
 22
22 -
 23
23 -
 24
24 -
 25
25 -
 26
26 -
 27
27 -
 28
28 -
29
-
30
-
31
-
32
-
33
-
34
-
35
-
36
-
37
-
38
-
39
-
40
-
41
-
42
-
43
-
44
-
45
-
46
-
47
-
48
-
49
-
50
-
51
-
52
-
53
-
54
-
55
-
56
-
57
-
58
-
59
-
60
-
61
-
62
-
63
-
64
-
65
-
66
-
67
-
68
-
69
-
70
-
71
-
72
-
73
-
74
 |
 |