Alesis M1Active 320 USB Quick Start Guide - Page 5
Rear Panel Overview - driver
 |
View all Alesis M1Active 320 USB manuals
Add to My Manuals
Save this manual to your list of manuals |
Page 5 highlights
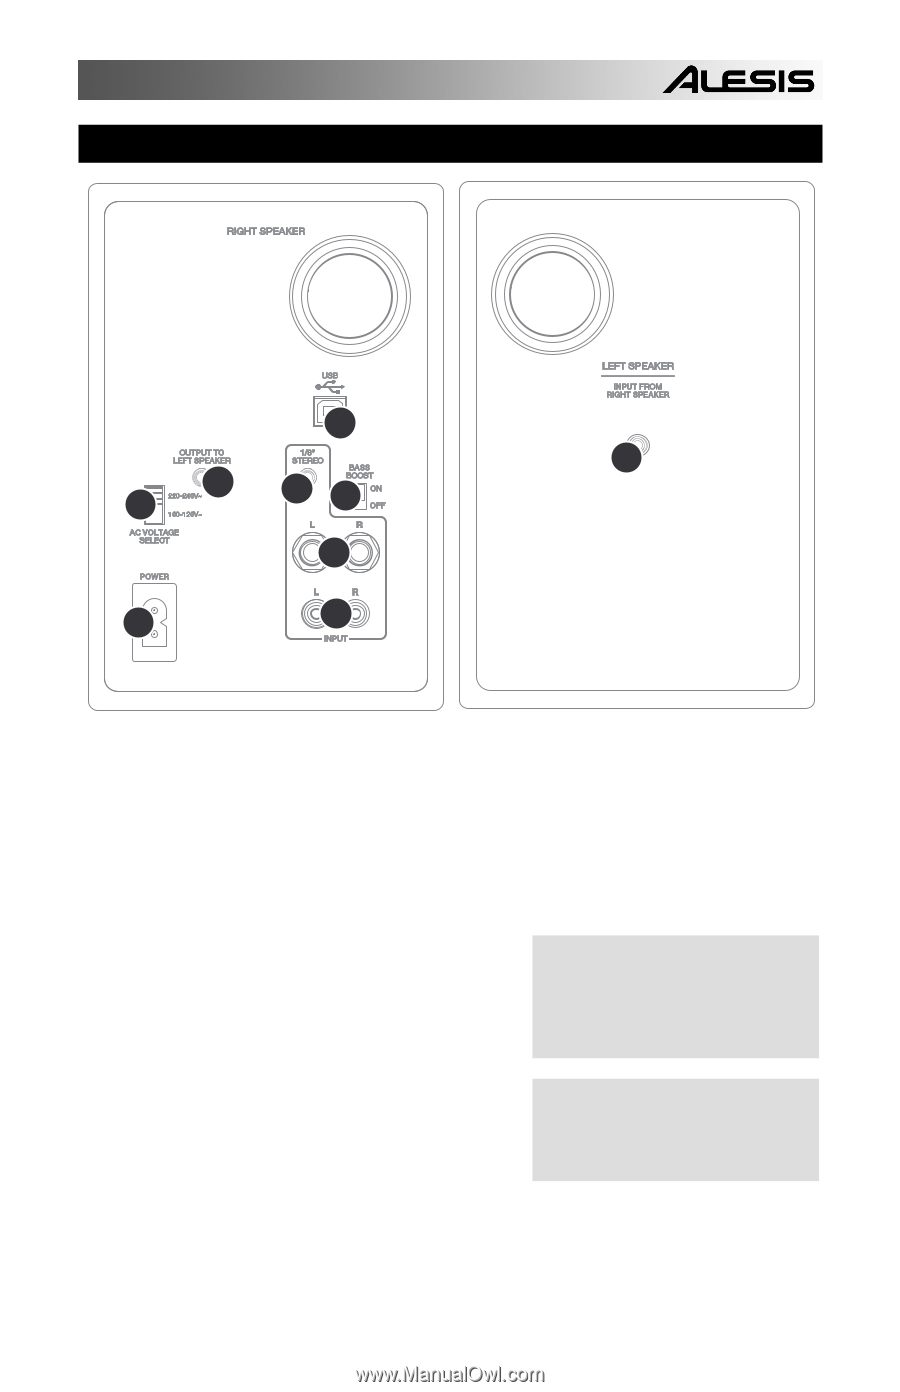
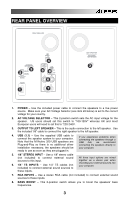
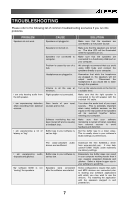
REAR PANEL OVERVIEW 4 3 2 3 58 6 1 7 1. POWER - Use the included power cable to connect the speakers to a live power source. Make sure your AC Voltage Selector (see item #2 below) is set to the correct voltage for your country. 2. AC VOLTAGE SELECTOR - This 2-position switch sets the AC input voltage for the speaker. US users should set this switch to "100-120V" whereas UK and most European users will need to set this to "220-240V. 3. OUTPUT TO LEFT SPEAKER - This is the audio connection to the left speaker. Use the included 1/8" cable to connect the right speaker to the left speaker. 4. USB (1.1) - Use the supplied USB cable to connect the speaker system to your computer. Note that the M1Active 320 USB speakers are Plug-and-Play so there is no additional driver installation necessary; the speakers should be ready to use as soon as they are plugged in. If you experience problems when connecting the speakers through a USB hub, we recommend connecting the speakers directly to your computer. 5. 1/8" STEREO INPUT - Use a 1/8" stereo cable (not included) to connect external sound sources to this input. 6. 1/4" TS INPUTS - Use 1/4" TS cables (not included) to connect external sound sources to these inputs. All three input options are mixed together as a stereo pair when recording your external sources into your computer. 7. RCA INPUTS - Use a stereo RCA cable (not included) to connect external sound sources to these inputs. 8. BASS BOOST - This 2-position switch allows you to boost the speakers' bass frequencies. 3
-
 1
1 -
 2
2 -
 3
3 -
 4
4 -
 5
5 -
 6
6 -
 7
7 -
 8
8 -
 9
9 -
 10
10 -
 11
11 -
12
-
13
-
14
-
15
-
16
-
17
-
18
-
19
-
20
-
21
-
22
-
23
-
24
-
25
-
26
-
27
-
28
-
29
-
30
-
31
-
32
-
33
-
34
-
35
-
36
-
37
-
38
-
39
-
40
-
41
-
42
-
43
-
44
 |
 |