Alesis MultiMix 8 USB FX User Manual - Page 13
Audio configuration, Device, Connections, Fig. 12, Fig. 12, Inputs, Bus Name, Add Bus, Fig. 13,
 |
View all Alesis MultiMix 8 USB FX manuals
Add to My Manuals
Save this manual to your list of manuals |
Page 13 highlights
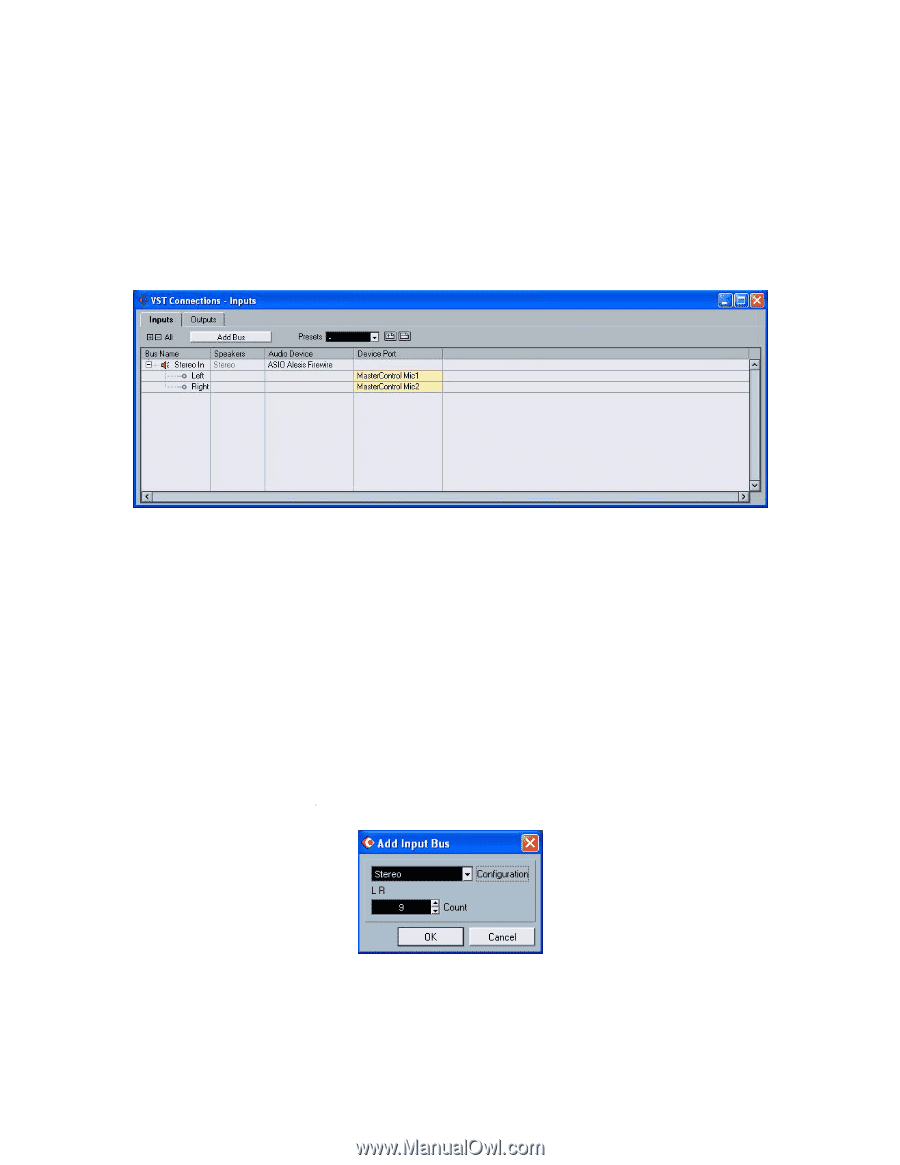
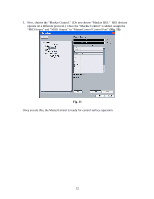
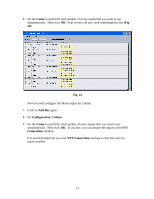
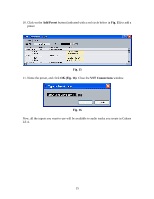
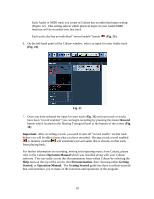
Audio configuration Cubase LE 4, by default, starts up with only two inputs enabled, even though the MasterControl allows for 26 simultaneous inputs. Before all the inputs will be available to your system, you need to set up your VST Connections. 1. In Cubase LE 4, click on the Device menu at the top of the screen and select VST Connections. It should look like this (Fig. 12): Fig. 12 2. Click on Inputs at the top of the window. You'll notice that, under the Inputs, there are only two inputs showing up. You'll need to create a new configuration. 3. Click on the input titled under the Bus Name column and press the backspace key on your keyboard to delete it. The VST connections window should now be empty. Next, you will create Stereo and Mono Input Busses for all of the inputs on your interface. 4. Click on the Add Bus button. Fig. 13 5. Set Configuration to Stereo (Fig. 13). 13
-
 1
1 -
2
-
3
-
4
-
5
-
6
-
7
-
 8
8 -
 9
9 -
 10
10 -
 11
11 -
 12
12 -
 13
13 -
 14
14 -
 15
15 -
 16
16 -
 17
17 -
 18
18 -
19
-
20
-
21
 |
 |