Alesis MultiMix 8 USB FX User Manual - Page 17
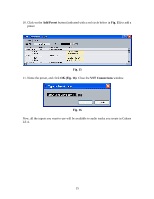
Fig. 19, Project, Add Track, Audio Fig. 20, Fig. 20
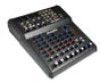 |
View all Alesis MultiMix 8 USB FX manuals
Add to My Manuals
Save this manual to your list of manuals |
Page 17 highlights
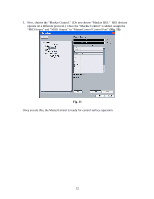
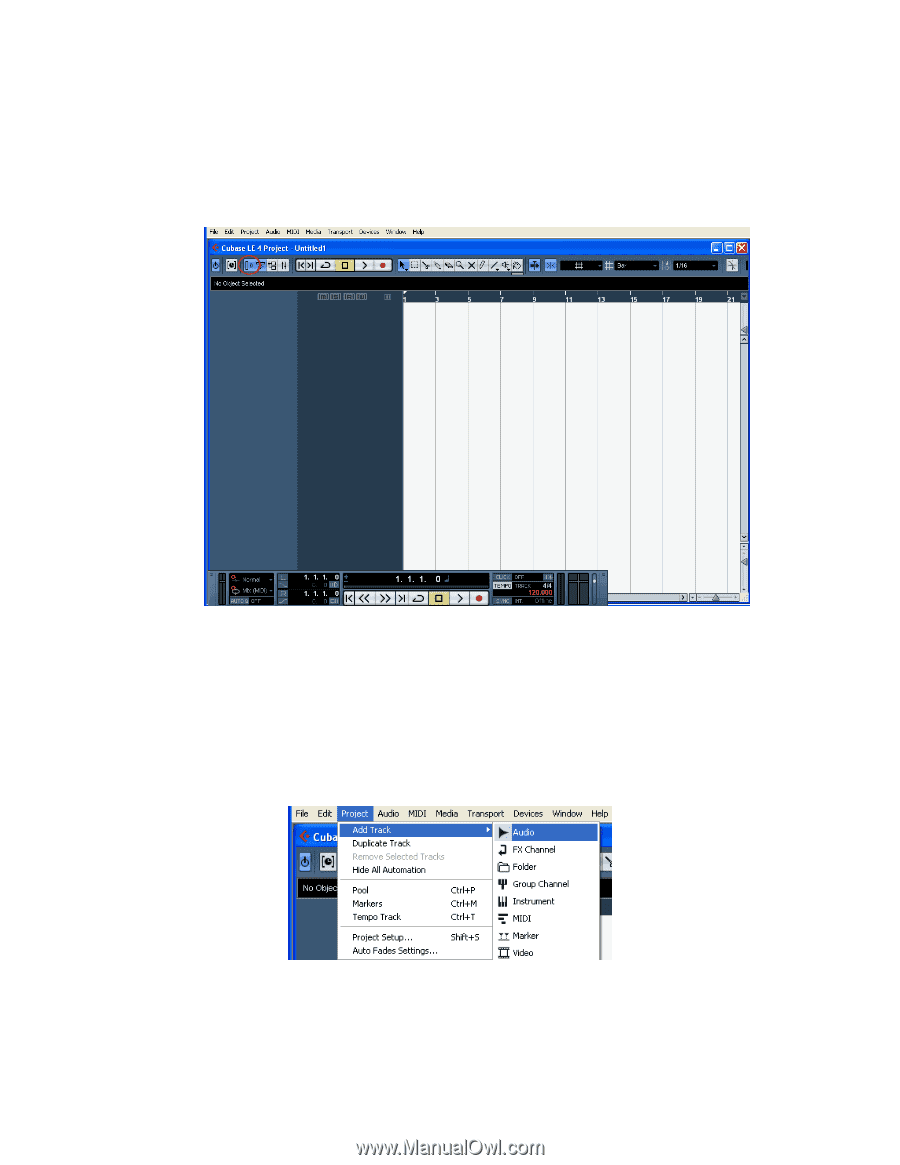
You will be presented with a blank project window that is divided into sections. You should see two grey columns on the left and in the middle, and a timeline on the right, with a black ruler over the top. If there is only one grey column click on the first square button in the upper left of your screen to enable it (indicated by a red circle in Fig. 19). Fig. 19 Hint: The Cubase user interface has many icons and buttons that are not labeled. If you hold your mouse over a button or icon for a few seconds, some text will appear that describes the button's function. 5. Select the Project menu from the top of the screen and choose Add Track and then Audio (Fig. 20). Fig. 20 A new Audio track will be created. 17
-
 1
1 -
2
-
3
-
4
-
5
-
6
-
7
-
8
-
9
-
10
-
11
-
 12
12 -
 13
13 -
 14
14 -
 15
15 -
 16
16 -
 17
17 -
 18
18 -
 19
19 -
 20
20 -
 21
21
 |
 |
17
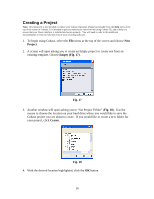
You will be presented with a blank project window that is divided into sections.
You should see two grey columns on the left and in the middle, and a timeline on
the right, with a black ruler over the top. If there is only one grey column click on
the first square button in the upper left of your screen to enable it (indicated by a
red circle in
Fig. 19
).
Fig. 19
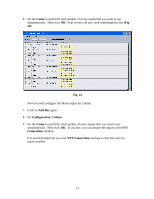
Hint:
The Cubase user interface has many icons and buttons that are not labeled.
If you hold your mouse over a button or icon for a few seconds, some text will
appear that describes the button’s function.
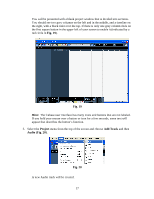
5.
Select the
Project
menu from the top of the screen and choose
Add Track
and then
Audio (Fig. 20)
.
Fig. 20
A new Audio track will be created.