Alesis Strike Drum Module Strike Pro Performance Drum Module - User Guide v1.5 - Page 25
Saving Samples, Trimmed Sample
 |
View all Alesis Strike Drum Module manuals
Add to My Manuals
Save this manual to your list of manuals |
Page 25 highlights
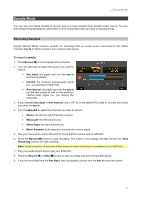
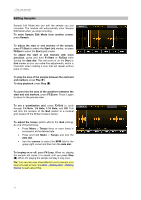
Saving Samples When you want to save the sample, you must select how you want to use it; you can save it as a loop-a normal audio file that you can play back in Sample Playback Mode-or as an instrument-a sound that you can assign to a voice in a kit. Important: When you save a loop or instrument, it will be saved to your SD card only. You cannot save or overwrite loops or instruments in your Strike module's internal memory. To save the sample: 1. While in Sample Edit mode, press the Save button, and a window will appear. 2. Enter a name for the sample. To move to the previous or next character, press F1/>. To change the current character, turn the data dial. To delete the current character, press F4/Delete. To clear all characters, press F5/Clear. 3. Press the down cursor to highlight the Save type. Then turn the data dial to select Full Sample, Trimmed Sample, or Instrument. To save the entire sample (without edits) as a loop, select Full Sample. To save the edited sample as a loop, select Trimmed Sample. To save the edited sample as an instrument, select Instrument. Then press the down cursor to highlight the instrument Category. Turn the data dial to select Acoustic, Melodic, or Electronic. Note: We recommend saving samples immediately as Full or Trimmed loops so you can name the file. You can always reload, edit, or play a loop later-or use it to create an instrument-while an instrument is simply for assigning to a trigger. 4. Press F3/Save to save the sample. To return to the previous screen without saving, press F6/Back. Important: If you try to save a loop or instrument with a name that already exists, the module will ask if you want to overwrite (replace) the existing one. To overwrite the loop or instrument, press F1/Save. To cancel, press F6/Back. 25
-
 1
1 -
2
-
3
-
4
-
5
-
6
-
7
-
8
-
9
-
10
-
11
-
12
-
13
-
14
-
15
-
16
-
17
-
18
-
19
-
 20
20 -
 21
21 -
 22
22 -
 23
23 -
 24
24 -
 25
25 -
 26
26 -
 27
27 -
 28
28 -
 29
29 -
 30
30 -
31
-
32
 |
 |
