Alesis Strike Drum Module Strike Pro Performance Drum Module - User Guide v1.5 - Page 4
Features, Top Panel - - with color display
 |
View all Alesis Strike Drum Module manuals
Add to My Manuals
Save this manual to your list of manuals |
Page 4 highlights
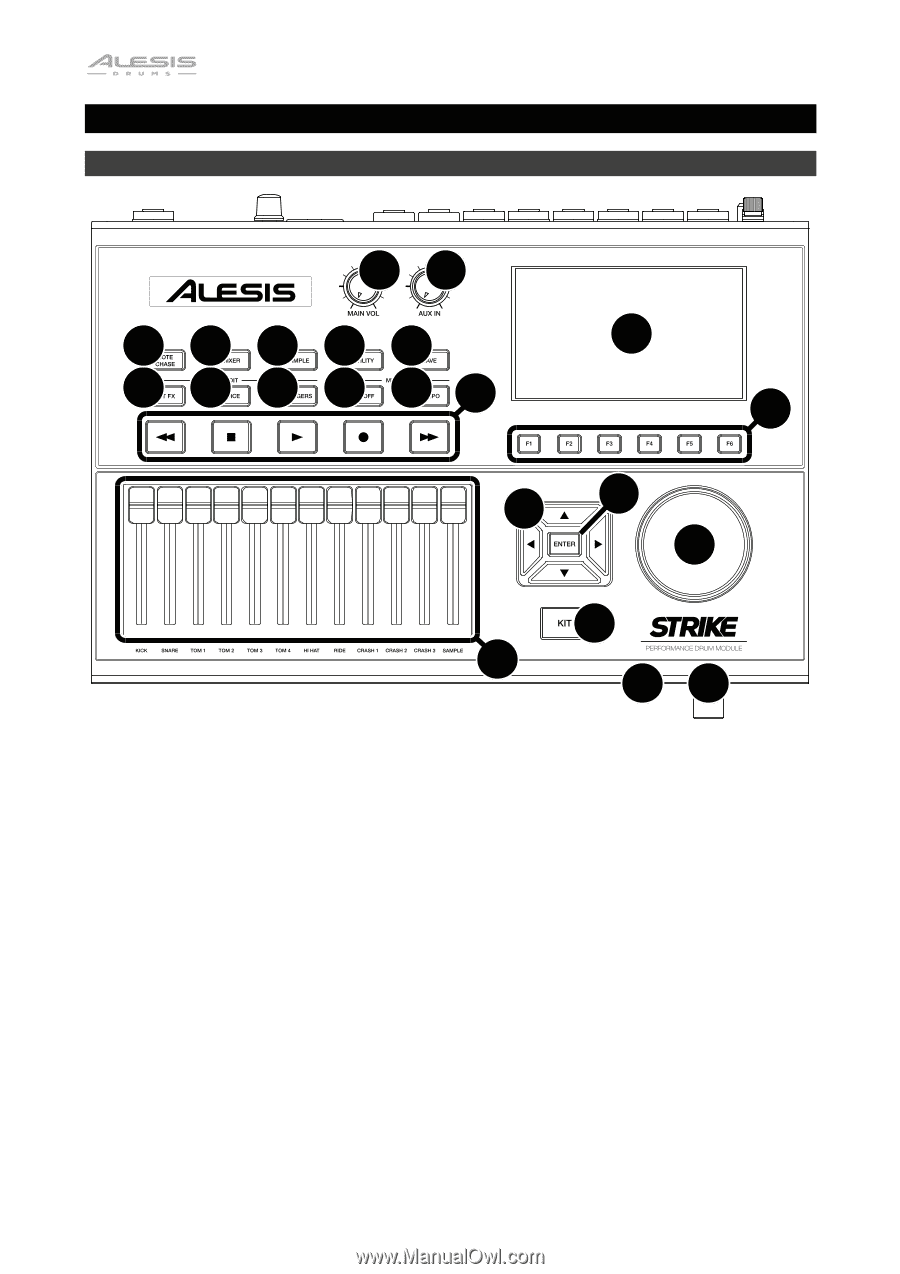
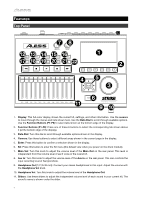
Features Top Panel 78 12 13 14 15 16 17 18 19 20 21 22 1 2 45 3 6 11 9 10 1. Display: This full-color display shows the current kit, settings, and other information. Use the cursors to move through the menus and lists shown here. Use the Data Dial to scroll through available options. Use the Function Buttons (F1-F6) to select tabs shown at the bottom edge of the display. 2. Function Buttons (F1-F6): Press one of these 6 buttons to select the corresponding tab shown above it (at the bottom edge of the display). 3. Data Dial: Turn this dial to scroll through available options shown in the display. 4. Cursors: Use these buttons to select different areas shown in the current page in the display. 5. Enter: Press this button to confirm a selection shown in the display. 6. Kit: Press this button to enter the Kit menu (the default view when you power on the drum module). 7. Main Vol: Turn this knob to adjust the volume level of the Main Out on the rear panel. This level is independent from the volume level of each voice or the overall kit. 8. Aux In: Turn this knob to adjust the volume level of the Aux In on the rear panel. This also controls the input recording level of Sample Mode. 9. Headphone Out (1/4"/6.35 mm): Connect your stereo headphones to this input. Adjust the volume with the Headphone Vol knob. 10. Headphone Vol: Turn this knob to adjust the volume level of the Headphone Out. 11. Sliders: Use these sliders to adjust the independent volume level of each sound in your current kit. The sound's name is shown under the slider. 4
-
 1
1 -
 2
2 -
 3
3 -
 4
4 -
 5
5 -
 6
6 -
 7
7 -
 8
8 -
 9
9 -
 10
10 -
11
-
12
-
13
-
14
-
15
-
16
-
17
-
18
-
19
-
20
-
21
-
22
-
23
-
24
-
25
-
26
-
27
-
28
-
29
-
30
-
31
-
32
 |
 |