Asus AP1710-E1 AP1710-E1 English version manual - Page 42
Hard disk drives
 |
View all Asus AP1710-E1 manuals
Add to My Manuals
Save this manual to your list of manuals |
Page 42 highlights
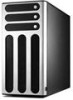
2.7 Hard disk drives 2.7.1 Installing a hot-swap SATA/SCSI HDD If you purchased an AS8, AS4, or AA4 configured model, follow these instructions to install a hot-swap SATA or SCSI hard disk drive (HDD). 1. Open the front bezel to access the hot-swap drive trays. 2. Release a drive tray by pushing the spring lock to the right, then pulling the tray lever outward. The drive tray ejects slightly after you pull out the lever. Spring lock Tray lever 3. Firmly hold the tray lever and pull the drive tray out of the bay. 4. An empty drive tray requires a metal bracket for support. Use a Phillips (cross) screwdriver to remove the bracket when you are ready to install a hard disk in the drive tray. 2-18 Metal bracket Chapter 2: Hardware setup
-
 1
1 -
2
-
3
-
4
-
5
-
6
-
7
-
8
-
9
-
10
-
11
-
12
-
13
-
14
-
15
-
16
-
17
-
18
-
19
-
20
-
21
-
22
-
23
-
24
-
25
-
26
-
27
-
28
-
29
-
30
-
31
-
32
-
33
-
34
-
35
-
36
-
 37
37 -
 38
38 -
 39
39 -
 40
40 -
 41
41 -
 42
42 -
 43
43 -
 44
44 -
 45
45 -
 46
46 -
 47
47 -
48
-
49
-
50
-
51
-
52
-
53
-
54
-
55
-
56
-
57
-
58
-
59
-
60
-
61
-
62
-
63
-
64
-
65
-
66
-
67
-
68
-
69
-
70
-
71
-
72
-
73
-
74
-
75
-
76
-
77
-
78
-
79
-
80
-
81
-
82
-
83
-
84
-
85
-
86
-
87
-
88
-
89
-
90
-
91
-
92
-
93
-
94
-
95
-
96
-
97
-
98
-
99
-
100
-
101
-
102
-
103
-
104
-
105
-
106
-
107
-
108
-
109
-
110
-
111
-
112
-
113
-
114
-
115
-
116
-
117
-
118
-
119
-
120
-
121
-
122
-
123
-
124
-
125
-
126
-
127
-
128
-
129
-
130
-
131
-
132
-
133
-
134
-
135
-
136
-
137
-
138
-
139
-
140
-
141
-
142
-
143
-
144
-
145
-
146
-
147
-
148
-
149
-
150
-
151
-
152
-
153
-
154
-
155
-
156
-
157
-
158
 |
 |

Chapter 2:
Hardware setup
Chapter 2:
Hardware setup
Chapter 2:
Hardware setup
Chapter 2:
Hardware setup
Chapter 2:
Hardware setup
2-18
2-18
2-18
2-18
2-18
2.7
Hard disk drives
2.7.1
2.7.1
2.7.1
2.7.1
2.7.1
Installing a hot-swap SATA/SCSI HDD
Installing a hot-swap SATA/SCSI HDD
Installing a hot-swap SATA/SCSI HDD
Installing a hot-swap SATA/SCSI HDD
Installing a hot-swap SATA/SCSI HDD
If you purchased an AS8, AS4, or AA4 configured model, follow these
instructions to install a hot-swap SATA or SCSI hard disk drive (HDD).
1.
Open the front bezel to access the hot-swap drive trays.
2.
Release a drive tray by pushing
the spring lock to the right,
then pulling the tray lever
outward. The drive tray ejects
slightly after you pull out the
lever.
3.
Firmly hold the tray lever and
pull the drive tray out of the
bay.
4.
An empty drive tray requires a metal bracket for support. Use a
Phillips (cross) screwdriver to remove the bracket when you are ready
to install a hard disk in the drive tray.
Metal bracket
Metal bracket
Metal bracket
Metal bracket
Metal bracket
Tray lever
Tray lever
Tray lever
Tray lever
Tray lever
Spring lock
Spring lock
Spring lock
Spring lock
Spring lock