Asus ExpertCenter E500 G9 E500 G9 English User Manual - Page 43
CHA_FAN2, optional Connect the M.2_1 heatsink fan to
 |
View all Asus ExpertCenter E500 G9 manuals
Add to My Manuals
Save this manual to your list of manuals |
Page 43 highlights
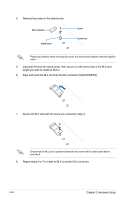
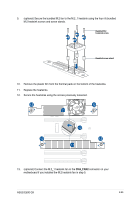
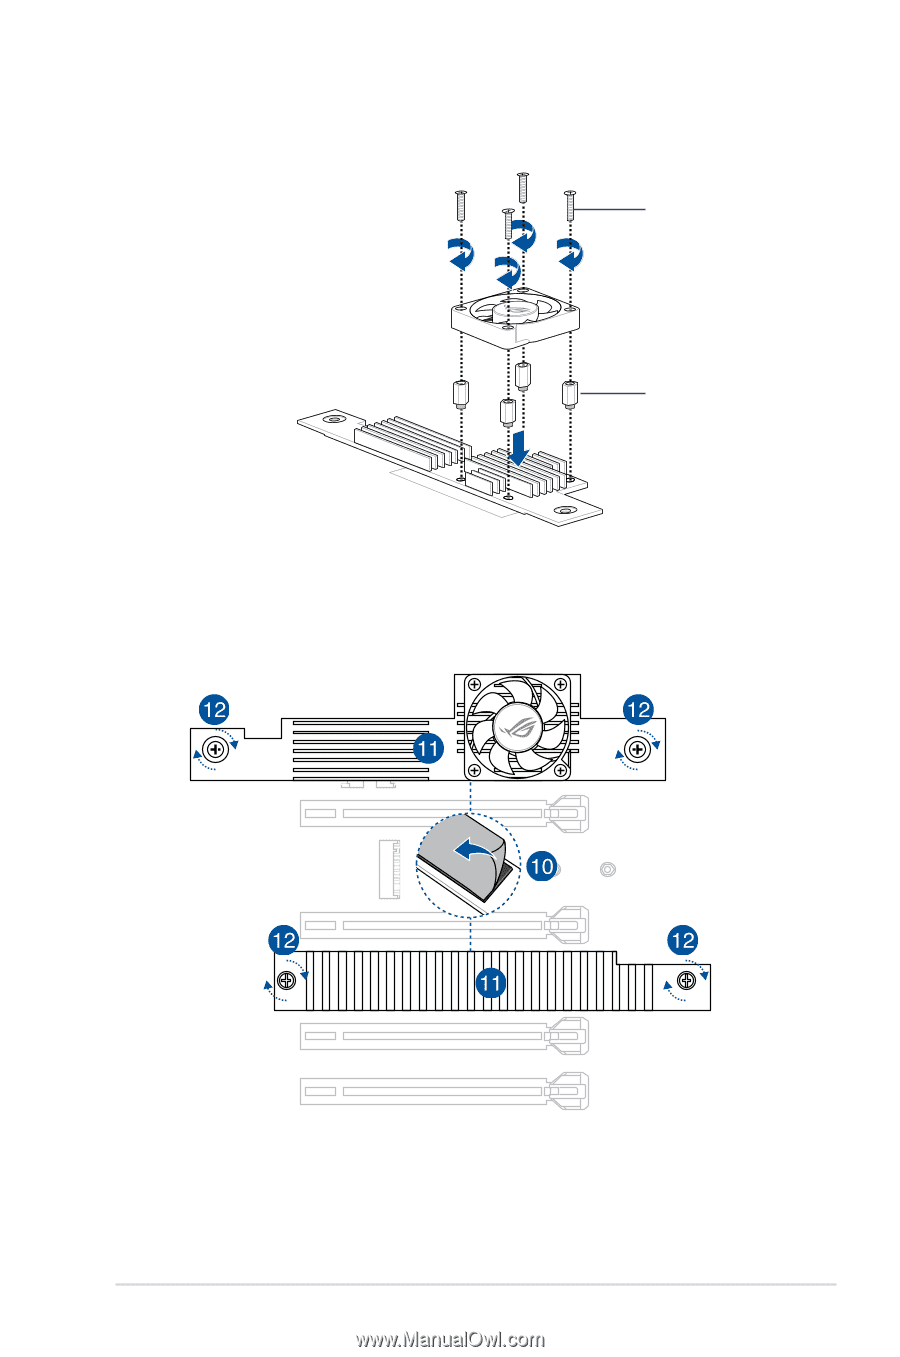
9. (optional) Secure the bundled M.2 fan to the M.2_1 heatsink using the four (4) bundled M.2 heatsink screws and screw stands. Bundled M.2 heatsink screw Bundled screw stand 10. Remove the plastic film from the thermal pads on the bottom of the heatsinks. 11. Replace the heatsinks. 12. Secure the heatsinks using the screws previously loosened. 13. (optional) Connect the M.2_1 heatsink fan to the CHA_FAN2 connector on your motherboard if you installed the M.2 heatsink fan in step 9. ASUS E500 G9 2-25
-
 1
1 -
2
-
3
-
4
-
5
-
6
-
7
-
8
-
9
-
10
-
11
-
12
-
13
-
14
-
15
-
16
-
17
-
18
-
19
-
20
-
21
-
22
-
23
-
24
-
25
-
26
-
27
-
28
-
29
-
30
-
31
-
32
-
33
-
34
-
35
-
36
-
37
-
 38
38 -
 39
39 -
 40
40 -
 41
41 -
 42
42 -
 43
43 -
 44
44 -
 45
45 -
 46
46 -
 47
47 -
 48
48 -
49
-
50
-
51
-
52
-
53
-
54
-
55
-
56
-
57
-
58
-
59
-
60
-
61
-
62
-
63
-
64
-
65
-
66
-
67
-
68
-
69
-
70
-
71
-
72
-
73
-
74
-
75
-
76
-
77
-
78
-
79
-
80
-
81
-
82
-
83
-
84
-
85
-
86
-
87
-
88
-
89
-
90
-
91
-
92
-
93
-
94
-
95
-
96
-
97
-
98
-
99
-
100
-
101
-
102
-
103
-
104
-
105
-
106
-
107
-
108
-
109
-
110
-
111
-
112
-
113
-
114
-
115
-
116
-
117
-
118
-
119
-
120
-
121
-
122
-
123
-
124
-
125
-
126
-
127
-
128
-
129
-
130
-
131
-
132
-
133
-
134
-
135
-
136
-
137
-
138
-
139
-
140
-
141
-
142
-
143
-
144
-
145
-
146
-
147
-
148
-
149
-
150
-
151
-
152
-
153
-
154
-
155
-
156
-
157
-
158
-
159
-
160
-
161
-
162
-
163
-
164
-
165
-
166
-
167
-
168
-
169
-
170
-
171
-
172
-
173
-
174
-
175
-
176
-
177
-
178
-
179
-
180
-
181
-
182
-
183
-
184
-
185
-
186
 |
 |
2-25
ASUS E500 G9
9.
(optional) Secure the bundled M.2 fan to the M.2_1 heatsink using the four (4) bundled
M.2 heatsink screws and screw stands.
10.
Remove the plastic film from the thermal pads on the bottom of the heatsinks.
11.
Replace the heatsinks.
12.
Secure the heatsinks using the screws previously loosened.
Bundled screw stand
Bundled M.2
heatsink screw
13.
(optional) Connect the M.2_1 heatsink fan to the
CHA_FAN2
connector on your
motherboard if you installed the M.2 heatsink fan in step 9.