Asus P10S-M WS ASWM Enterprise User Manual for English - Page 36
Automatically scanning the Active Directory
 |
View all Asus P10S-M WS manuals
Add to My Manuals
Save this manual to your list of manuals |
Page 36 highlights
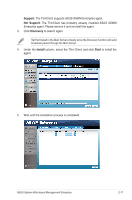
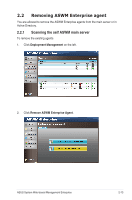
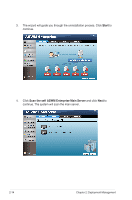
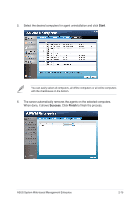
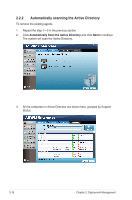
2.2.2 Automatically scanning the Active Directory To remove the existing agents 1. Repeat the step 1-3 in the previous section. 2. Click Automatically Scan the Active Directory and click Next to continue. The system will scan the Active Directory. 3. All the computers in Active Directory are shown here, grouped by Support Status. 2-16 Chapter 2: Deployment Management
-
 1
1 -
2
-
3
-
4
-
5
-
6
-
7
-
8
-
9
-
10
-
11
-
12
-
13
-
14
-
15
-
16
-
17
-
18
-
19
-
20
-
21
-
22
-
23
-
24
-
25
-
26
-
27
-
28
-
29
-
30
-
 31
31 -
 32
32 -
 33
33 -
 34
34 -
 35
35 -
 36
36 -
 37
37 -
 38
38 -
 39
39 -
 40
40 -
 41
41 -
42
-
43
-
44
-
45
-
46
-
47
-
48
-
49
-
50
-
51
-
52
-
53
-
54
-
55
-
56
-
57
-
58
-
59
-
60
-
61
-
62
-
63
-
64
-
65
-
66
-
67
-
68
-
69
-
70
-
71
-
72
-
73
-
74
-
75
-
76
-
77
-
78
-
79
-
80
-
81
-
82
-
83
-
84
-
85
-
86
-
87
-
88
-
89
-
90
-
91
-
92
-
93
-
94
-
95
-
96
-
97
-
98
-
99
-
100
-
101
-
102
-
103
-
104
-
105
-
106
-
107
-
108
-
109
-
110
-
111
-
112
 |
 |
2-16
Chapter 2: Deployment Management
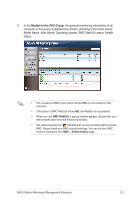
2.2.2
Automatically scanning the Active Directory
To remove the existing agents
1.
Repeat the step 1—3 in the previous section.
2.
Click
Automatically
Scan the Active Directory
and click
Next
to continue.
The system will scan the Active Directory.
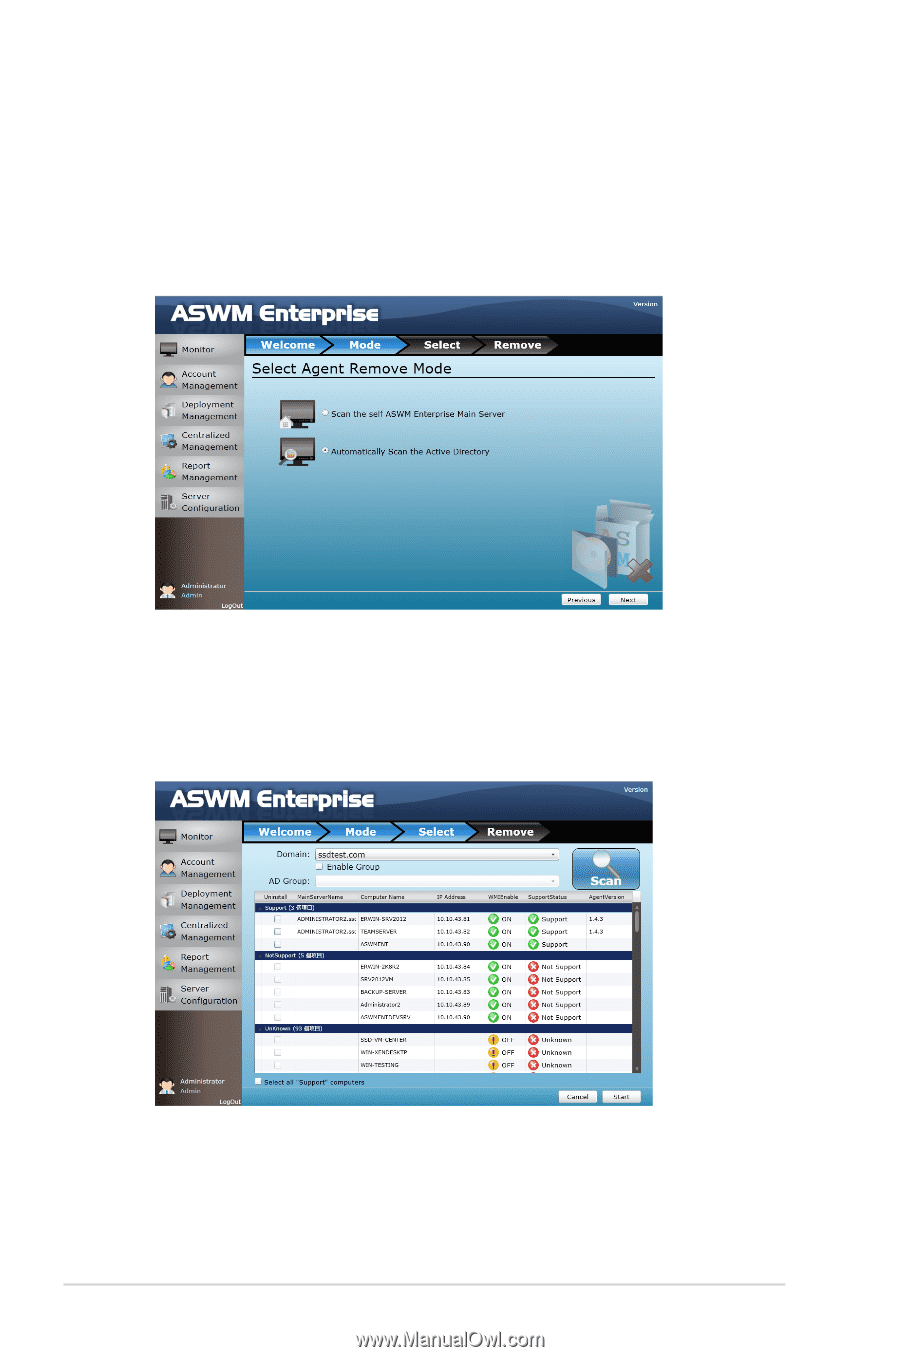
3.
All the computers in Active Directory are shown here, grouped by Support
Status.