Asus P2B-N P2B-N User Manual - Page 27
ASUS P2B-N User's Manual, Insert the SECC2/SECC/SEPP, SECC with Pentium, II only, Secure the SECC2/
 |
View all Asus P2B-N manuals
Add to My Manuals
Save this manual to your list of manuals |
Page 27 highlights
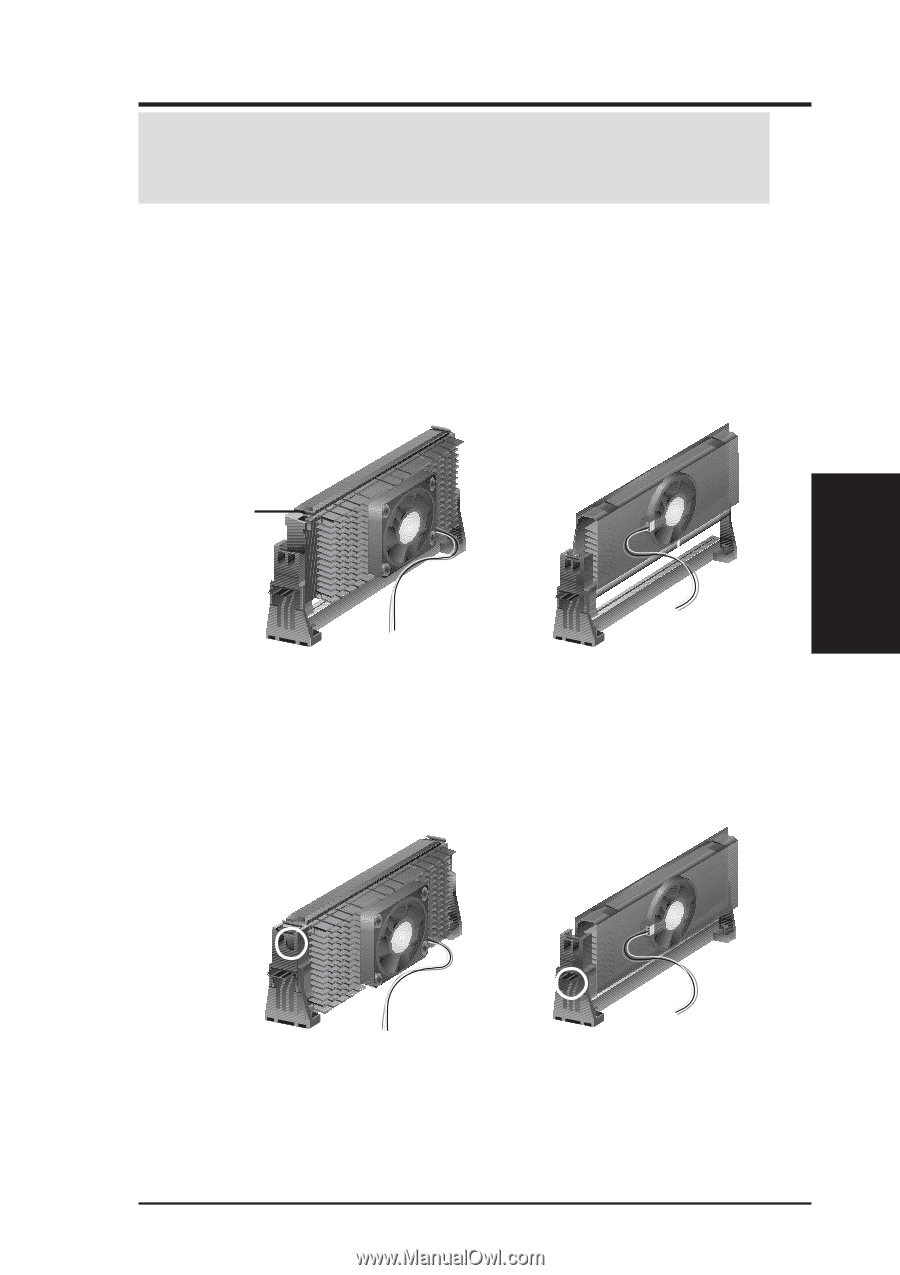
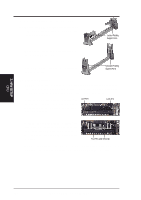
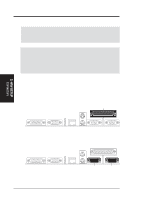
3. H/W SETUP CPU 3. HARDWARE SETUP WARNING! Make sure the heatsink is mounted tightly against the SECC2, SECC, or SEPP; otherwise, the CPU will overheat. You may install an auxiliary fan to provide adequate circulation across the processor's passive heatsink. 3. Insert the SECC2/SECC/SEPP SECC with Pentium® II only: Push the SECC's two locks inward until you hear a click (the picture in step 2 shows the locks in the outward position and inward in the picture below). With the heatsink facing the motherboard's chipset, push the SECC, SECC2, or SEPP gently but firmly into the Slot 1 connector until it is fully inserted. SECC SECC2/SEPP Push lock inward CPU fan cable to fan connector CPU fan cable to fan connector 4. Secure the SECC2/SECC/SEPP Secure the SECC2/SECC/SEPP in place by pushing the SECC2/SECC/SEPP until it is firmly seated on the Slot 1 connector. SECC with Pentium® II only: The SECC locks should be outward when secured so that the lock shows through the retention mechanism's lock holes. SECC SECC2/SEPP Lock hole CPU fan cable to fan connector Lock hole CPU fan cable to fan connector ASUS P2B-N User's Manual 27
-
 1
1 -
2
-
3
-
4
-
5
-
6
-
7
-
8
-
9
-
10
-
11
-
12
-
13
-
14
-
15
-
16
-
17
-
18
-
19
-
20
-
21
-
 22
22 -
 23
23 -
 24
24 -
 25
25 -
 26
26 -
 27
27 -
 28
28 -
 29
29 -
 30
30 -
 31
31 -
 32
32 -
33
-
34
-
35
-
36
-
37
-
38
-
39
-
40
-
41
-
42
-
43
-
44
-
45
-
46
-
47
-
48
-
49
-
50
-
51
-
52
-
53
-
54
-
55
-
56
-
57
-
58
-
59
-
60
-
61
-
62
-
63
-
64
-
65
-
66
-
67
-
68
-
69
-
70
-
71
-
72
-
73
-
74
-
75
-
76
-
77
-
78
-
79
-
80
-
81
-
82
-
83
-
84
-
85
-
86
-
87
-
88
-
89
-
90
-
91
-
92
-
93
-
94
-
95
-
96
-
97
-
98
-
99
-
100
-
101
-
102
-
103
-
104
-
105
-
106
-
107
-
108
-
109
-
110
-
111
-
112
-
113
-
114
-
115
-
116
-
117
-
118
-
119
-
120
 |
 |