Asus P3PH4 P3-PH4 User''s Manual for English Edition - Page 33
Installing hard disk drives HDDs
 |
View all Asus P3PH4 manuals
Add to My Manuals
Save this manual to your list of manuals |
Page 33 highlights
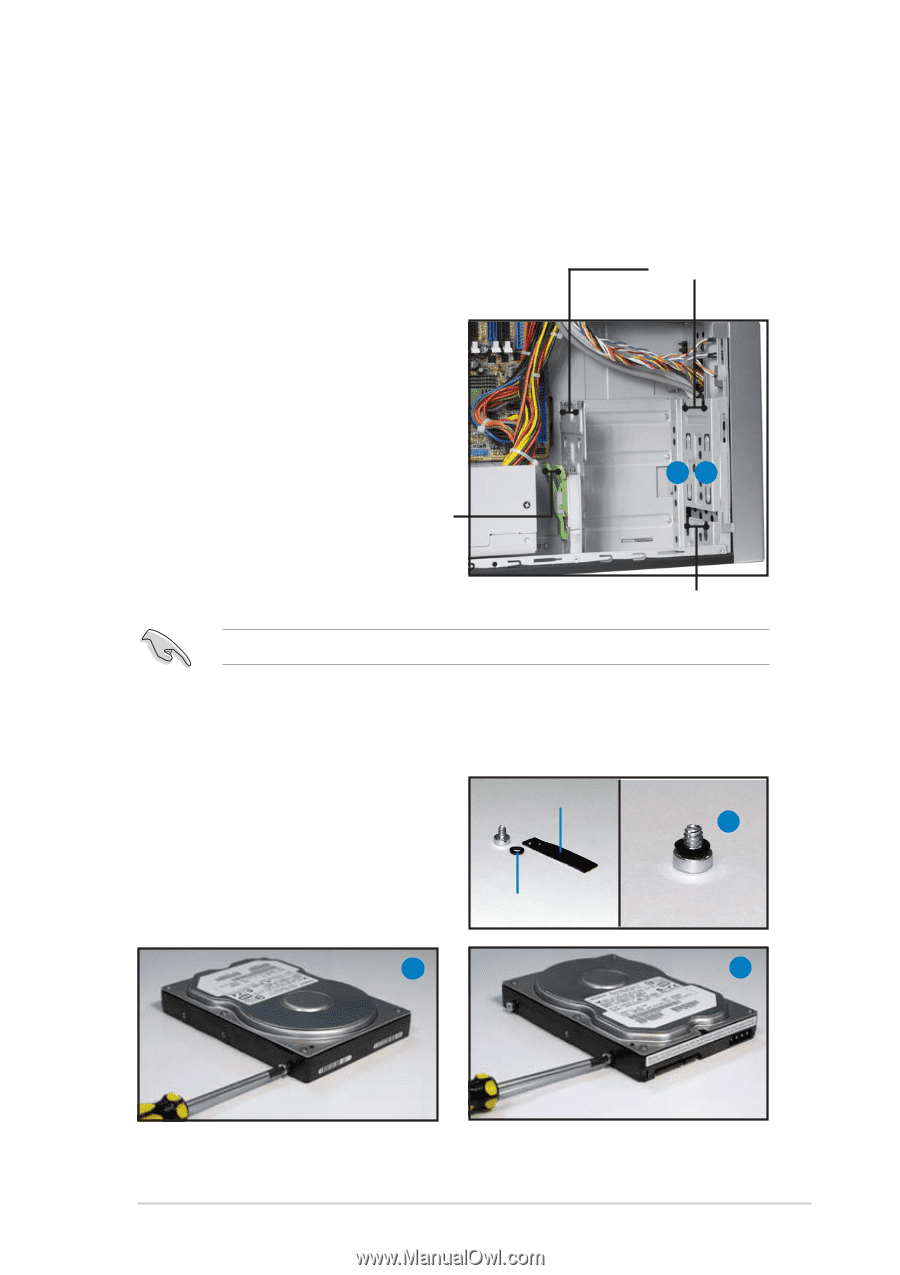
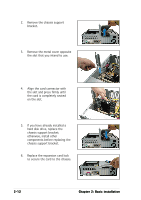
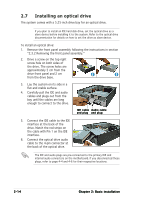
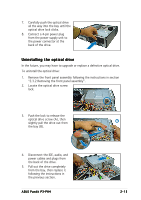
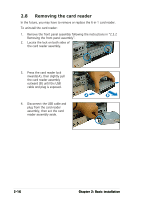
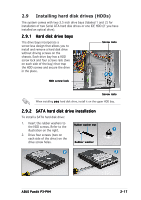
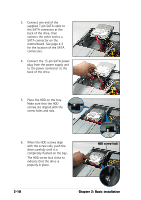
2.9 Installing hard disk drives (HDDs) The system comes with two 3.5-inch drive bays (labeled 1 and 2) for installation of two Serial ATA hard disk drives or one IDE HDD (if you have installed an optical drive). 2.9.1 Hard disk drive bays The drive bays incorporate a screw-less design that allows you to install and remove a hard disk drive without driving screws on the chassis. Each drive bay has a HDD screw lock and four screws rails (two on each side of the bay) that trap the HDD screws and secure the drive in the place. Screw rails 21 HDD screw lock Screw rails When installing o n e hard disk drive, install it on the upper HDD bay. 2.9.2 SATA hard disk drive installation To install a SATA hard disk drive: 1. Insert the rubber washers to the HDD screws. Refer to the Rubber washer mat illustration on the right. 1 2. Drive four screws (two on each side of the drive) on the drive screw holes. Rubber washer 2 2 ASUS Pundit P3-PH4 2-17
-
 1
1 -
2
-
3
-
4
-
5
-
6
-
7
-
8
-
9
-
10
-
11
-
12
-
13
-
14
-
15
-
16
-
17
-
18
-
19
-
20
-
21
-
22
-
23
-
24
-
25
-
26
-
27
-
 28
28 -
 29
29 -
 30
30 -
 31
31 -
 32
32 -
 33
33 -
 34
34 -
 35
35 -
 36
36 -
 37
37 -
 38
38 -
39
-
40
-
41
-
42
-
43
-
44
-
45
-
46
-
47
-
48
-
49
-
50
-
51
-
52
-
53
-
54
-
55
-
56
-
57
-
58
-
59
-
60
-
61
-
62
-
63
-
64
-
65
-
66
-
67
-
68
-
69
-
70
-
71
-
72
-
73
-
74
-
75
-
76
-
77
-
78
-
79
-
80
-
81
-
82
-
83
-
84
-
85
-
86
-
87
-
88
-
89
-
90
-
91
-
92
-
93
-
94
-
95
-
96
 |
 |