Asus P5VDC-MX V2.0 Motherboard DIY Troubleshooting Guide - Page 93
Auto Setup for Data Security and press <Enter>.
 |
View all Asus P5VDC-MX V2.0 manuals
Add to My Manuals
Save this manual to your list of manuals |
Page 93 highlights
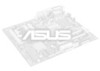
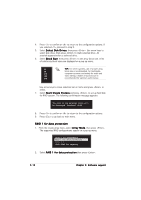
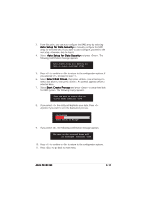
3. From this point, you can auto-configure the RAID array by selecting A u t o S e t u p f o r D a t a S e c u r i t y or manually configure the RAID array for mirrored sets. If you want to auto-configure, proceed to the next step, otherwise, skip to step 6. 4. Select A u t o S e t u p f o r D a t a S e c u r i t y and press . The following confirmation message appears. Auto create array will destroy all data on disks, Continue? (Y/N) 5. Press to confirm or to return to the configuration options. If you selected , proceed to step 11. 6. Select S e l e c t D i s k D r i v e s, then press . Use arrow keys to select disk drive/s, then press . An asterisk appears before a selected drive. 7. Select S t a r t C r e a t e P r o c e s s and press to setup hard disk for RAID system. The following inquiry appears: Save the data on source disk to mirror after creation? (Y/N) 8. If you select the utility will duplicate your data. Press anytime if you want to exit the duplication process. Duplicating... RAID 1 for data protection Press Yes(Y) to Escape 9. If you select , the following confirmation message appears. The data on the selected disks will be destroyed. Continue? (Y/N) 10. Press to confirm or to return to the configuration options. 11. Press to go back to main menu. ASUS P5VDC-MX 3-11
-
 1
1 -
2
-
3
-
4
-
5
-
6
-
7
-
8
-
9
-
10
-
11
-
12
-
13
-
14
-
15
-
16
-
17
-
18
-
19
-
20
-
21
-
22
-
23
-
24
-
25
-
26
-
27
-
28
-
29
-
30
-
31
-
32
-
33
-
34
-
35
-
36
-
37
-
38
-
39
-
40
-
41
-
42
-
43
-
44
-
45
-
46
-
47
-
48
-
49
-
50
-
51
-
52
-
53
-
54
-
55
-
56
-
57
-
58
-
59
-
60
-
61
-
62
-
63
-
64
-
65
-
66
-
67
-
68
-
69
-
70
-
71
-
72
-
73
-
74
-
75
-
76
-
77
-
78
-
79
-
80
-
81
-
82
-
83
-
84
-
85
-
86
-
87
-
 88
88 -
 89
89 -
 90
90 -
 91
91 -
 92
92 -
 93
93 -
 94
94
 |
 |