Asus PR-DLSR PR-DLSR User Manual - Page 94
selected, then click on
 |
View all Asus PR-DLSR manuals
Add to My Manuals
Save this manual to your list of manuals |
Page 94 highlights
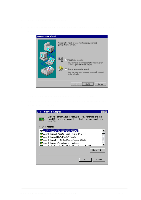
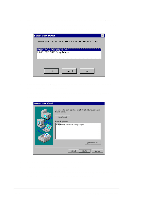
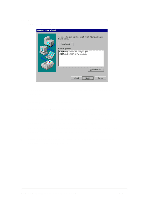
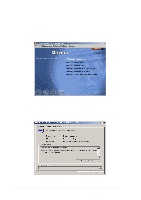
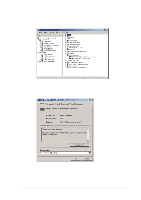
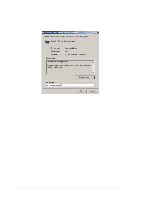
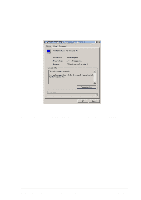
4. The appropriate driver is shown highlighted. Press Enter to proceed. 5. Return to the Windows 2000 Setup screen. Press Enter to proceed. The message about setup loading files appears. At this point, simply follow the Microsoft Windows 2000 installation procedure. C. Existing System Installation 1. Boot Windows 2000 and log on as Administrator. 2. Right click on My Computer and click on Properties. 3. Click on the Hardware tab, and then click on the Device Manager button. 4. Click the "+" sign to the left of the SCSI and RAID controllers line. Find the adapter desired for the driver upgrade and double click on the entry. Click on the Driver tab. 5. Information on the currently installed driver is displayed, and additional driver details can be viewed by clicking the Driver Details.... button. 6. To update the existing driver, click the Update Driver button. The Upgrade Device Driver Wizard begins. Click on the Next button. 7. Make sure that the item Search for a suitable driver for my device is selected, then click on the Next button. 8. Make sure that the item Floppy disk drives location is checked. Insert the appropriate LSI driver disk that contains the Windows 2000 driver required to support your LSI adapter(s) and press Enter. The LSI driver disk was created earlier. 9. The system scans the existing driver database and the floppy disk drive for drivers for the selected adapter. 10. A list of suitable drivers appears. The entry for the upgrade driver can be verified by scrolling the display to the right, and viewing the Location field. Highlight the driver for the upgrade installation disk and click on the Next button. 5-10 Chapter 5: OS Installation
-
 1
1 -
2
-
3
-
4
-
5
-
6
-
7
-
8
-
9
-
10
-
11
-
12
-
13
-
14
-
15
-
16
-
17
-
18
-
19
-
20
-
21
-
22
-
23
-
24
-
25
-
26
-
27
-
28
-
29
-
30
-
31
-
32
-
33
-
34
-
35
-
36
-
37
-
38
-
39
-
40
-
41
-
42
-
43
-
44
-
45
-
46
-
47
-
48
-
49
-
50
-
51
-
52
-
53
-
54
-
55
-
56
-
57
-
58
-
59
-
60
-
61
-
62
-
63
-
64
-
65
-
66
-
67
-
68
-
69
-
70
-
71
-
72
-
73
-
74
-
75
-
76
-
77
-
78
-
79
-
80
-
81
-
82
-
83
-
84
-
85
-
86
-
87
-
88
-
 89
89 -
 90
90 -
 91
91 -
 92
92 -
 93
93 -
 94
94 -
 95
95 -
 96
96 -
 97
97 -
 98
98 -
 99
99 -
100
-
101
-
102
-
103
-
104
-
105
-
106
 |
 |