Asus T2-PE1 T2-PE1 English User Manual E2151 - Page 27
Reinstalling the CPU fan and heatsink, assembly
 |
View all Asus T2-PE1 manuals
Add to My Manuals
Save this manual to your list of manuals |
Page 27 highlights
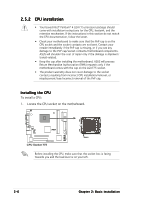
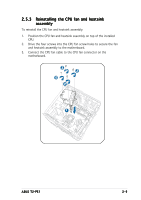
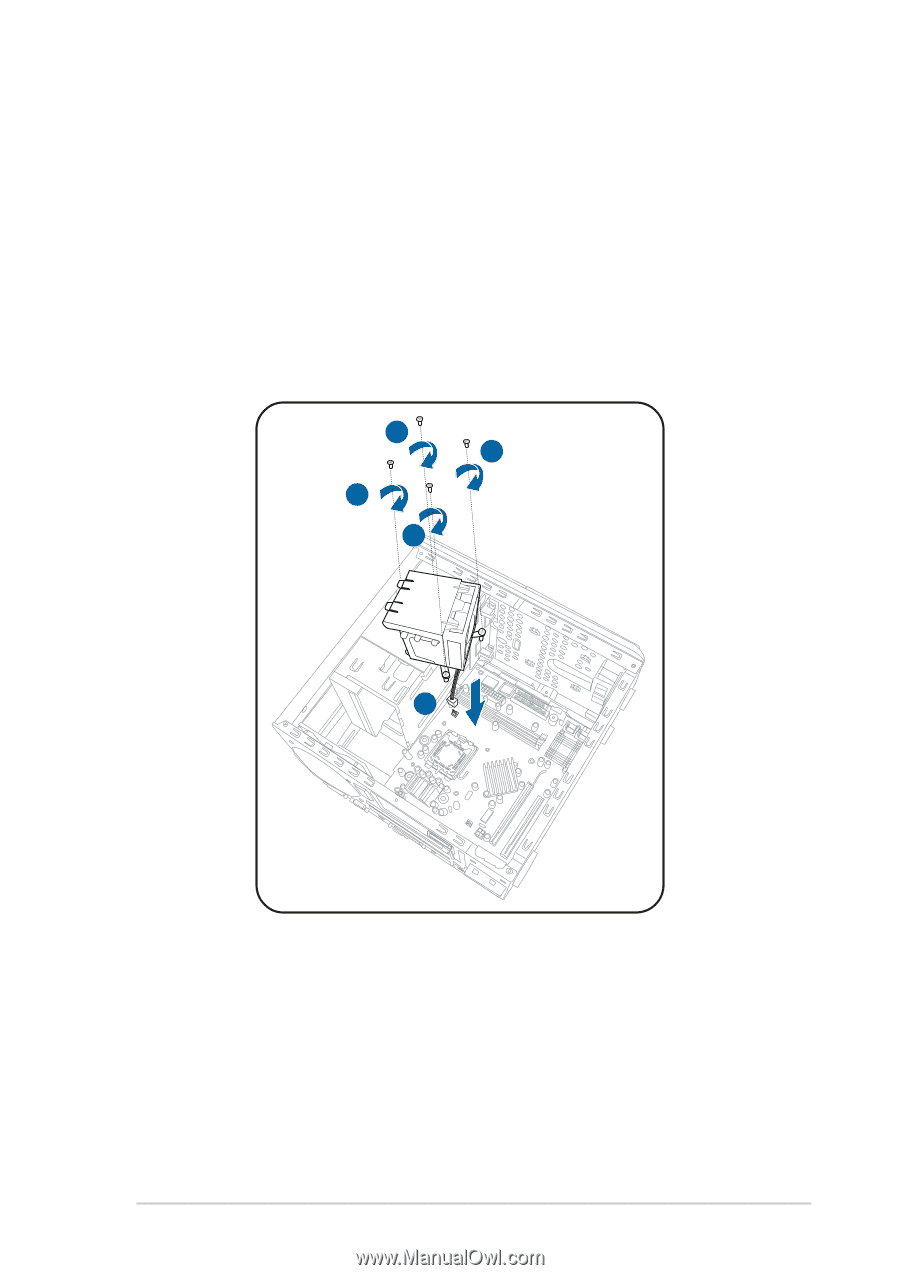
2.5.3 Reinstalling the CPU fan and heatsink assembly To reinstall the CPU fan and heatsink assembly: 1. Position the CPU fan and heatsink assembly on top of the installed CPU. 2. Drive the four screws into the CPU fan screw holes to secure the fan and heatsink assembly to the motherboard. 3. Connect the CPU fan cable to the CPU fan connector on the motherboard. 2 2 2 2 1 ASUS T2-PE1 2-9
-
 1
1 -
2
-
3
-
4
-
5
-
6
-
7
-
8
-
9
-
10
-
11
-
12
-
13
-
14
-
15
-
16
-
17
-
18
-
19
-
20
-
21
-
 22
22 -
 23
23 -
 24
24 -
 25
25 -
 26
26 -
 27
27 -
 28
28 -
 29
29 -
 30
30 -
 31
31 -
 32
32 -
33
-
34
-
35
-
36
-
37
-
38
-
39
-
40
-
41
-
42
-
43
-
44
-
45
-
46
-
47
-
48
-
49
-
50
-
51
-
52
-
53
-
54
-
55
-
56
-
57
-
58
-
59
-
60
-
61
-
62
-
63
-
64
-
65
-
66
-
67
-
68
-
69
-
70
-
71
-
72
-
73
-
74
-
75
-
76
-
77
-
78
-
79
-
80
-
81
-
82
-
83
-
84
-
85
-
86
-
87
-
88
-
89
-
90
-
91
-
92
-
93
-
94
-
95
-
96
-
97
-
98
-
99
-
100
-
101
-
102
-
103
-
104
-
105
-
106
-
107
-
108
-
109
-
110
 |
 |
2-9
2-9
2-9
2-9
2-9
ASUS T2-PE1
ASUS T2-PE1
ASUS T2-PE1
ASUS T2-PE1
ASUS T2-PE1
2.5.3
2.5.3
2.5.3
2.5.3
2.5.3
Reinstalling the CPU fan and heatsink
Reinstalling the CPU fan and heatsink
Reinstalling the CPU fan and heatsink
Reinstalling the CPU fan and heatsink
Reinstalling the CPU fan and heatsink
assembly
assembly
assembly
assembly
assembly
To reinstall the CPU fan and heatsink assembly:
1.
Position the CPU fan and heatsink assembly on top of the installed
CPU.
2.
Drive the four screws into the CPU fan screw holes to secure the fan
and heatsink assembly to the motherboard.
3.
Connect the CPU fan cable to the CPU fan connector on the
motherboard.
2
2
2
2
1