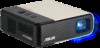
Asus ZenBeam E2 User Guide
Asus ZenBeam E2 Manual
 |
View all Asus ZenBeam E2 manuals
Add to My Manuals
Save this manual to your list of manuals |
Asus ZenBeam E2 manual content summary:
- Asus ZenBeam E2 | User Guide - Page 1
E17737 First Edition June 2021 E-Manual - Asus ZenBeam E2 | User Guide - Page 2
ASUS; or (2) the serial number of the is defaced or missing. ASUS PROVIDES THIS MANUAL "AS IS"WITHOUT WARRANTY OF ANY KIND, EITHER EXPRESS OR IMPLIED, INCLUDING BUT NOT OR YOUR RESELLER IS INFORMED OF THEIR POSSIBILITY. SERVICE AND SUPPORT Visit our multi-language web site at https://www.asus.com - Asus ZenBeam E2 | User Guide - Page 3
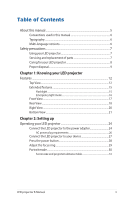
Table of Contents About this manual 5 Conventions used in this manual 6 Typography...6 Multi-language versions 6 Safety precautions 7 Using your LED projector 7 Servicing and replacement of parts 7 Caring for your LED projector 8 Proper disposal 9 Chapter 1: Knowing your LED projector - Asus ZenBeam E2 | User Guide - Page 4
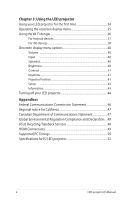
46 Regional notice for California 47 Canadian Department of Communications Statement 47 Global Environmental Regulation Compliance and Declaration ....48 ASUS Recycling/Takeback Services 48 HDMI Connectivity 49 Supported PC Timings 50 Specifications for E2 LED projector 52 4 LED projector - Asus ZenBeam E2 | User Guide - Page 5
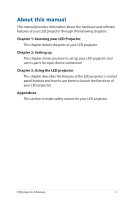
About this manual This manual provides information about the hardware and software features of your LED projector through the following chapters: Chapter 1: Knowing the functions of your LED projector. Appendices This section includes safety notices for your LED projector. LED projector E-Manual 5 - Asus ZenBeam E2 | User Guide - Page 6
and components. Typography Bold = This indicates a menu or an item that must be selected. Italic = This indicates sections that you can refer to in this manual. Multi-language versions Download other language versions of this E-Manual via this website: https://www.asus.com/support/ 6 LED projector - Asus ZenBeam E2 | User Guide - Page 7
to the manual and take note of the safety instructions before operating your LED projector. • Follow the notes and warnings stated in the user manual. • type. Dispose used batteries according to safety instructions and contact your local ASUS service center for assistance. • When replacing parts - Asus ZenBeam E2 | User Guide - Page 8
up as this may cause the lens' surface film to peel off. • DO NOT use a hard object to wipe or tap the lens. 8 LED projector E-Manual - Asus ZenBeam E2 | User Guide - Page 9
battery in municipal waste. The symbol of the crossed out wheeled bin indicates that the battery should not be placed in municipal waste. LED projector E-Manual 9 - Asus ZenBeam E2 | User Guide - Page 10
10 LED projector E-Manual - Asus ZenBeam E2 | User Guide - Page 11
Chapter 1: Knowing your LED projector Chapter 1: Knowing your LED projector LED projector E-Manual 11 - Asus ZenBeam E2 | User Guide - Page 12
: For more information on using the control panel buttons to access your LED projector's settings, refer to Chapter 3: Using the LED projector. 12 LED projector E-Manual - Asus ZenBeam E2 | User Guide - Page 13
currently used as a power bank and charging your mobile device. Blinking Red and A system error occurred. The LED projector will Green shutdown automatically. LED projector E-Manual 13 - Asus ZenBeam E2 | User Guide - Page 14
Battery charge indicator This LED indicator lights up when the LED projector is plugged to a power source using its power adapter. IMPORTANT! Use only the bundled power adapter to charge the battery pack and supply power to your LED projector. 14 LED projector E-Manual - Asus ZenBeam E2 | User Guide - Page 15
as a flashlight: 1. Disconnect all peripherals and the Wi-Fi dongle from your LED projector then press the power button to turn it on. LED projector E-Manual 15 - Asus ZenBeam E2 | User Guide - Page 16
on. 2. Press the Input button and change the input source to HDMI. 3. Press repeatedly until the LED projector flashes a blinking white light. 16 LED projector E-Manual - Asus ZenBeam E2 | User Guide - Page 17
Front View Lens The lens projects video or image files onscreen from your input device. WARNING! • DO NOT touch the lens with your hands or any sharp object. • DO NOT look directly into the lens. LED projector E-Manual 17 - Asus ZenBeam E2 | User Guide - Page 18
or turn off your LED projector. Short press this button to turn on or turn off power bank mode. Manual reset hole If your LED projector is unresponsive, insert a straightened paper clip into this hole to turn off your from your body while it is connected to a power source. 18 LED projector E-Manual - Asus ZenBeam E2 | User Guide - Page 19
you to mirror or cast content from your mobile device. NOTE: For more details, refer to the Using the Wi-Fi dongle section in this manual. LED projector E-Manual 19 - Asus ZenBeam E2 | User Guide - Page 20
! Ensure that paper, books, clothing, cables, or other objects do not block any of the air vents or else overheating may occur. 20 LED projector E-Manual - Asus ZenBeam E2 | User Guide - Page 21
Bottom View Tripod socket Attach the LED projector to a tripod using this socket. Adjustable foot Rotate this adjustable foot to adjust the height of the LED projector. LED projector E-Manual 21 - Asus ZenBeam E2 | User Guide - Page 22
22 LED projector E-Manual - Asus ZenBeam E2 | User Guide - Page 23
Chapter 2: Setting up Chapter 2: Setting up LED projector E-Manual 23 - Asus ZenBeam E2 | User Guide - Page 24
it in battery mode for the first time. NOTE: The power adapter may vary in appearance, depending on models and your region. 24 LED projector E-Manual - Asus ZenBeam E2 | User Guide - Page 25
or gas; • A battery subjected to extremely low air pressure that may result in an explosion or the leakage of flammable liquid or gas. LED projector E-Manual 25 - Asus ZenBeam E2 | User Guide - Page 26
to prevent signal interference due to voltage fluctuations. For Australia and Mainland China For Argentina For Korea For U.K. For U.S.A., Japan, and Taiwan 26 LED projector E-Manual - Asus ZenBeam E2 | User Guide - Page 27
Connect the LED projector to your device Audio output HDMI Power output (5V/1A) LED projector E-Manual 27 - Asus ZenBeam E2 | User Guide - Page 28
. Refer to the battery indicator for the current charge status of your LED projector. You may also refer to the Top View section in this manual for more details. 28 LED projector - Asus ZenBeam E2 | User Guide - Page 29
Adjust the focus ring NOTE: Use a still image when adjusting the onscreen display. Adjust the image focus of the projection onscreen by moving the focus ring up or down. LED projector E-Manual 29 - Asus ZenBeam E2 | User Guide - Page 30
Portrait mode Your LED projector supports both landscape (standard) and portrait modes. To use the portrait mode, rotate the projector to a vertical position, and or cast content from your mobile device, refer to the Using the Wi-Fi dongle section in this manual for more details. 30 LED projector - Asus ZenBeam E2 | User Guide - Page 31
1182 100 2540 2214 1245 Projection distance (mm) 864 1007 1151 1295 1439 1583 1727 1871 2015 2159 2303 2447 2591 2735 2879 LED projector E-Manual 31 - Asus ZenBeam E2 | User Guide - Page 32
32 LED projector E-Manual - Asus ZenBeam E2 | User Guide - Page 33
Chapter 3: Using the LED projector Chapter 3: Using the LED projector LED projector E-Manual 33 - Asus ZenBeam E2 | User Guide - Page 34
for three (3) seconds to turn it on. 2. Press or on your LED projector's control panel to browse through the available language options. 34 LED projector E-Manual - Asus ZenBeam E2 | User Guide - Page 35
Select button on the control panel of your LED projector. NOTE: For more details, refer to the Onscreen display menu options section in this manual. To scroll through the options on the onscreen display menu, press the navigation buttons (up/down/left/right) on your LED projector's control panel - Asus ZenBeam E2 | User Guide - Page 36
5GHz to 2.4GHz, press and hold the Input button for three (3) seconds and wait for another three (3) seconds to enable the change. 36 LED projector E-Manual - Asus ZenBeam E2 | User Guide - Page 37
the device list, select your LED projector to cast to. 5. Once connected, tap Play and your content will start playing from the projector. LED projector E-Manual 37 - Asus ZenBeam E2 | User Guide - Page 38
device list, select your LED projector to cast to. 5. Once connected, tap Play and your content will start playing from the projector. 38 LED projector E-Manual - Asus ZenBeam E2 | User Guide - Page 39
the device list, select your LED projector to cast to. 4. Once connected, tap Play and your content will start playing from the projector. LED projector E-Manual 39 - Asus ZenBeam E2 | User Guide - Page 40
adjust the brightness of your projection on screen. You may adjust the brightness on a scale of 0 to 10, from darkest to brightest. 40 LED projector E-Manual - Asus ZenBeam E2 | User Guide - Page 41
contrast. Keystone Select this option to adjust the keystone of your projection onscreen. NOTE: If you wish to enable the Auto Keystone feature after manual adjustment, go to Setup and turn on Auto Keystone. Projector Position This option allows you to change the way your projections are oriented on - Asus ZenBeam E2 | User Guide - Page 42
to select Auto (15 minutes) or set the number of minutes with no HDMI signal before your LED projector shut down automatically. 42 LED projector E-Manual - Asus ZenBeam E2 | User Guide - Page 43
Information Select this menu option to see an overview of information about your LED projector. model name LED projector's firmware version input device's screen resolution LED projector E-Manual 43 - Asus ZenBeam E2 | User Guide - Page 44
LED projector may not immediately start after the device is powered off. Once the projector cools off, charging its battery automatically begins. 44 LED projector E-Manual - Asus ZenBeam E2 | User Guide - Page 45
AAppppeennddiicceess Appendices LED projector E-Manual 45 - Asus ZenBeam E2 | User Guide - Page 46
radiate radio frequency energy and, if not installed and used in accordance with the instructions, may cause harmful interference to radio communications. However, there is no guarantee that device must accept any interference that may cause undesired operation. 46 LED projector E-Manual - Asus ZenBeam E2 | User Guide - Page 47
apparatus set out in the Radio Interference Regulations of the Canadian Department of Communications. This class B digital apparatus complies with Canadian ICES-003. LED projector E-Manual 47 - Asus ZenBeam E2 | User Guide - Page 48
with: Japan JIS-C-0950 Material Declarations EU REACH SVHC Korea RoHS ASUS Recycling/Takeback Services ASUS recycling and takeback programs come from our commitment to the highest standards for protecting .htm for detailed recycling information in different regions. 48 LED projector E-Manual - Asus ZenBeam E2 | User Guide - Page 49
™ Digital AV Adapter • HDMI to HDMI Cable Devices with USB 3.1 Gen 2 Type-C™ port • USB 3.1 Gen 2 Type-C™ Digital AV Adapter • HDMI to HDMI Cable LED projector E-Manual 49 - Asus ZenBeam E2 | User Guide - Page 50
Supported PC Timings HDMI (PC) Mode VGA SVGA XGA SXGA SXGA+ UXGA PowerBook G4 PowerBook G4 PowerBook G4 Resolution 640x480 800x600 1024x768 1280x1024 1400x1050 1600x1200 59.7 60.0 65.3 60.0 67.5 60.0 47.7 Clock (MHz) 74.250 71.000 108.000 119.000 148.500 72.000 50 LED projector E-Manual - Asus ZenBeam E2 | User Guide - Page 51
(digital) 27.000 27.000 74.250 74.250 74.250 74.250 74.250 145.500 145.500 74.250 74.250 LED projector E-Manual 51 - Asus ZenBeam E2 | User Guide - Page 52
% Fixed Standard, Theater, Presentation Vertical ±40° Yes Front Table, Rear Table 5W speaker (ASUS SonicMaster Audio technology) (continued on the next page) 52 LED projector E-Manual - Asus ZenBeam E2 | User Guide - Page 53
1.3 (compatible to 1.4) Earphone out Yes (5V@1A) Golden Yes Yes No 107.5 mm x 110 mm x 37 mm (L x W x H) 400 g (continued on the next page) LED projector E-Manual 53 - Asus ZenBeam E2 | User Guide - Page 54
Operating Humidity 20% to 80% Accessories Carry Bag, Power Adapter, AC Plug, HDMI Cable, Dongle, Quick Start Guide, Warranty Card Regulation Approvals FCC / CE / CB / CCC / RCM / VCCI / CU / IEC62471 / names mentioned are trademarks of their respective companies. 54 LED projector E-Manual
-
 1
1 -
 2
2 -
 3
3 -
 4
4 -
 5
5 -
 6
6 -
 7
7 -
8
-
9
-
10
-
11
-
12
-
13
-
14
-
15
-
16
-
17
-
18
-
19
-
20
-
21
-
22
-
23
-
24
-
25
-
26
-
27
-
28
-
29
-
30
-
31
-
32
-
33
-
34
-
35
-
36
-
37
-
38
-
39
-
40
-
41
-
42
-
43
-
44
-
45
-
46
-
47
-
48
-
49
-
50
-
51
-
52
-
53
-
54
 |
 |

E17737
First Edition
June 2021
E-Manual