Beko BDVG693 User Manual - Page 32
Maintenance
 |
View all Beko BDVG693 manuals
Add to My Manuals
Save this manual to your list of manuals |
Page 32 highlights
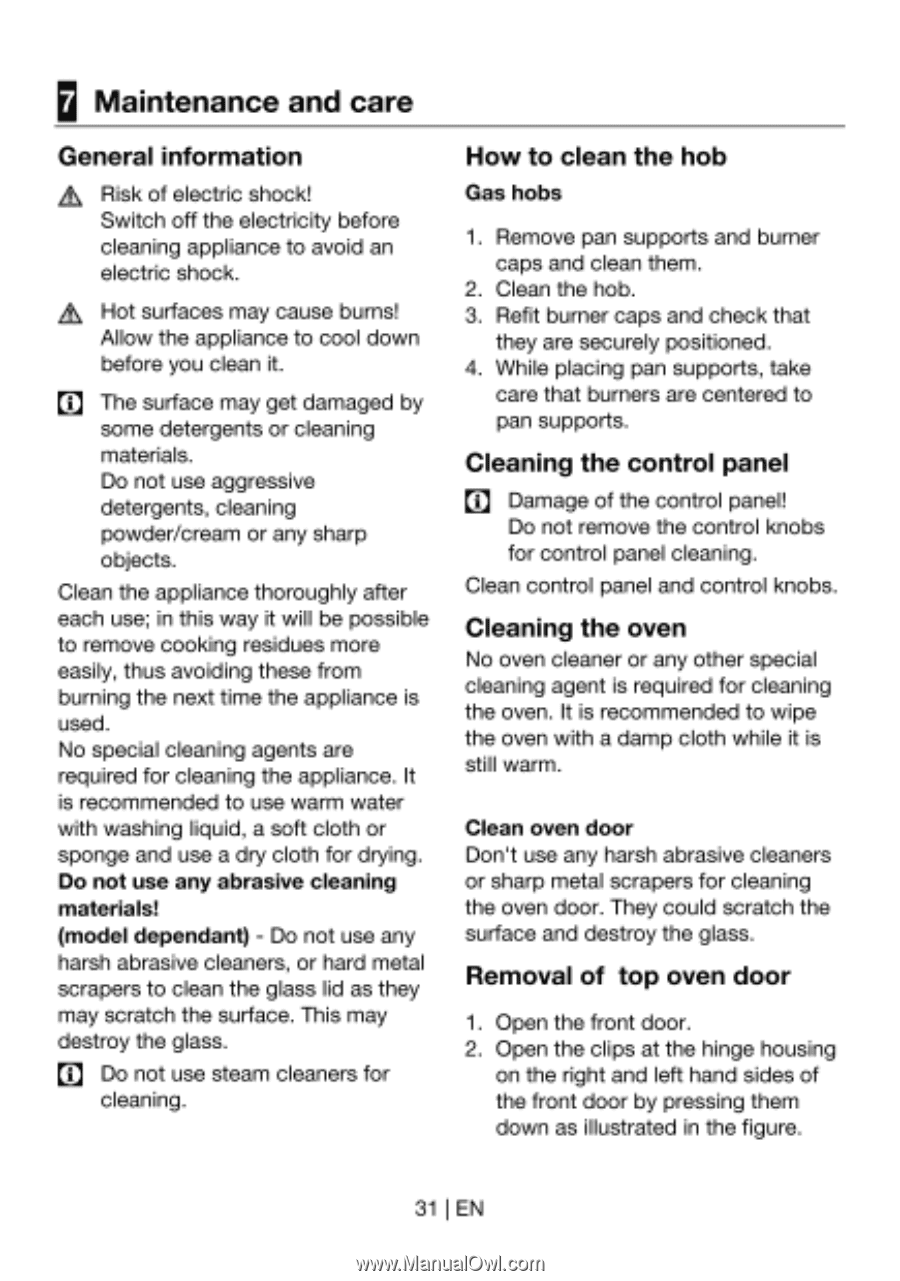
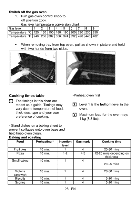
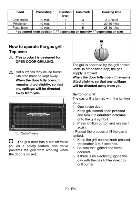
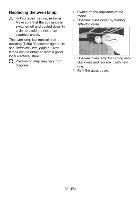
Maintenance and care General information 4 Risk of electric shock! Switch off the electricity before cleaning appliance to avoid an electric shock. Et Hot surfaces may cause burns! Allow the appliance to cool down before you clean it. The surface may get damaged by some detergents or cleaning materials. Do not use aggressive detergents, cleaning powder/cream or any sharp objects. Clean the appliance thoroughly after each use; in this way it will be possible to remove cooking residues more easily, thus avoiding these from burning the next time the appliance is used. No special cleaning agents are required for cleaning the appliance. It is recommended to use warm water with washing liquid, a soft cloth or sponge and use a dry cloth for drying. Do not use any abrasive cleaning materials! (model dependant) - Do not use any harsh abrasive cleaners, or hard metal scrapers to clean the glass lid as they may scratch the surface. This may destroy the glass. Do not use steam cleaners for cleaning. How to clean the hob Gas hobs 1. Remove pan supports and burner caps and clean them. 2. Clean the hob. 3. Refit burner caps and check that they are securely positioned. 4. While placing pan supports, take care that burners are centered to pan supports. Cleaning the control panel [j] Damage of the control panel! Do not remove the control knobs for control panel cleaning. Clean control panel and control knobs. Cleaning the oven No oven cleaner or any other special cleaning agent is required for cleaning the oven. It is recommended to wipe the oven with a damp cloth while it is still warm. Clean oven door Don't use any harsh abrasive cleaners or sharp metal scrapers for cleaning the oven door. They could scratch the surface and destroy the glass. Removal of top oven door 1. Open the front door. 2. Open the clips at the hinge housing on the right and left hand sides of the front door by pressing them down as illustrated in the figure. 31 1 EN
-
 1
1 -
2
-
3
-
4
-
5
-
6
-
7
-
8
-
9
-
10
-
11
-
12
-
13
-
14
-
15
-
16
-
17
-
18
-
19
-
20
-
21
-
22
-
23
-
24
-
25
-
26
-
 27
27 -
 28
28 -
 29
29 -
 30
30 -
 31
31 -
 32
32 -
 33
33 -
 34
34 -
 35
35 -
 36
36 -
 37
37 -
38
-
39
-
40
 |
 |