Belkin F1PI241ENau User Manual - Page 45
Manual IP Configuration, TCP/IP Configuration Setting, Disable HTTP Proxy
 |
View all Belkin F1PI241ENau manuals
Add to My Manuals
Save this manual to your list of manuals |
Page 45 highlights
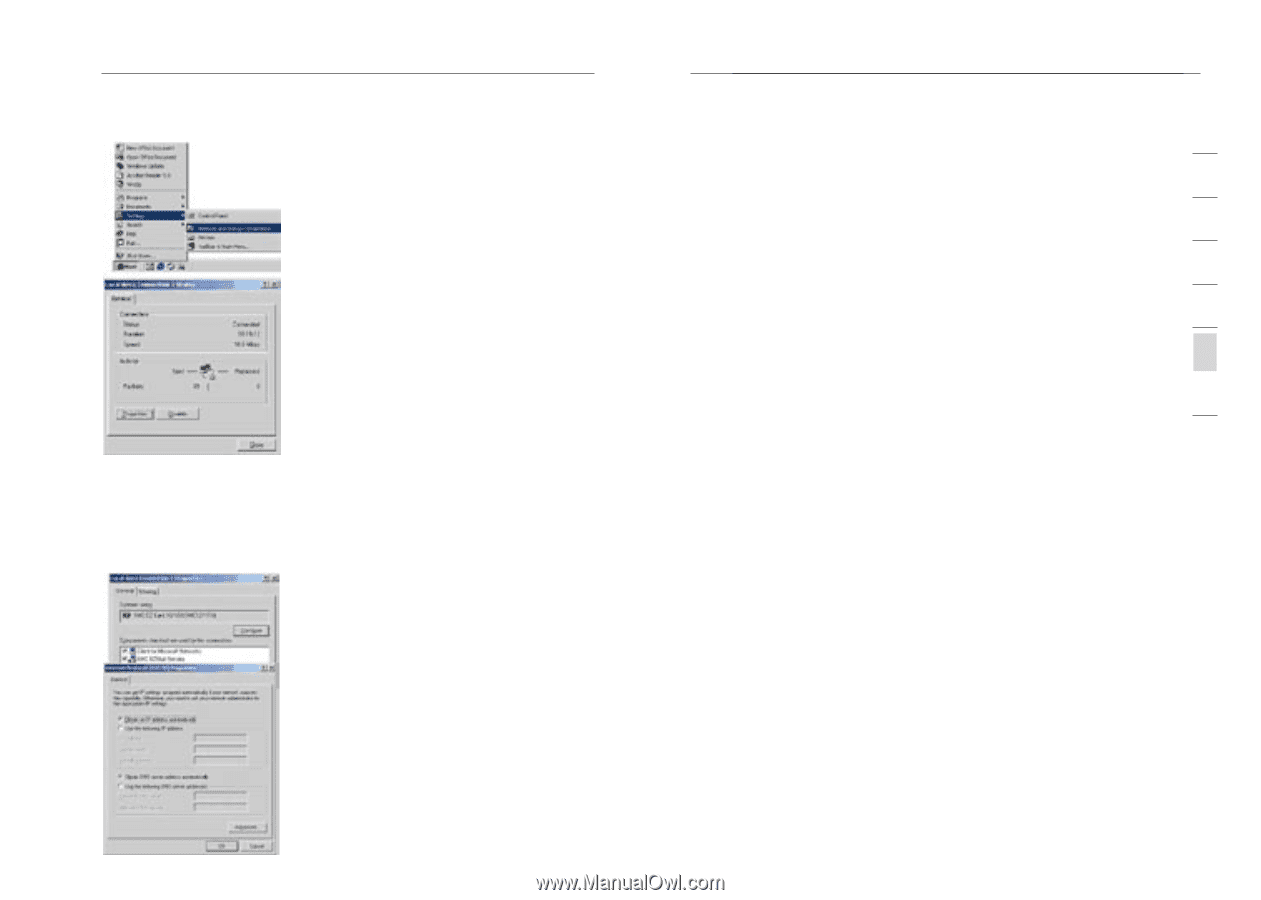
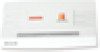
Appendices 1. Double-click Internet Protocol (TCP/IP). 2. If "Obtain an IP address automatically" and "Obtain DNS server address automatically" are already selected, your computer is already configured for DHCP. If not, select these options and then click ok and then ok again, or click Cancel to close each window. 86 Appendices 1 Manual IP Configuration 1. Follow steps 1-4 in "DHCP IP Configuration" on the previous page. 2 2. Select "Use the following IP address." Enter an IP address based on the default network 3 10.1.1.x (where x is between 2 and 254), use 255.255.255.0 for the subnet mask and the IP address of the 4 VoIP Router 10.1.1.1 for the Default gateway field. 3. Select "Use the following DNS server addresses." 5 4. Enter the IP address for the VoIP Router in the Preferred DNS server field. This automatically relays DNS requests to the DNS 6 server(s) provided by your ISP. also, add a specific DNS server of your ISP into the Alternate DNS Server field and click OK to close the dialog boxes. 7 5. Record the configured information in the following table. TCP/IP Configuration Setting IP Address Subnet Mask Default Gateway Preferred DNS Server Alternate DNS Server Disable HTTP Proxy You need to verify that the "HTTP Proxy" feature of your web browser is disabled. This is so that your browser can view the VoIP Router's HTML configuration pages. 1. Open control panel. 2. Open internet options 3. Go to the connections tab and click on the LAN settings button. 4. Ensure that NOTHING is ticked on this screen and click ok. 5. On the connections tab, make sure that there are no dial up connections, select the "Never dial a connection" radio button. 87 section
-
 1
1 -
2
-
3
-
4
-
5
-
6
-
7
-
8
-
9
-
10
-
11
-
12
-
13
-
14
-
15
-
16
-
17
-
18
-
19
-
20
-
21
-
22
-
23
-
24
-
25
-
26
-
27
-
28
-
29
-
30
-
31
-
32
-
33
-
34
-
35
-
36
-
37
-
38
-
39
-
 40
40 -
 41
41 -
 42
42 -
 43
43 -
 44
44 -
 45
45 -
 46
46 -
 47
47 -
 48
48 -
 49
49 -
 50
50 -
51
-
52
 |
 |