Bernina 2500DCET Manual - Page 24
Stitch display/stitch selection, Stitch display
 |
View all Bernina 2500DCET manuals
Add to My Manuals
Save this manual to your list of manuals |
Page 24 highlights
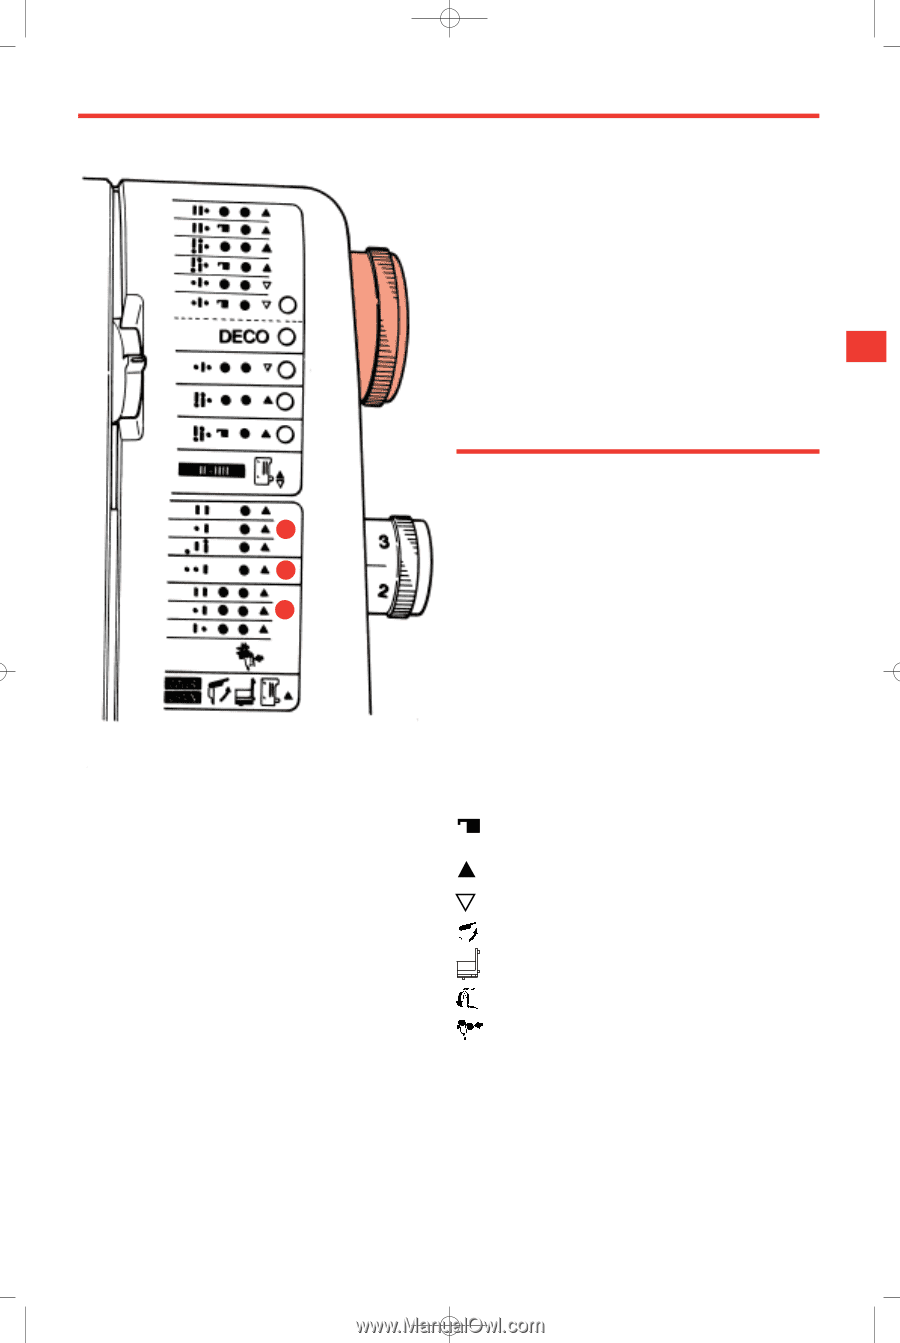
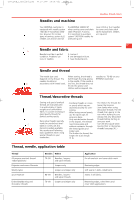
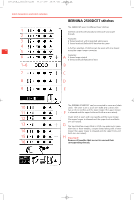
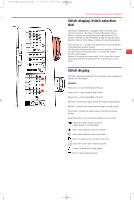
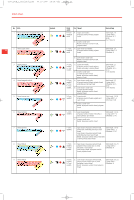
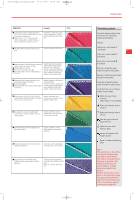
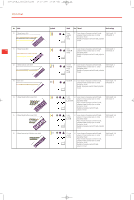
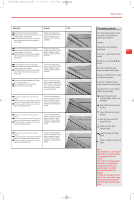
2500_DCE_1_englisch_neu 09.10.2007 14:34 Uhr Seite 25 1 2 3 4 5 6 A 1-6 B 7 C 8 D 9 E 10 11 F 12 13 G 14 15 H 16 Stitch formations and stitch selection Stitch display /stitch selection dial The Bernina 2500DCET is equipped with a one dial stitch selection function. The basic tension settings for sixteen different stitches are distributed over eight positions. The position desired can be selected by simply turning the stitch selection dial. An LED display indicates the selected position. The positions A, C, D and E are adjusted for overlock stitches using standard overlock thread. The stitches on Position B are the same as position A but with pre-set tensions for woolly nylon or a similar decorative 25 thread in the loopers. Position F is pre-set for cover stitch, G for chain stitch using all-purpose overlock thread and H for top & bottom cover stitch. Stitch display The stitch display provides all the information you need about stitches and threading. Symbols: Yellow line = insert needle L and thread Green line = insert needle C and thread Brown line = insert needle R and thread Blue dot = thread the upper looper through the blue guides Red dot = thread the lower looper through the red guides Purple dot = thread the lower looper through the purple guides Small black dot = do not thread needle, remove needle Attach the upper looper converter (upper looper is not threaded) Move stitch selection lever to overlock Move stitch selection lever to roll hem Raise the upper knife and upper knife arm Attach the cover stitch extension plate Lower the wiper and finger guard Press in wiper activating lever
-
 1
1 -
2
-
3
-
4
-
5
-
6
-
7
-
8
-
9
-
10
-
11
-
12
-
13
-
14
-
15
-
16
-
17
-
18
-
 19
19 -
 20
20 -
 21
21 -
 22
22 -
 23
23 -
 24
24 -
 25
25 -
 26
26 -
 27
27 -
 28
28 -
 29
29 -
30
-
31
-
32
-
33
-
34
-
35
-
36
-
37
-
38
-
39
-
40
-
41
-
42
-
43
-
44
-
45
-
46
-
47
-
48
-
49
-
50
-
51
-
52
-
53
-
54
-
55
-
56
-
57
-
58
-
59
-
60
-
61
-
62
-
63
-
64
-
65
-
66
-
67
-
68
-
69
-
70
-
71
-
72
-
73
-
74
-
75
-
76
-
77
-
78
-
79
-
80
-
81
-
82
 |
 |