Bernina 2500DCET Manual - Page 67
Simple hem, Flat joining seam
 |
View all Bernina 2500DCET manuals
Add to My Manuals
Save this manual to your list of manuals |
Page 67 highlights
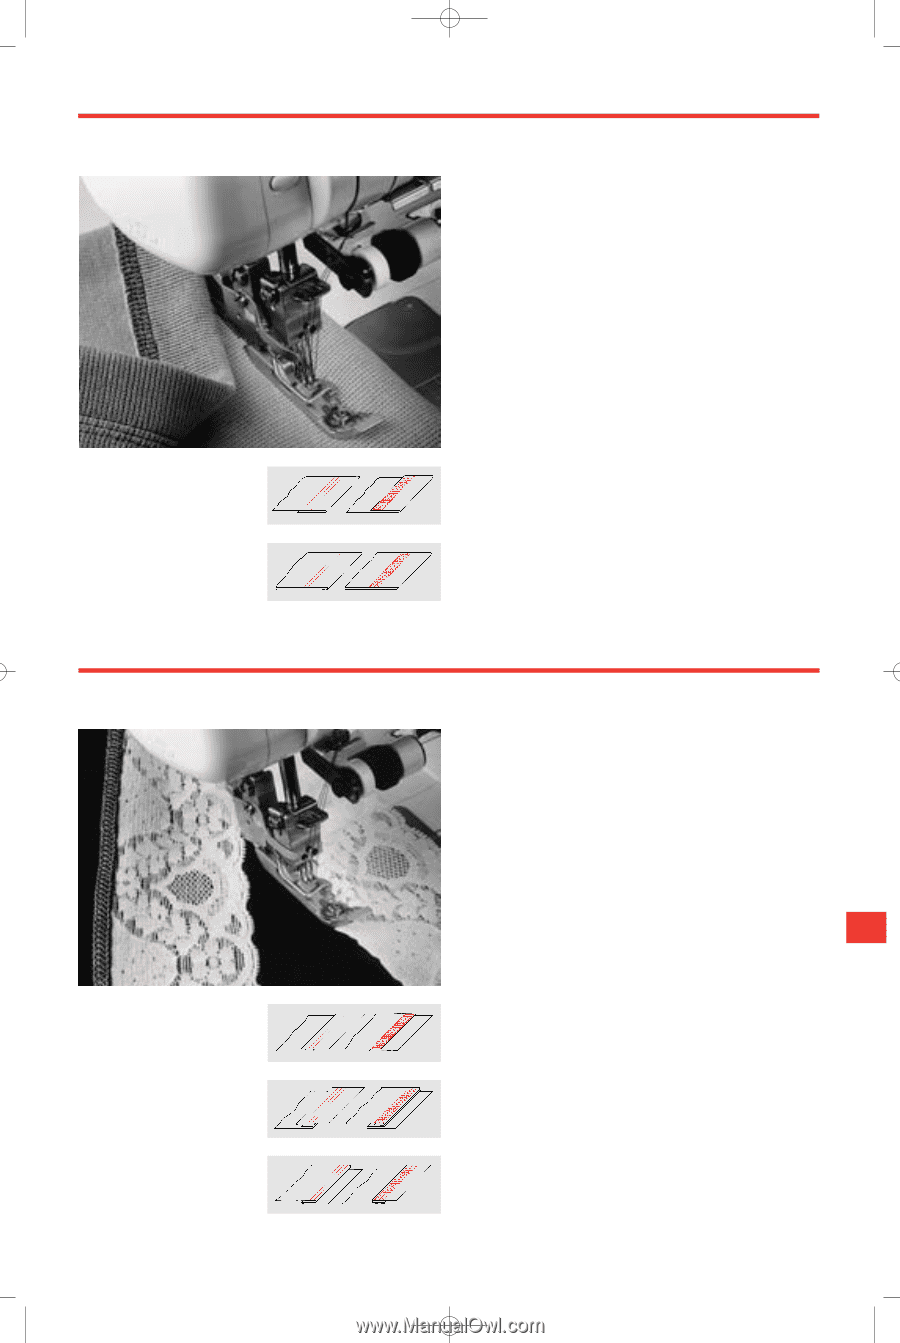
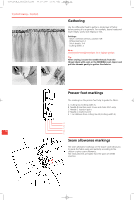
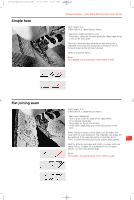
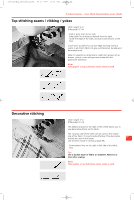
2500_DCE_2_englisch_neu 09.10.2007 15:01 Uhr Seite 67 Simple hem Practical Sewing - Cover Stitch (top & bottom cover stitch) Stitch length: 3-4 Differential: N-2 (depending on fabric) · Mark hem depth and fold or press. · Place fabric under the foot and guide the folded edge along a line on the stitch plate. The hem is sewn and the raw edge on the wrong side is neatened simultaneously. Surplus seam allowance can be trimmed closed to the stitches if desired. Ideal for all stretch fabrics. Note: This applies to top & bottom cover stitch as well. Flat joining seam Stitch length: 3-4 Differential: N-2 (depending on fabric) · Mark seam allowances. · Turn or press under the edge of the upper fabric (if not already neatened). · Place edges on top of one another. · Guide fabric edge along one of the side sections of the foot. When sewing on elastic or lace, place it on the fabric and cover with the seam allowance. The underside (raw edge) will be neatened. If the seam allowance is more than 6 mm 67 (1/4"), it can be trimmed close to the stitches after sewing. Ideal for all hems and edges with elastic in jerseys, knits and stretch fabrics. Suitable for shaped pieces such as raglan sleeves, curved inserts and bindings. Note: This applies to top & bottom cover stitch as well.
-
 1
1 -
2
-
3
-
4
-
5
-
6
-
7
-
8
-
9
-
10
-
11
-
12
-
13
-
14
-
15
-
16
-
17
-
18
-
19
-
20
-
21
-
22
-
23
-
24
-
25
-
26
-
27
-
28
-
29
-
30
-
31
-
32
-
33
-
34
-
35
-
36
-
37
-
38
-
39
-
40
-
41
-
42
-
43
-
44
-
45
-
46
-
47
-
48
-
49
-
50
-
51
-
52
-
53
-
54
-
55
-
56
-
57
-
58
-
59
-
60
-
61
-
 62
62 -
 63
63 -
 64
64 -
 65
65 -
 66
66 -
 67
67 -
 68
68 -
 69
69 -
 70
70 -
 71
71 -
 72
72 -
73
-
74
-
75
-
76
-
77
-
78
-
79
-
80
-
81
-
82
 |
 |