Bernina 2500DCET Manual - Page 47
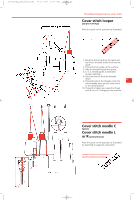
Cover stitch looper, Cover stitch needle C, Cover stitch needle L
 |
View all Bernina 2500DCET manuals
Add to My Manuals
Save this manual to your list of manuals |
Page 47 highlights
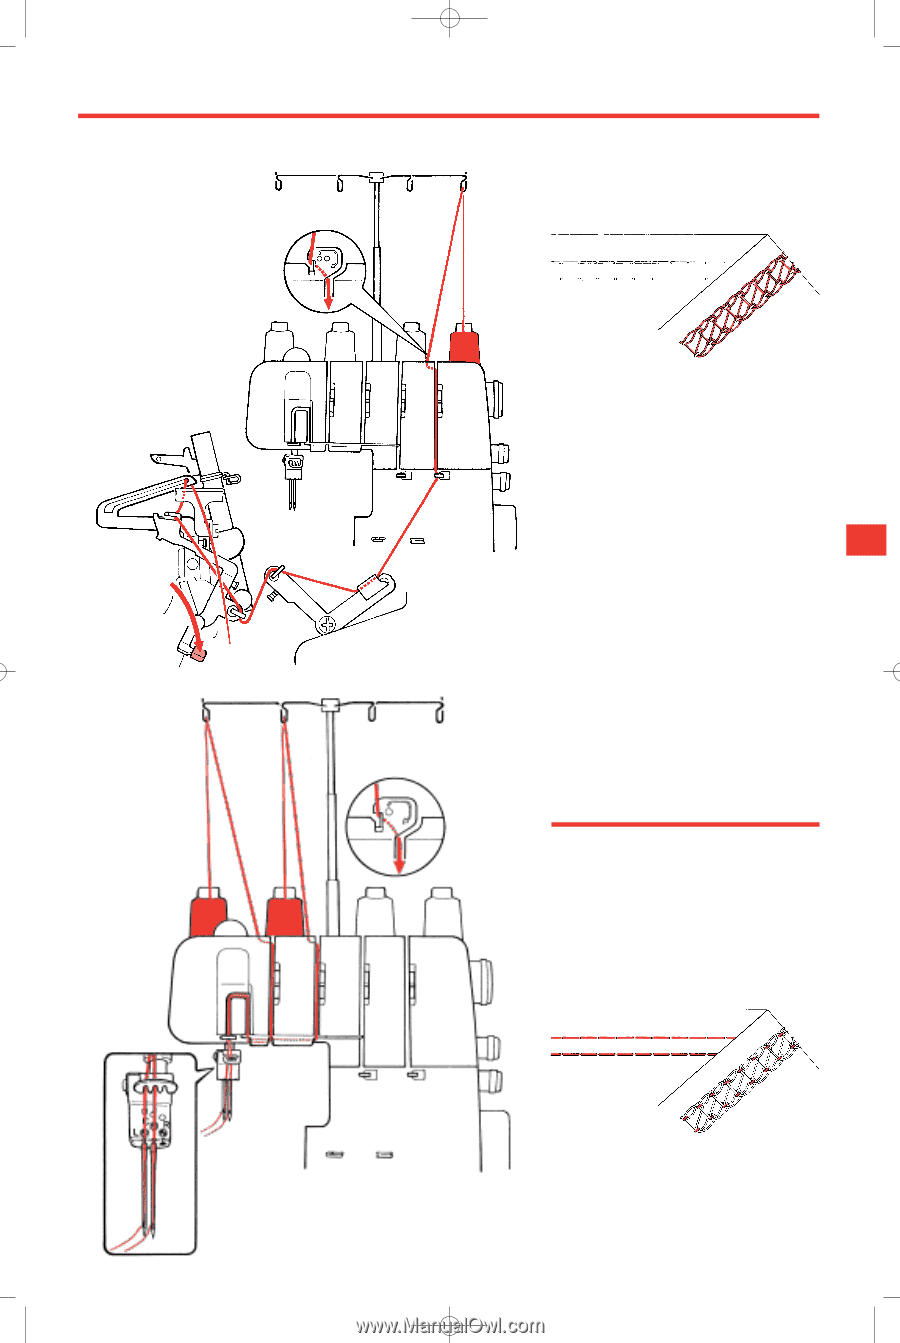
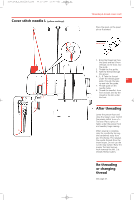
2500_DCE_2_englisch_neu 09.10.2007 15:00 Uhr Seite 47 Threading 3-thread narrow cover stitch Cover stitch looper (purple markings) 1 Place the spool on the spool pin as illustrated. 2 2 3 1. Bring the thread up from the spool and lay it from the back to the front into the guide. 2. Thread the first guide on the machine. 10 3. Take the thread through the groove. 4 4, 5, 6, 7, thread guides as illustrated 9 (purple markings). 8. Press the lever of the auto-threader down. 47 46 6 5 9. Thread the slit of the threader. Push the auto-threader lever up and it will return to its normal position. 10. Thread the looper eye. Leave the thread end (8 cm or 3") hanging in the machine. 7 8 1 1 2 2 2 3 3 5 6 7 4 8 Cover stitch needle C (green) Cover stitch needle L or R (yellow/brown) Place the spool on the spool pin as illustrated. As described on pages 43, 44 and 45. 8
-
 1
1 -
2
-
3
-
4
-
5
-
6
-
7
-
8
-
9
-
10
-
11
-
12
-
13
-
14
-
15
-
16
-
17
-
18
-
19
-
20
-
21
-
22
-
23
-
24
-
25
-
26
-
27
-
28
-
29
-
30
-
31
-
32
-
33
-
34
-
35
-
36
-
37
-
38
-
39
-
40
-
41
-
 42
42 -
 43
43 -
 44
44 -
 45
45 -
 46
46 -
 47
47 -
 48
48 -
 49
49 -
 50
50 -
 51
51 -
 52
52 -
53
-
54
-
55
-
56
-
57
-
58
-
59
-
60
-
61
-
62
-
63
-
64
-
65
-
66
-
67
-
68
-
69
-
70
-
71
-
72
-
73
-
74
-
75
-
76
-
77
-
78
-
79
-
80
-
81
-
82
 |
 |