Brother International CS-8060 Users Manual - English - Page 86
Appliqué stitching, Attach zigzag foot J.
 |
View all Brother International CS-8060 manuals
Add to My Manuals
Save this manual to your list of manuals |
Page 86 highlights
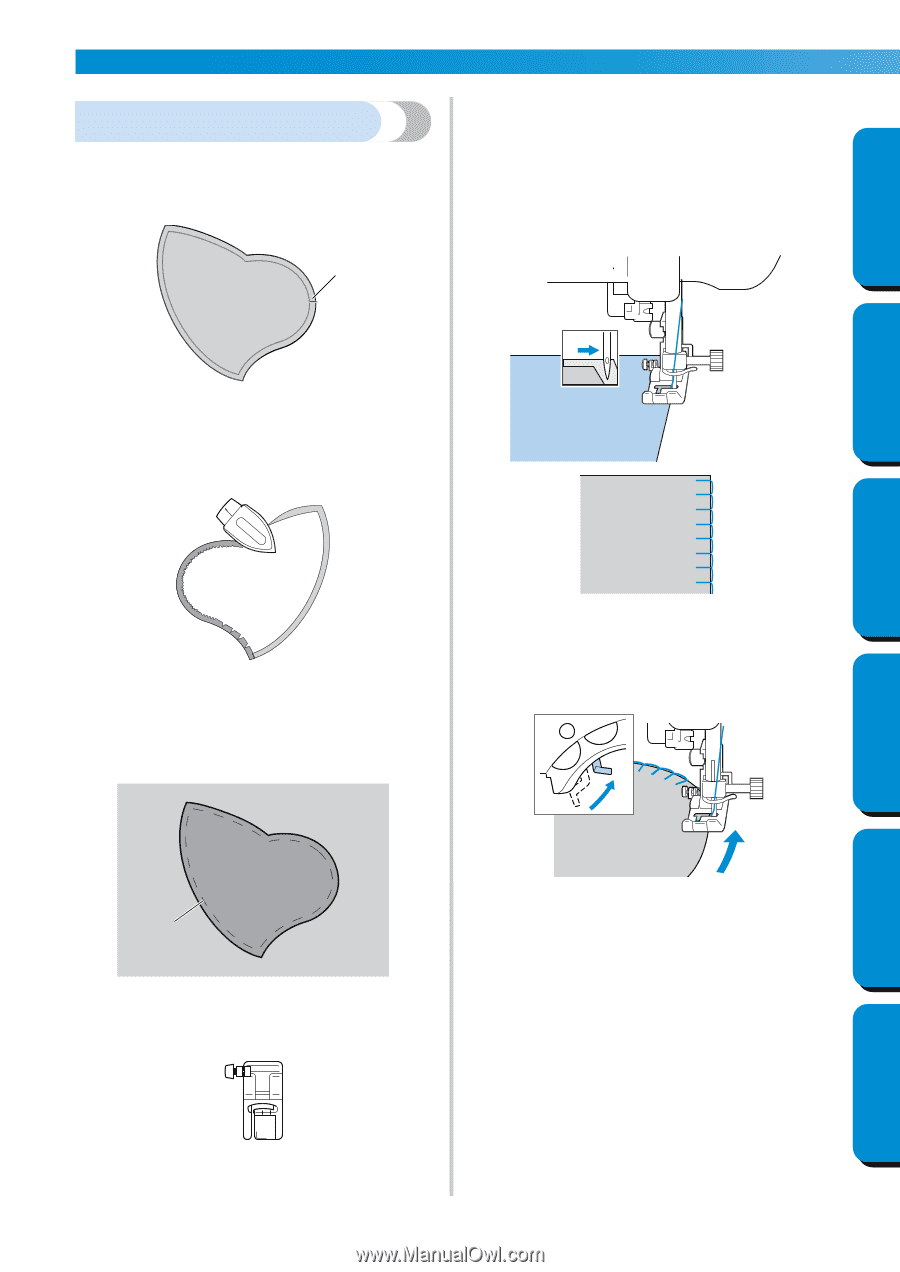
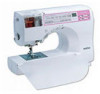
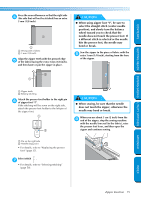
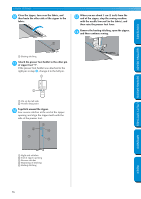
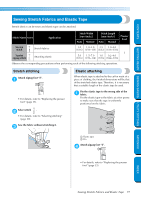
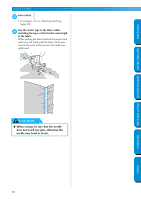
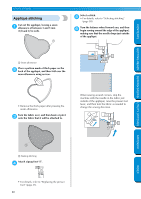
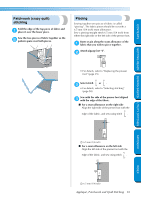
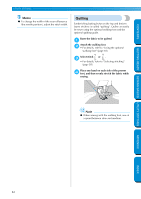
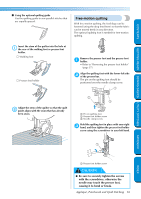
GETTING READY SEWING BASICS UTILITY STITCHES UTILITY STITCHES CONTENTS Appliqué stitching Cut out the appliqué, leaving a seam 1 allowance of between 3 and 5 mm (1/8 and 3/16 inch). 1 Select a stitch. 5 • For details, refer to "Selecting stitching" (page 58). Turn the balance wheel toward you, and then 6 begin sewing around the edge of the appliqué, making sure that the needle drops just outside of the appliqué. 1 Seam allowance Place a pattern made of thick paper on the 2 back of the appliqué, and then fold over the seam allowance using an iron. • Remove the thick paper after pressing the seam allowance. Turn the fabric over, and then baste or pin it 3 onto the fabric that it will be attached to. When sewing around corners, stop the machine with the needle in the fabric just outside of the appliqué, raise the presser foot lever, and then turn the fabric as needed to change the sewing direction. APPENDIX INDEX 1 1 Basting stitching Attach zigzag foot "J". 4 J • For details, refer to "Replacing the presser foot" (page 35). 80
-
 1
1 -
2
-
3
-
4
-
5
-
6
-
7
-
8
-
9
-
10
-
11
-
12
-
13
-
14
-
15
-
16
-
17
-
18
-
19
-
20
-
21
-
22
-
23
-
24
-
25
-
26
-
27
-
28
-
29
-
30
-
31
-
32
-
33
-
34
-
35
-
36
-
37
-
38
-
39
-
40
-
41
-
42
-
43
-
44
-
45
-
46
-
47
-
48
-
49
-
50
-
51
-
52
-
53
-
54
-
55
-
56
-
57
-
58
-
59
-
60
-
61
-
62
-
63
-
64
-
65
-
66
-
67
-
68
-
69
-
70
-
71
-
72
-
73
-
74
-
75
-
76
-
77
-
78
-
79
-
80
-
 81
81 -
 82
82 -
 83
83 -
 84
84 -
 85
85 -
 86
86 -
 87
87 -
 88
88 -
 89
89 -
 90
90 -
 91
91 -
92
-
93
-
94
-
95
-
96
-
97
-
98
-
99
-
100
-
101
-
102
-
103
-
104
-
105
-
106
-
107
-
108
-
109
-
110
-
111
-
112
-
113
-
114
-
115
-
116
 |
 |