Brother International E-100 Users Manual - English - Page 27
Selecting the next operation
 |
View all Brother International E-100 manuals
Add to My Manuals
Save this manual to your list of manuals |
Page 27 highlights
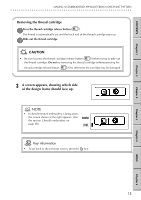
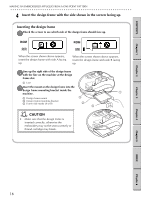
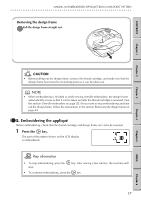
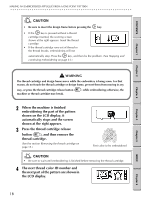
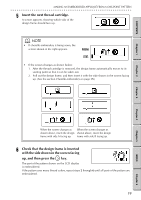
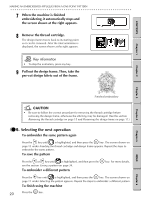
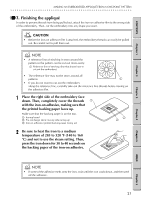
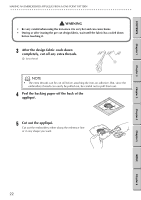
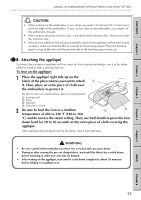
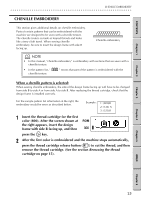
CONTENTS MAKING AN EMBROIDERED APPLIQUÉ FROM A ONE-POINT PATTERN G G G G G G G G G G G G G G G G G G G G G G G G G G G G G G G G G G G G G G G G G G G G G G G G G G G G G G G G G 7 When the machine is finished embroidering, it automatically stops and the screen shown at the right appears. 8 Remove the thread cartridge. The design frame moves back to its starting point so it can be removed. After the final animation is displayed, the screen shown at the right appears. Key information • To skip the animation, press any key. 9 Pull out the design frame. Then, take the pre-cut design fabric out of the frame. Chapter 1 Chapter 2 Chapter 3 Chapter 4 Chapter 5 Finished embroidery CAUTION • Be sure to follow the correct procedure for removing the thread cartridge before removing the design frame, otherwise the stitching may be damaged. (See the section Removing the thread cartridge on page 15 and Removing the design frame on page 17.) GG 6. Selecting the next operation To embroider the same pattern again Press the key until is highlighted, and then press the key. The screen shown on page 13 under Inserting the thread cartridge and design frame appears. Repeat the steps to embroider the same pattern. To save the pattern Press the or key until is highlighted, and then press the see the section Saving a pattern on page 34. To embroider a different pattern key. For more details, Press the key until is highlighted, and then press the key. The screen shown on page 11 under Selecting the pattern appears. Repeat the steps to embroider a different pattern. To finish using the machine 20 Press the key. INDEX Chapter 6
-
 1
1 -
2
-
3
-
4
-
5
-
6
-
7
-
8
-
9
-
10
-
11
-
12
-
13
-
14
-
15
-
16
-
17
-
18
-
19
-
20
-
21
-
 22
22 -
 23
23 -
 24
24 -
 25
25 -
 26
26 -
 27
27 -
 28
28 -
 29
29 -
 30
30 -
 31
31 -
 32
32 -
33
-
34
-
35
-
36
-
37
-
38
-
39
-
40
-
41
-
42
-
43
-
44
-
45
-
46
-
47
-
48
-
49
-
50
-
51
-
52
-
53
-
54
-
55
-
56
-
57
-
58
-
59
-
60
-
61
-
62
-
63
-
64
-
65
-
66
 |
 |
