Brother International E-100 Users Manual - English - Page 56
Appendix, Cleaning precautions, Troubleshooting,
 |
View all Brother International E-100 manuals
Add to My Manuals
Save this manual to your list of manuals |
Page 56 highlights
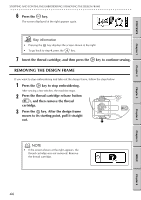
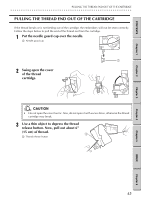
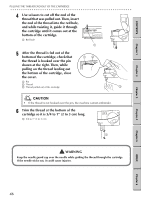
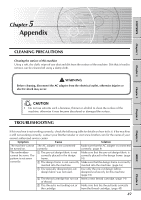
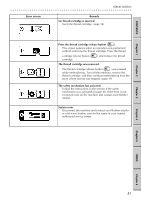
CONTENTS 5 Chapter 5Appendix Chapter 1 Chapter 2 Chapter 3 Chapter 4 CLEANING PRECAUTIONS Cleaning the surface of this machine Using a soft, dry cloth, wipe off any dust and dirt from the surface of the machine. Dirt that is hard to remove can be cleaned off using a damp cloth. WARNING Before cleaning, disconnect the AC adapter from the electrical outlet, otherwise injuries or electric shock may occur. CAUTION • Do not use solvents such a benzene, thinner or alcohol to clean the surface of the machine, otherwise it may become discolored or damaged the surface. TROUBLESHOOTING If this machine is not working correctly, check the following table for details on how to fix it. If the machine is still not working correctly, contact your Brother retailer or visit www.brother.com for the name of your nearest authorized service center. Symptom Cause Solution The machine cannot The AC adapter is not connected be turned on. correctly. Make sure that the AC adapter is connected correctly. (page 9) The embroidery cannot be sewn. The pattern is not sewn correctly. 1 The pre-cut design fabric is not Make sure that the pre-cut design fabric is correctly placed in the design correctly placed in the design frame. (page frame. 10) 2 The design frame is not correctly Make sure that the design frame is correctly inserted into the machine. inserted into the machine. (page 16) 3 The specially designed pre-cut design fabric was not used. Use only the pre-cut design fabrics designed exclusively for this machine. (page 10) 4 The thread cartridge has run out Insert a new thread cartridge. (page 14) of thread. 5 The thread is not feeding out of Make sure that the thread feeds correctly the cartridge. from the thread cartridge. (page 45) 49 Chapter 5 INDEX Chapter 6
-
 1
1 -
2
-
3
-
4
-
5
-
6
-
7
-
8
-
9
-
10
-
11
-
12
-
13
-
14
-
15
-
16
-
17
-
18
-
19
-
20
-
21
-
22
-
23
-
24
-
25
-
26
-
27
-
28
-
29
-
30
-
31
-
32
-
33
-
34
-
35
-
36
-
37
-
38
-
39
-
40
-
41
-
42
-
43
-
44
-
45
-
46
-
47
-
48
-
49
-
50
-
 51
51 -
 52
52 -
 53
53 -
 54
54 -
 55
55 -
 56
56 -
 57
57 -
 58
58 -
 59
59 -
 60
60 -
 61
61 -
62
-
63
-
64
-
65
-
66
 |
 |