Brother International PC-8500 Users Manual - English - Page 112
Initializing the embroidery unit, One-point patterns
 |
View all Brother International PC-8500 manuals
Add to My Manuals
Save this manual to your list of manuals |
Page 112 highlights
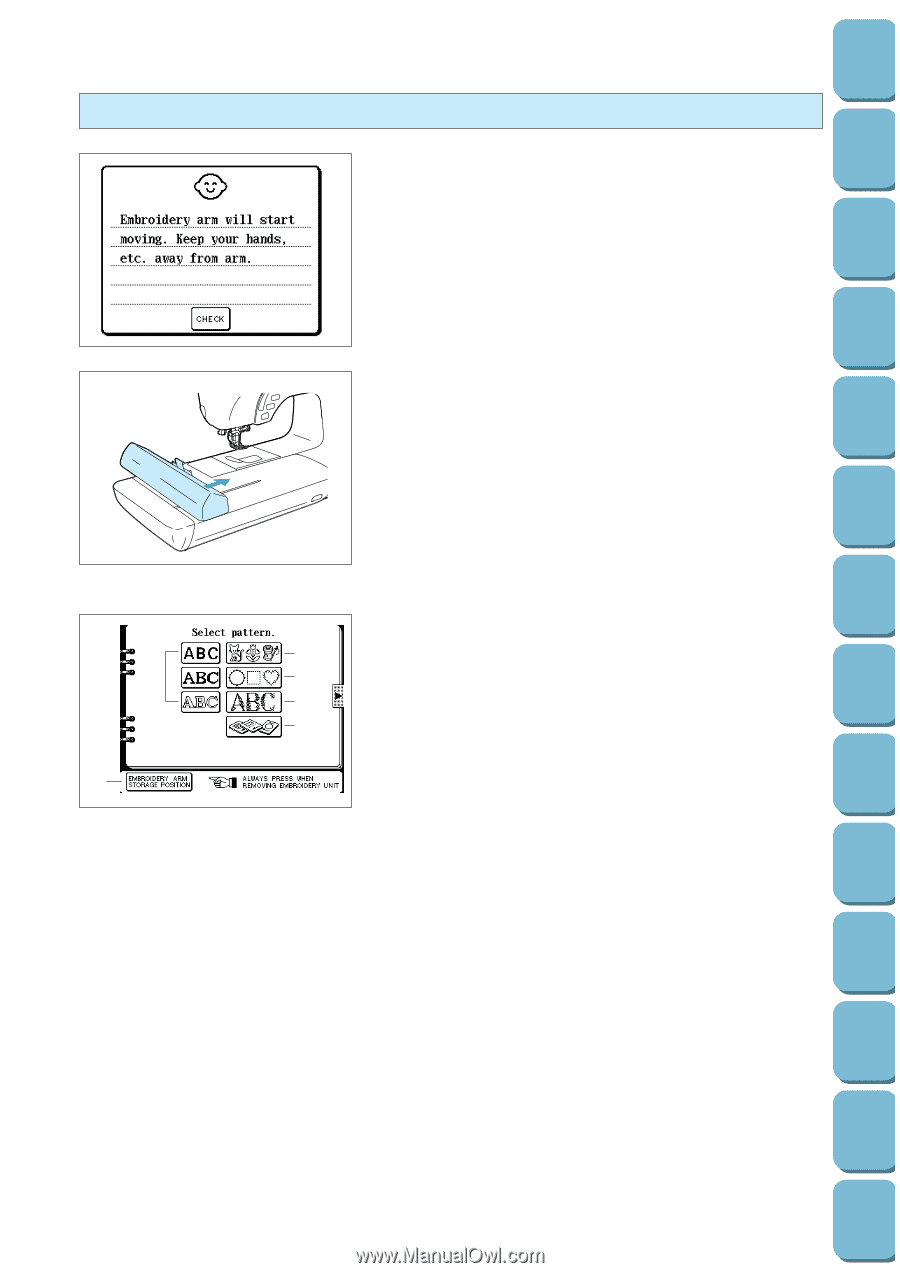
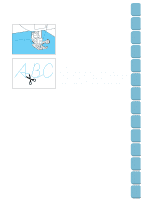
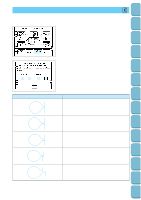
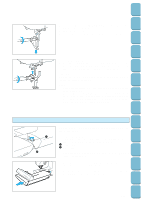
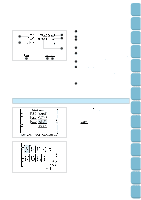
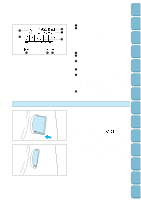
Setting Up Sewing Utility Stitches Characters and Decorative Stitches Embroidering Initializing the embroidery unit 1. Turn on the power. The following display will appear on the LCD. * When the buttonhole lever, the needle or the presser foot lever are lowered or when the bobbin winding shaft is at the right, an error message will vary depending on which of the conditions mentioned above is occurring. The display shown at left will appear after the error condition has been remedied. 1 6 2. Touch the "CHECK" key. The carriage will move in order to initialize the embroidery unit. CAUTION Do not place your hands near the embroidery arm, otherwise injury may result. Please note that the embroidery arm may make an unusual noise while initialization is being carried out, but this is normal. If the initialization could not be carried out normally, a buzzer will sound. If this occurs, make sure that the embroidery frame is not attached and try again to initialize the embroidery unit. This is not a malfunction. The types of patterns available will then be displayed on the LCD. 2 3 1 Alphabetical characters 4 2 One-point patterns 3 Frame patterns 5 4 Floral alphabets 5 Patterns found on memory card (optional) 6 Touch to position the embroidery arm for removing unit. Editing Embroidery Patterns Retrieving My Custom Stitch TM Error Maintenance Messages Trouble shooting Sewing Chart Patterns (Programmed in Machine) Patterns (Memory Card) 109
-
 1
1 -
2
-
3
-
4
-
5
-
6
-
7
-
8
-
9
-
10
-
11
-
12
-
13
-
14
-
15
-
16
-
17
-
18
-
19
-
20
-
21
-
22
-
23
-
24
-
25
-
26
-
27
-
28
-
29
-
30
-
31
-
32
-
33
-
34
-
35
-
36
-
37
-
38
-
39
-
40
-
41
-
42
-
43
-
44
-
45
-
46
-
47
-
48
-
49
-
50
-
51
-
52
-
53
-
54
-
55
-
56
-
57
-
58
-
59
-
60
-
61
-
62
-
63
-
64
-
65
-
66
-
67
-
68
-
69
-
70
-
71
-
72
-
73
-
74
-
75
-
76
-
77
-
78
-
79
-
80
-
81
-
82
-
83
-
84
-
85
-
86
-
87
-
88
-
89
-
90
-
91
-
92
-
93
-
94
-
95
-
96
-
97
-
98
-
99
-
100
-
101
-
102
-
103
-
104
-
105
-
106
-
 107
107 -
 108
108 -
 109
109 -
 110
110 -
 111
111 -
 112
112 -
 113
113 -
 114
114 -
 115
115 -
 116
116 -
 117
117 -
118
-
119
-
120
-
121
-
122
-
123
-
124
-
125
-
126
-
127
-
128
-
129
-
130
-
131
-
132
-
133
-
134
-
135
-
136
-
137
-
138
-
139
-
140
-
141
-
142
-
143
-
144
-
145
-
146
-
147
-
148
-
149
-
150
-
151
-
152
-
153
-
154
-
155
-
156
-
157
-
158
-
159
-
160
-
161
-
162
-
163
-
164
-
165
-
166
-
167
-
168
-
169
-
170
-
171
-
172
-
173
-
174
-
175
-
176
-
177
-
178
-
179
-
180
-
181
-
182
-
183
-
184
-
185
-
186
-
187
-
188
-
189
-
190
-
191
-
192
-
193
-
194
-
195
-
196
 |
 |