Brother International PC-8500 Users Manual - English - Page 51
Zigzag Stitches, Overcasting using a zigzag stitch, Applique using a zigzag stitch
 |
View all Brother International PC-8500 manuals
Add to My Manuals
Save this manual to your list of manuals |
Page 51 highlights
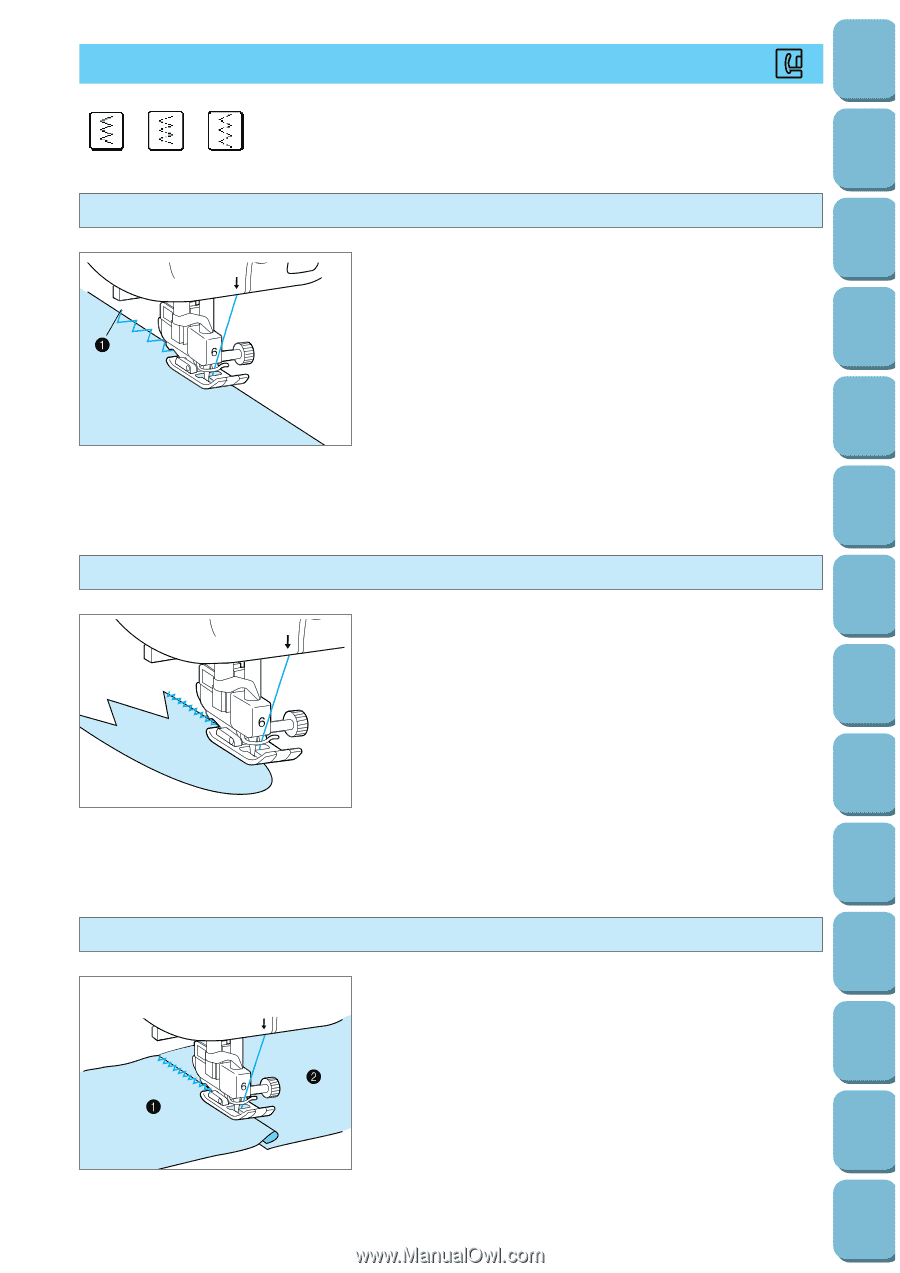
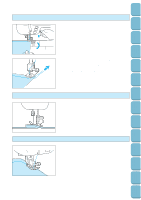
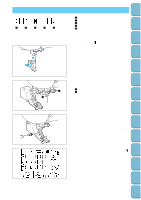
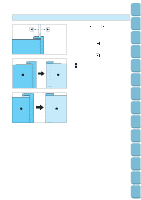
Setting Up Sewing ZIGZAG STITCHES J 1 2 3 1 Zigzag stitch 2 Elastic zigzag stitch 3 Elastic zigzag stitch Overcasting (using a zigzag stitch) Sew the overcasting along the edge of the fabric so that the 5 right hand side needle drop point is over the edge of the fabric. 1 Needle drop point Utility Stitches Characters and Decorative Stitches Embroidering Editing Embroidery Patterns Retrieving Applique (using a zigzag stitch) 5 Attach the applique using adhesive or basting, then sew it. * Sew a zigzag stitch, while positioning the right hand needle drop point just outside the edge of the fabric. My Custom Stitch TM Error Maintenance Messages Trouble shooting Sewing Chart Patchwork (for crazy quilt) 3 5 Turn back the desired width of fabric and position it over the lower fabric, then sew so that the stitch bridges both pieces of fabric. 1 Upper fabric 2 Lower fabric 48 Patterns (Programmed in Machine) Patterns (Memory Card)
-
 1
1 -
2
-
3
-
4
-
5
-
6
-
7
-
8
-
9
-
10
-
11
-
12
-
13
-
14
-
15
-
16
-
17
-
18
-
19
-
20
-
21
-
22
-
23
-
24
-
25
-
26
-
27
-
28
-
29
-
30
-
31
-
32
-
33
-
34
-
35
-
36
-
37
-
38
-
39
-
40
-
41
-
42
-
43
-
44
-
45
-
 46
46 -
 47
47 -
 48
48 -
 49
49 -
 50
50 -
 51
51 -
 52
52 -
 53
53 -
 54
54 -
 55
55 -
 56
56 -
57
-
58
-
59
-
60
-
61
-
62
-
63
-
64
-
65
-
66
-
67
-
68
-
69
-
70
-
71
-
72
-
73
-
74
-
75
-
76
-
77
-
78
-
79
-
80
-
81
-
82
-
83
-
84
-
85
-
86
-
87
-
88
-
89
-
90
-
91
-
92
-
93
-
94
-
95
-
96
-
97
-
98
-
99
-
100
-
101
-
102
-
103
-
104
-
105
-
106
-
107
-
108
-
109
-
110
-
111
-
112
-
113
-
114
-
115
-
116
-
117
-
118
-
119
-
120
-
121
-
122
-
123
-
124
-
125
-
126
-
127
-
128
-
129
-
130
-
131
-
132
-
133
-
134
-
135
-
136
-
137
-
138
-
139
-
140
-
141
-
142
-
143
-
144
-
145
-
146
-
147
-
148
-
149
-
150
-
151
-
152
-
153
-
154
-
155
-
156
-
157
-
158
-
159
-
160
-
161
-
162
-
163
-
164
-
165
-
166
-
167
-
168
-
169
-
170
-
171
-
172
-
173
-
174
-
175
-
176
-
177
-
178
-
179
-
180
-
181
-
182
-
183
-
184
-
185
-
186
-
187
-
188
-
189
-
190
-
191
-
192
-
193
-
194
-
195
-
196
 |
 |