Brother International VX-1120 Users Manual - English - Page 21
bisco
 |
View all Brother International VX-1120 manuals
Add to My Manuals
Save this manual to your list of manuals |
Page 21 highlights
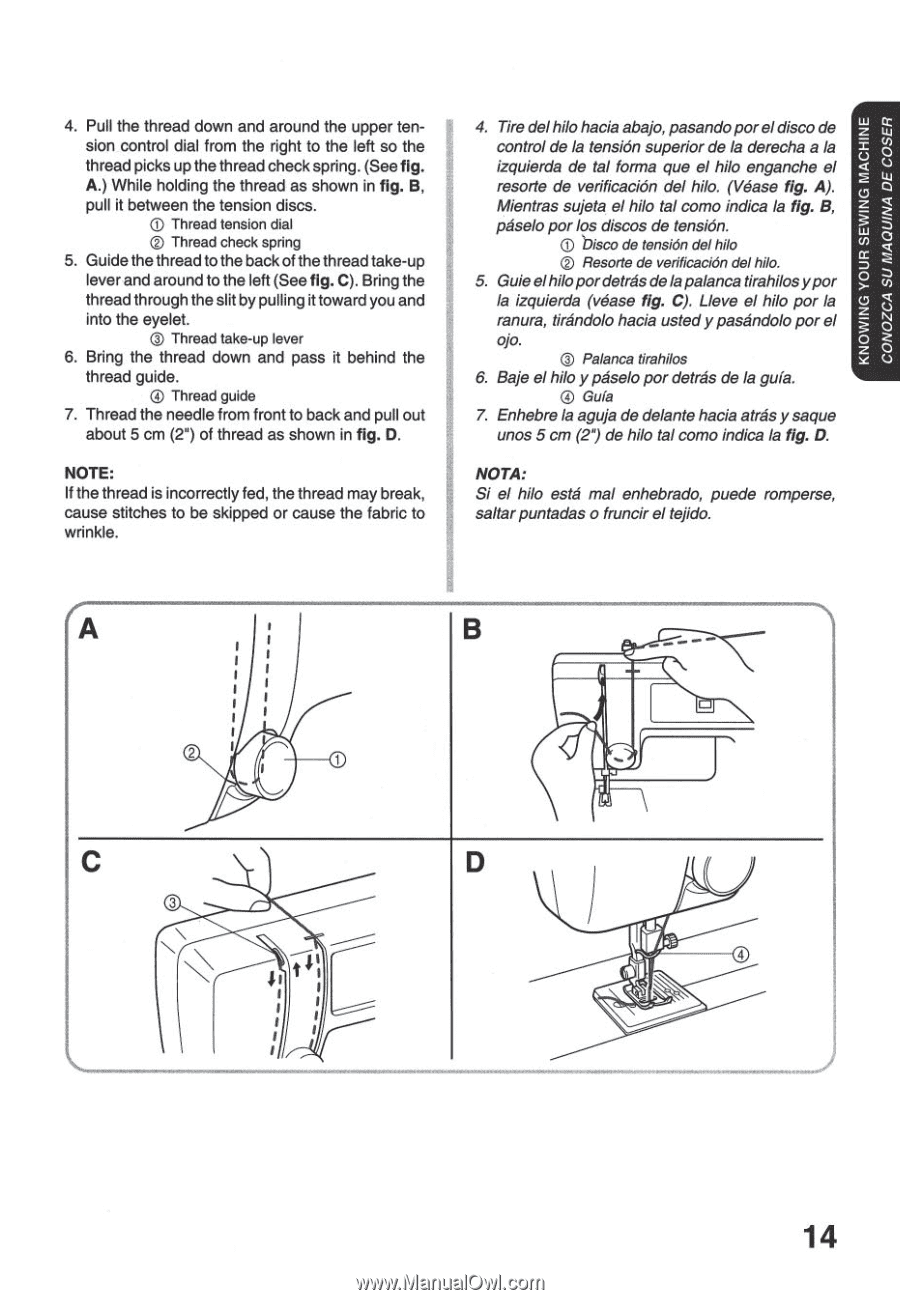
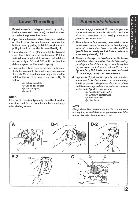
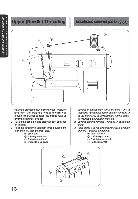
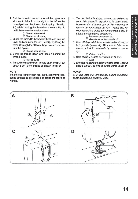
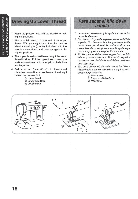
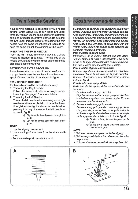
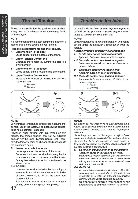
KNOWING YOUR SEWING MACHINE CONOZCA SU MAQUINA DE COSER OO 4. Pull the thread down and around the upper tension control dial from the right to the left so the thread picks up the thread check spring. (See fig. A.) While holding the thread as shown in fig. B, pull it between the tension discs. C) Thread tension dial Thread check spring 5. Guide the thread tothe back of the thread take-up lever and around to the left (See fig. C). Bring the thread through the slit by pulling it toward you and into the eyelet. () Thread take-up lever 6. Bring the thread down and pass it behind the thread guide. C) Thread guide 7. Thread the needle from front to back and pull out about 5 cm (2") of thread as shown in fig. D. NOTE: If the thread is incorrectly fed, the thread may break, cause stitches to be skipped or cause the fabric to wrinkle. 4. Tire delhilo hacia abajo, pasandopor eldisco de control de la tension superior de la derecha a la izquierda de tal forma que el hilo enganche el resorte de verificacion del hilo. (Vease fig. A). Mientras sujeta el hilo tal como indica la fig. B, paselo por los discos de tensiOn. 0 bisco de tensiOn del bib Resorte de verificacien del bib. 5. Guieelbibpordetras delapalanca tirahilosypor la izquierda (vOase fig. C). Lleve el bib por la ranura, tIrandolo hacla usted y pasandolo por el ojo. QQ Palanca tirahilos 6. Bale el hilo y paselo por detras de la gula. • Gufa 7. Enhebre la aguja de delante hacia atras y saque unos 5 cm (2") de hilo tal como indica la fig. D. NOTA: Si el hilo este mal enhebrado, puede romperse, saltar puntadas o fruncir el tejido. A B ••• C D 4 j.; tji 14
-
 1
1 -
2
-
3
-
4
-
5
-
6
-
7
-
8
-
9
-
10
-
11
-
12
-
13
-
14
-
15
-
 16
16 -
 17
17 -
 18
18 -
 19
19 -
 20
20 -
 21
21 -
 22
22 -
 23
23 -
 24
24 -
 25
25 -
 26
26 -
27
-
28
-
29
-
30
-
31
-
32
-
33
-
34
-
35
-
36
-
37
-
38
-
39
-
40
-
41
-
42
-
43
-
44
-
45
-
46
-
47
-
48
-
49
-
50
-
51
-
52
-
53
-
54
-
55
-
56
-
57
-
58
-
59
-
60
-
61
-
62
-
63
-
64
 |
 |