Brother International VX-1120 Users Manual - English - Page 28
giratoria.
 |
View all Brother International VX-1120 manuals
Add to My Manuals
Save this manual to your list of manuals |
Page 28 highlights
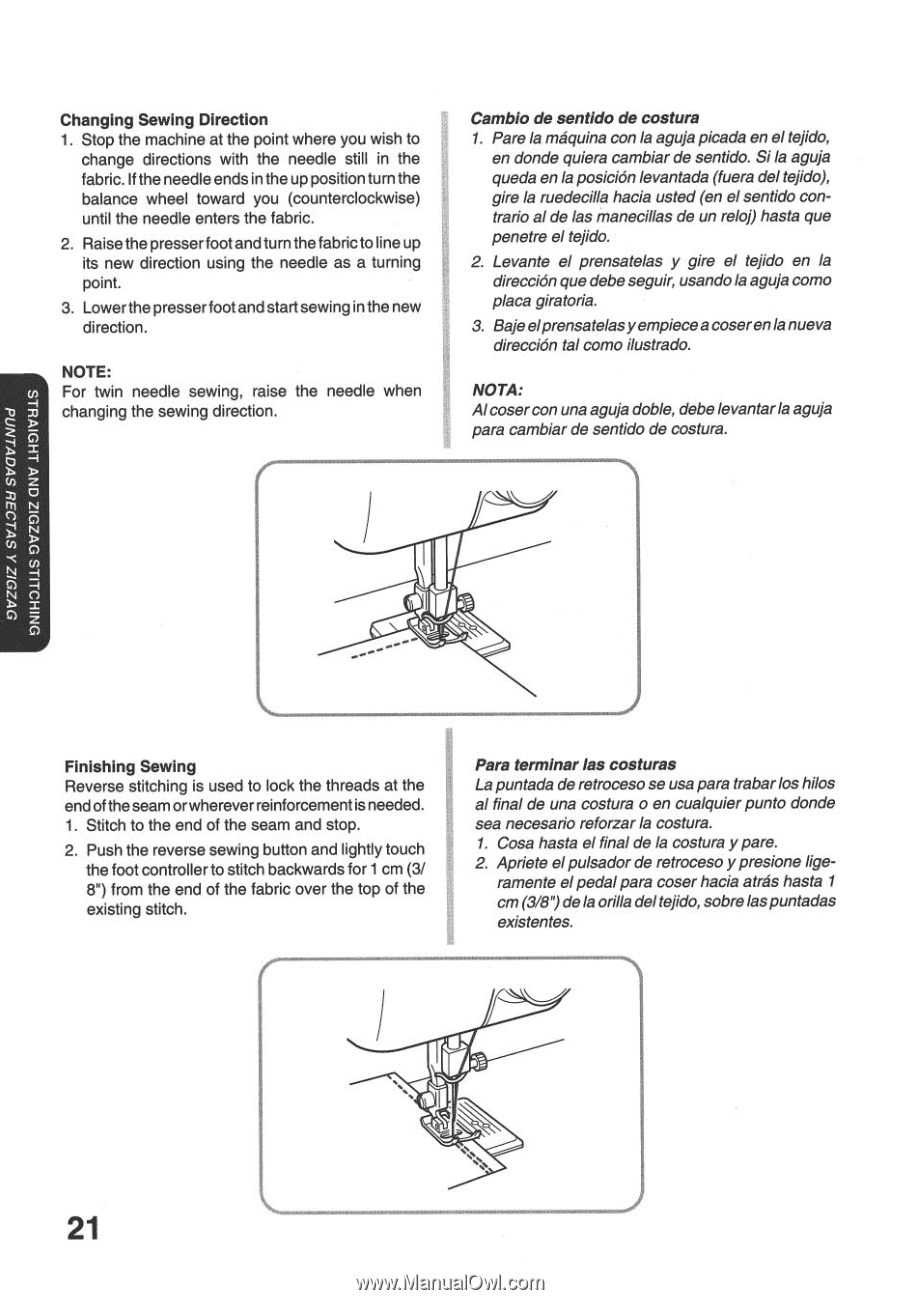
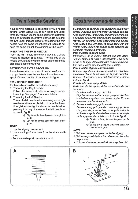
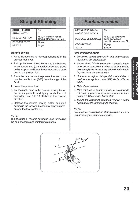
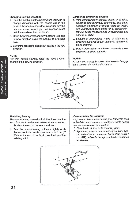
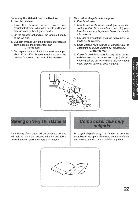
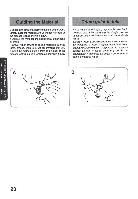
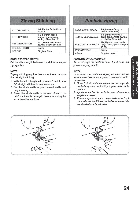
Changing Sewing Direction 1. Stop the machine at the point where you wish to change directions with the needle still in the fabric. If the needle ends in the up position turn the balance wheel toward you (counterclockwise) until the needle enters the fabric. 2. Raise the presser foot and turn the fabric to line up its new direction using the needle as a turning point. 3. Lower the presserfoot andstart sewingin thenew direction. NOTE: For twin needle sewing, raise the needle when changing the sewing direction. Camblo de sent/do de costura 1. Pare la maquina con la aguja picada en el tejido, en donde quiera cambiar de sentido. Si la aguja queda en la posicion levantada (fuera del tejido), gire la ruedecilla hacia usted (en el sentido contraria alde las manecillas de un reloj) hasta qua penetre el tejido. 2. Levante el prensatelas y gire of tejido en la direcci0n que debe seguir, usandola aguja como p/aca giratoria. 3. Bajeelprensatelasyempiecea coserenlanueva direcci0n cal como ilustrado. NOTA: Alcosercon una aguja doble, debelevantarla aguja para cambiar de sentido de costura. OVZOIZ A SV.L03L1StiCIV.I.NrId ONIHOILLS OVZDIZ (INV 1HOIVELLS Finishing Sewing Reverse stitching is used to lock the threads at the end of the seam or wherever reinforcement is needed. 1. Stitch to the end of the seam and stop. 2. Push the reverse sewing bAton and lightly touch the foot controller to stitch backwards for 1 cm (3/ 8") from the end of the fabric over the top of the existing stitch. Para terminar las costuras La puntada de retroceso se usa para trabar los hilcs al final de una costura o en cualquier punto donde sea necesario reforzar la costura. 1. Cosa hasta el final de la costura y pare. 2. Apriete elpulsador de retrcceso ypresione lige- ramente ofpedalpara coser hacia atras hasta 1 cm(3/8") dela orilla deltejido, sobrelaspuntadas existences. 21 •'• .1
-
 1
1 -
2
-
3
-
4
-
5
-
6
-
7
-
8
-
9
-
10
-
11
-
12
-
13
-
14
-
15
-
16
-
17
-
18
-
19
-
20
-
21
-
22
-
 23
23 -
 24
24 -
 25
25 -
 26
26 -
 27
27 -
 28
28 -
 29
29 -
 30
30 -
 31
31 -
 32
32 -
 33
33 -
34
-
35
-
36
-
37
-
38
-
39
-
40
-
41
-
42
-
43
-
44
-
45
-
46
-
47
-
48
-
49
-
50
-
51
-
52
-
53
-
54
-
55
-
56
-
57
-
58
-
59
-
60
-
61
-
62
-
63
-
64
 |
 |