Brother International VX-1120 Users Manual - English - Page 40
bot6n
 |
View all Brother International VX-1120 manuals
Add to My Manuals
Save this manual to your list of manuals |
Page 40 highlights
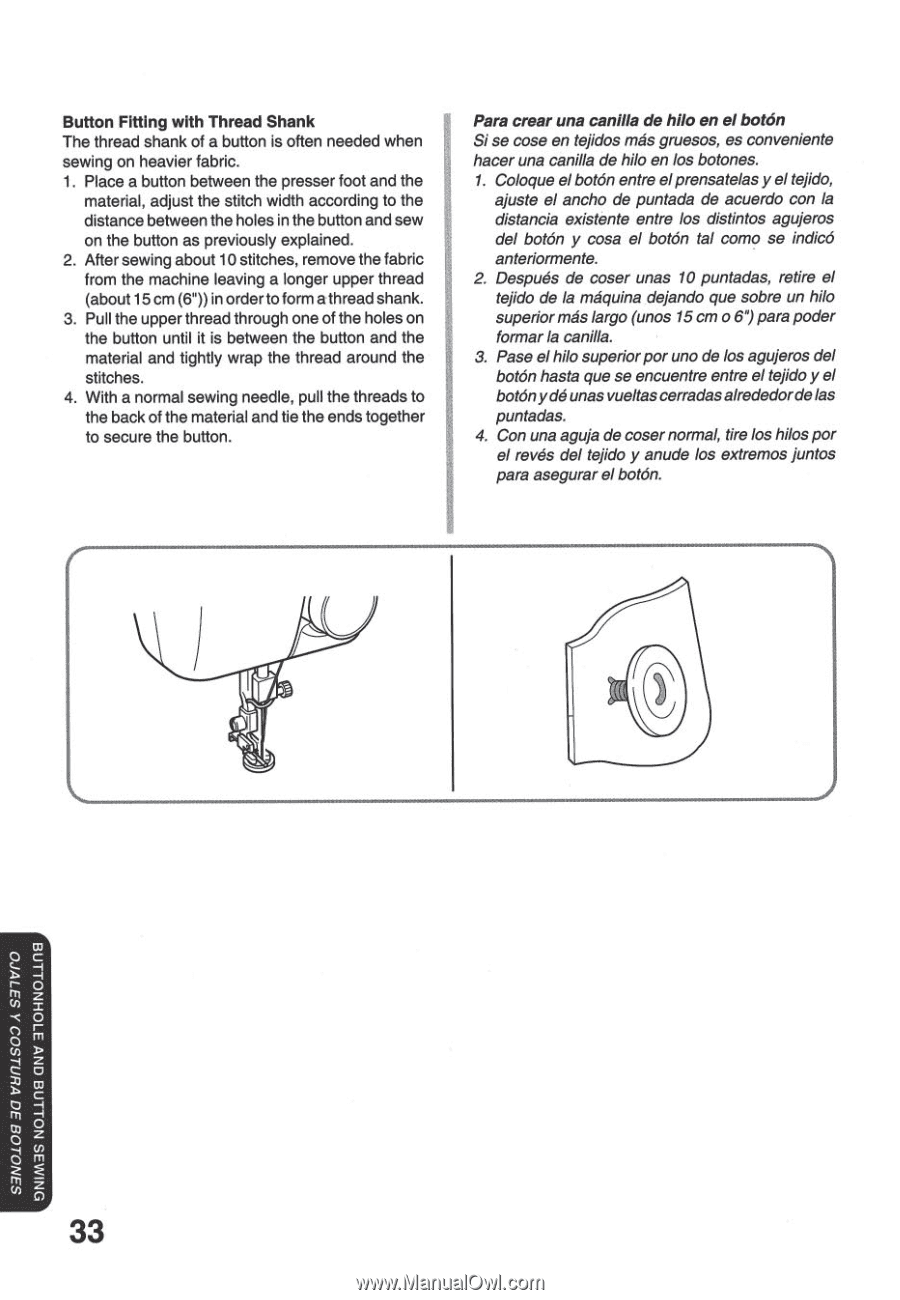
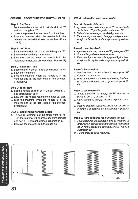
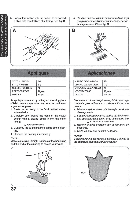
Button Fitting with Thread Shank Para crear una canilla de Me en el bot6n The thread shank of a button is often needed when Si se cose en tejidos mas gruesos, es convenience sewing on heavier fabric. hacer una canilla de hilo en los botones. 1. Place a button between the presser foot and the 1. Coloque elbot6n entre elprensatelas y el tejido, material, adjust the stitch width according to the ajuste el ancho de puntada de acuerdo con la distance between the holes in the button and sew distancia existente entre los distintos agujeros on the button as previously explained. del botan y cosa el botOn tal como se indica 2. After sewing about 10 stitches, remove the fabric anteriormente. from the machine leaving a longer upper thread 2. Despues de coser unas 10 puntadas, retire el (about 15 cm (6")) in order to form a thread shank. tejido de la maquina dejando que sobre un hilo 3. Pull the upper thread through one of the holes on superior mas largo (unos 15 cm o 6")para poder the button until it is between the button and the former la canilla. material and tightly wrap the thread around the 3. Pase elhilo superiorpor uno de los agujeros del stitches. ii botOn hasta que se encuentre entre el tejido y el 4. With a normal sewing needle, pull the threads to botonydeunas vueltas cerradasalrededordelas the back of the material and tie the ends together puntadas. to secure the button. 4. Con una aguja de coser normal, tire los hilos por el revs del tejido y anude los extremos juncos para asegurar el bot6n. 1 S3N0108 30 IMUILSO0 A S3717TO ONIAUS Noilna CINV 3-RDHNotins 33
-
 1
1 -
2
-
3
-
4
-
5
-
6
-
7
-
8
-
9
-
10
-
11
-
12
-
13
-
14
-
15
-
16
-
17
-
18
-
19
-
20
-
21
-
22
-
23
-
24
-
25
-
26
-
27
-
28
-
29
-
30
-
31
-
32
-
33
-
34
-
 35
35 -
 36
36 -
 37
37 -
 38
38 -
 39
39 -
 40
40 -
 41
41 -
 42
42 -
 43
43 -
 44
44 -
 45
45 -
46
-
47
-
48
-
49
-
50
-
51
-
52
-
53
-
54
-
55
-
56
-
57
-
58
-
59
-
60
-
61
-
62
-
63
-
64
 |
 |