Canon 1236B001 Digital Photo Professional Instruction Manual Windows (EOS DIG - Page 44
Performing Automatic Dust Erasure Processing, Automatic Dust Erasure Processing in the Main Window
 |
UPC - 013803066098
View all Canon 1236B001 manuals
Add to My Manuals
Save this manual to your list of manuals |
Page 44 highlights
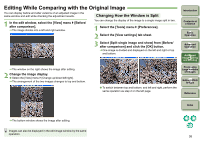
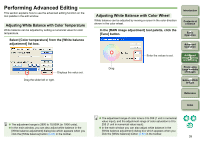
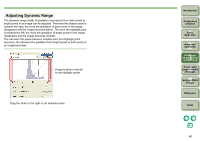
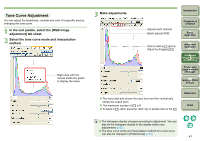
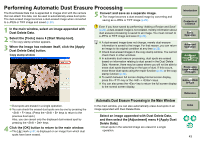
Performing Automatic Dust Erasure Processing The Dust Delete Data that is appended to images shot with the camera that can attach this data, can be used to automatically erase dust spots. The dust-erased image becomes a dust-erased image when converted to a JPEG or TIFF image and saved (p.29). 5 Convert and save as a separate image. O The image becomes a dust-erased image by converting and saving as a JPEG or TIFF image (p.29). 1 In the main window, select an image appended with Dust Delete Data. 2 Select the [Tools] menu ` [Start Stamp tool]. ¿ The copy stamp window appears. 3 When the image has redrawn itself, click the [Apply Dust Delete Data] button. Copy stamp window Even if you have saved by performing "Adding a Recipe and Save" (p.28), a dust-erased image is not created, merely information about dust erasure processing is saved to an image. You must convert to a JPEG or TIFF image and save it (p.29). O A dust-erased image does not change, merely dust erasure information is saved to the image. For that reason, you can return an image to its original condition at any time (p.28). O Check dust-erased images in the copy stamp window. You cannot check them in other windows. O In automatic dust erasure processing, dust spots are erased based on information relating to dust saved in the Dust Delete Data. However, there may be cases where you will not be able to erase dust spots depending on the type of dust. If this occurs, erase those dust spots using the repair function (p.44) or the copy stamp function (p.46). O To switch between full screen display/normal screen display, press the key or the + keys. O You can also press the key to return the full screen display to the normal screen display. ¿ Dust spots are erased in a single operation. O You can check the erased dust spots one by one by pressing the keys. (Press the keys to return to the previous dust spot.) Also, you can cancel only the displayed dust-erased spot by pressing the keys. 4 Click the [OK] button to return to the main window. ¿ The [ ] mark (p.81) is displayed on an image from which dust spots have been erased. Automatic Dust Erasure Processing in the Main Window In the main window, you can also automatically erase dust spots in an image appended with Dust Delete Data. Select an image appended with Dust Delete Data, and then select the [Adjustment] menu ` [Apply Dust Delete Data]. ¿ Dust spots in the selected image are erased in a single operation. Introduction Contents at a Glance 1Basic Operation 2Advanced Operation 3Advanced Image Editing and Printing 4 Processing Large Numbers of Images 5 Editing JPEG Images Reference Index 43
-
 1
1 -
2
-
3
-
4
-
5
-
6
-
7
-
8
-
9
-
10
-
11
-
12
-
13
-
14
-
15
-
16
-
17
-
18
-
19
-
20
-
21
-
22
-
23
-
24
-
25
-
26
-
27
-
28
-
29
-
30
-
31
-
32
-
33
-
34
-
35
-
36
-
37
-
38
-
 39
39 -
 40
40 -
 41
41 -
 42
42 -
 43
43 -
 44
44 -
 45
45 -
 46
46 -
 47
47 -
 48
48 -
 49
49 -
50
-
51
-
52
-
53
-
54
-
55
-
56
-
57
-
58
-
59
-
60
-
61
-
62
-
63
-
64
-
65
-
66
-
67
-
68
-
69
-
70
-
71
-
72
-
73
-
74
-
75
-
76
-
77
-
78
-
79
-
80
-
81
-
82
-
83
-
84
-
85
-
86
-
87
-
88
-
89
-
90
-
91
-
92
-
93
-
94
-
95
 |
 |
