Canon EOS 5D Mark II EOS 5D Mark II Instruction Manual - Page 109
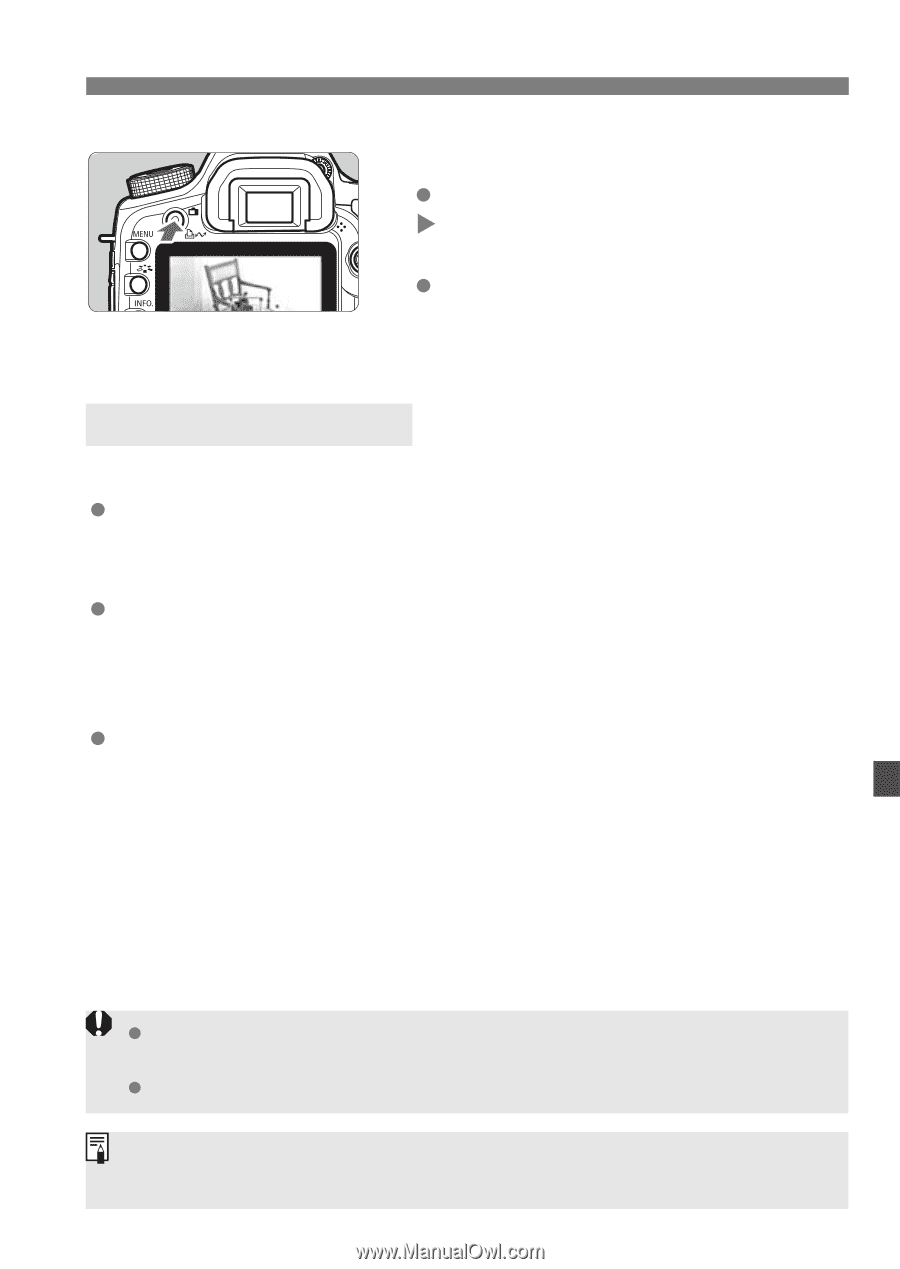
Display the Live View image., About [Screen settings]
 |
UPC - 013803105384
View all Canon EOS 5D Mark II manuals
Add to My Manuals
Save this manual to your list of manuals |
Page 109 highlights
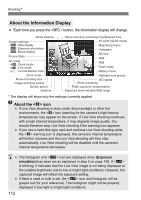
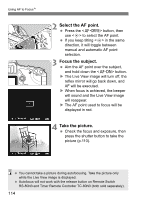
A Preparing for Live View ShootingN 6 Display the Live View image. Press the button. X The Live View image will appear on the LCD monitor. Press the button again to turn off the LCD monitor and quit the Live View shooting. About [Screen settings] You can select the LCD monitor's image brightness. Stills displayh Geared for still photos, the image is displayed at the standard brightness to make it easy to see. Exposure simulationg Geared for still photos, the Live View image will closely reflect the brightness level of the image you capture. If you set exposure compensation, the image brightness will change accordingly. Movie displaye Geared for movies, the image is displayed at the standard brightness and the depth of field will be wider than with [Stills display]. The shooting coverage will also correspond to the proportion of the movierecording size which was set. (The semi-transparent mask on the top, bottom, left, and right of the screen will not be included in the recorded movie.) Even when [Movie display] is set, you can take still photos by pressing the shutter button completely. The shutter speed, aperture, and ISO speed will be set automatically. During Live View shooting, do not point the lens toward the sun. The sun's heat can damage the camera's internal components. Cautions for using Live View shooting are on pages 125-126. Still and movie shooting are possible even in the fully-automatic modes (1/C) (p.121). 109
-
 1
1 -
2
-
3
-
4
-
5
-
6
-
7
-
8
-
9
-
10
-
11
-
12
-
13
-
14
-
15
-
16
-
17
-
18
-
19
-
20
-
21
-
22
-
23
-
24
-
25
-
26
-
27
-
28
-
29
-
30
-
31
-
32
-
33
-
34
-
35
-
36
-
37
-
38
-
39
-
40
-
41
-
42
-
43
-
44
-
45
-
46
-
47
-
48
-
49
-
50
-
51
-
52
-
53
-
54
-
55
-
56
-
57
-
58
-
59
-
60
-
61
-
62
-
63
-
64
-
65
-
66
-
67
-
68
-
69
-
70
-
71
-
72
-
73
-
74
-
75
-
76
-
77
-
78
-
79
-
80
-
81
-
82
-
83
-
84
-
85
-
86
-
87
-
88
-
89
-
90
-
91
-
92
-
93
-
94
-
95
-
96
-
97
-
98
-
99
-
100
-
101
-
102
-
103
-
 104
104 -
 105
105 -
 106
106 -
 107
107 -
 108
108 -
 109
109 -
 110
110 -
 111
111 -
 112
112 -
 113
113 -
 114
114 -
115
-
116
-
117
-
118
-
119
-
120
-
121
-
122
-
123
-
124
-
125
-
126
-
127
-
128
-
129
-
130
-
131
-
132
-
133
-
134
-
135
-
136
-
137
-
138
-
139
-
140
-
141
-
142
-
143
-
144
-
145
-
146
-
147
-
148
-
149
-
150
-
151
-
152
-
153
-
154
-
155
-
156
-
157
-
158
-
159
-
160
-
161
-
162
-
163
-
164
-
165
-
166
-
167
-
168
-
169
-
170
-
171
-
172
-
173
-
174
-
175
-
176
-
177
-
178
-
179
-
180
-
181
-
182
-
183
-
184
-
185
-
186
-
187
-
188
-
189
-
190
-
191
-
192
-
193
-
194
-
195
-
196
-
197
-
198
-
199
-
200
-
201
-
202
-
203
-
204
-
205
-
206
-
207
-
208
-
209
-
210
-
211
-
212
-
213
-
214
-
215
-
216
-
217
-
218
-
219
-
220
-
221
-
222
-
223
-
224
-
225
-
226
-
227
-
228
 |
 |