Canon FAXPHONE L120 FAXPHONE L120 Software Guide - Page 49
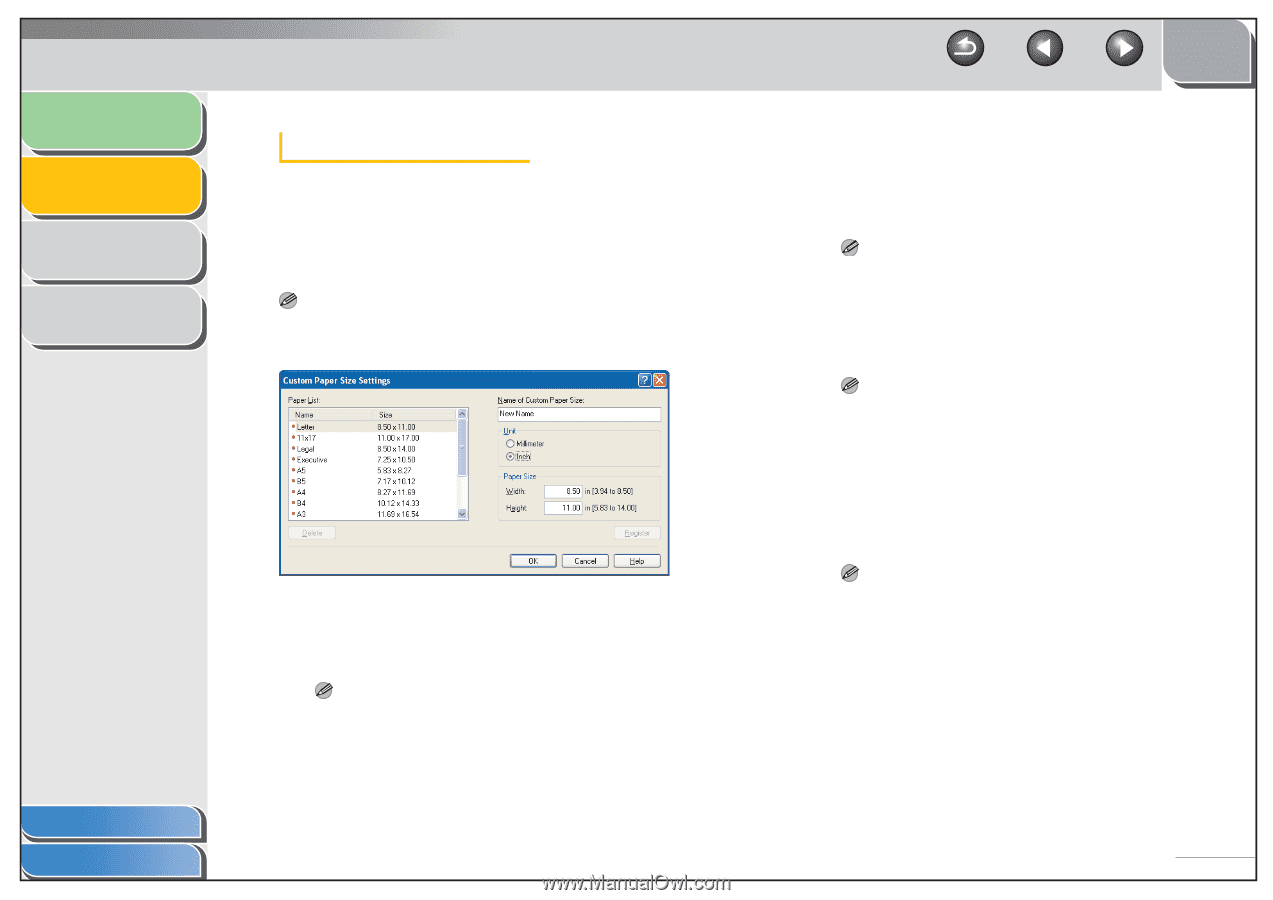
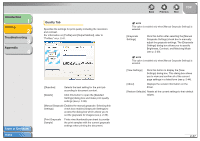
Clicking [Custom Paper Size] in the [ Setup] tab sheet, Name of Custom
 |
View all Canon FAXPHONE L120 manuals
Add to My Manuals
Save this manual to your list of manuals |
Page 49 highlights
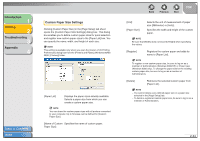
Introduction 1 Printing 2 Troubleshooting 3 Appendix 4 Custom Paper Size Settings Clicking [Custom Paper Size] in the [Page Setup] tab sheet opens the [Custom Paper Size Settings] dialog box. This dialog box enables you to define custom paper sizes for quick selection and register new custom paper sizes to the [Paper List] box. You can specify the name, width, and height of each size. NOTE This setting is available only when you open the [Canon L120 Printing Preferences] dialog box from the [Printers and Faxes] (Windows 98/Me/ 2000: [Printers]) folder. Table of Contents Index [Paper List] Displays the paper sizes actually available. Selects a paper size from which you can create a custom paper size. NOTE You can share the custom paper sizes with all printers connected to your computer. Up to 50 sizes can be defined for [Custom Paper Size]. [Name of Custom Specifies the name of custom paper. Paper Size] Back Previous Next TOP [Unit] [Paper Size] Selects the unit of measurement of paper size ([Millimeter] or [Inch]). Specifies the width and height of the custom paper. NOTE Be sure that [Width] does not exceed [Height] when specifying the values. [Register] Registers the custom paper and adds its name to [Paper List]. NOTE To register a new custom paper size, be sure to log on as a member of Administrators (Windows 2000/XP) or Power User (Windows 2000 only). To change the paper size for the existing custom paper size, be sure to log on as a member of Administrators. [Delete] Removes the selected custom paper from [Paper List]. NOTE - You cannot delete a pre-defined paper size or a paper size selected in the [Page Setup] tab. - To delete a registered custom paper size, be sure to log on as a member of Administrators. 2-34
-
 1
1 -
2
-
3
-
4
-
5
-
6
-
7
-
8
-
9
-
10
-
11
-
12
-
13
-
14
-
15
-
16
-
17
-
18
-
19
-
20
-
21
-
22
-
23
-
24
-
25
-
26
-
27
-
28
-
29
-
30
-
31
-
32
-
33
-
34
-
35
-
36
-
37
-
38
-
39
-
40
-
41
-
42
-
43
-
 44
44 -
 45
45 -
 46
46 -
 47
47 -
 48
48 -
 49
49 -
 50
50 -
 51
51 -
 52
52 -
 53
53 -
 54
54 -
55
-
56
-
57
-
58
-
59
-
60
-
61
-
62
-
63
-
64
-
65
-
66
-
67
-
68
-
69
-
70
-
71
-
72
-
73
-
74
-
75
-
76
-
77
-
78
-
79
-
80
-
81
-
82
-
83
-
84
-
85
 |
 |