Canon FAXPHONE L120 FAXPHONE L120 Software Guide - Page 60
Using the Machine on Your Network, Setting the Machine as a Shared Printer
 |
View all Canon FAXPHONE L120 manuals
Add to My Manuals
Save this manual to your list of manuals |
Page 60 highlights
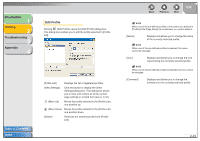
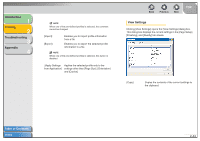
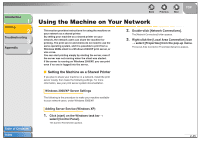
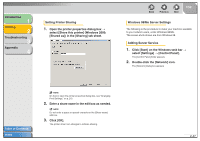
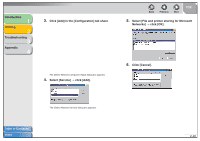
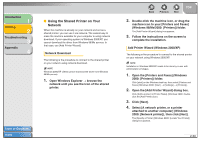
Introduction 1 Printing 2 Troubleshooting 3 Appendix 4 Table of Contents Index Back Previous Next TOP Using the Machine on Your Network This section provides instructions for using the machine on your network as a shared printer. By setting your machine as a shared printer on your network, the network users can share the machine for printing. The print server and clients do not need to use the same operating system, and it is possible to print from a Windows 98/Me client to a Windows 2000/XP print server, or vice versa. You can start printing simply by starting the server, even if the server was not running when the client was started. If the server is running on Windows 2000/XP, you can print even if no one is logged into the server. 2. Double-click [Network Connections]. The [Network Connections] folder appears. 3. Right-click the [Local Area Connection] icon → select [Properties] from the pop-up menu. The [Local Area Connection Properties] dialog box appears. ■ Setting the Machine as a Shared Printer If you plan to share your machine on a network, install the print server locally, then make the following settings. For more information, see your print server system documentation. Windows 2000/XP Server Settings The following is the procedure to make your machine available to your network users, under Windows 2000/XP. Adding Server Service (Windows XP) 1. Click [start] on the Windows task bar → select [Control Panel]. The [Control Panel] folder appears. 2-45
-
 1
1 -
2
-
3
-
4
-
5
-
6
-
7
-
8
-
9
-
10
-
11
-
12
-
13
-
14
-
15
-
16
-
17
-
18
-
19
-
20
-
21
-
22
-
23
-
24
-
25
-
26
-
27
-
28
-
29
-
30
-
31
-
32
-
33
-
34
-
35
-
36
-
37
-
38
-
39
-
40
-
41
-
42
-
43
-
44
-
45
-
46
-
47
-
48
-
49
-
50
-
51
-
52
-
53
-
54
-
 55
55 -
 56
56 -
 57
57 -
 58
58 -
 59
59 -
 60
60 -
 61
61 -
 62
62 -
 63
63 -
 64
64 -
 65
65 -
66
-
67
-
68
-
69
-
70
-
71
-
72
-
73
-
74
-
75
-
76
-
77
-
78
-
79
-
80
-
81
-
82
-
83
-
84
-
85
 |
 |
