Canon HV30E Instruction Manual - Page 70
Analog Line-In Recording, REC PAUSE]
 |
View all Canon HV30E manuals
Add to My Manuals
Save this manual to your list of manuals |
Page 70 highlights
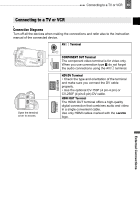
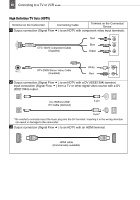
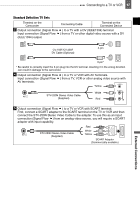
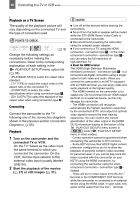
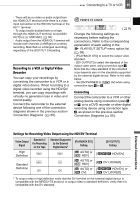
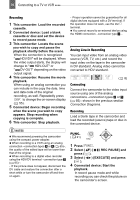
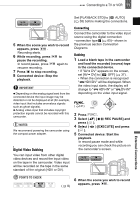
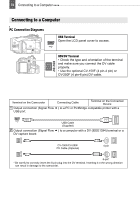
70 Connecting to a TV or VCR Recording 1 This camcorder: Load the recorded cassette. 2 Connected device: Load a blank cassette or disc and set the device to record pause mode. 3 This camcorder: Locate the scene you wish to copy and pause the playback shortly before the scene. When the connection is recognized " HDV/DV" will be displayed. When the video output starts, the display will change to " HDV-OUT" or " DV-OUT" depending on the video output signal. 4 This camcorder: Resume the movie playback. When using an analog connection you can include in the copy the date, time and data code of the original recording, as well. Repeatedly press DISP. to change the on-screen display ( 55). 5 Connected device: Begin recording when the scene you wish to copy appears. Stop recording when copying is complete. 6 This camcorder: Stop playback. - Proper operation cannot be guaranteed for all digital devices equipped with a DV terminal. If the operation does not work, use the AV/ terminal. You cannot record to an external device using the HDMI connection -connection type 3 -. Analog Line-In Recording You can input video from an analog video source (VCR, TV, etc.) and record the input video on the tape in the camcorder in DV standard. Analog video cannot be converted to HDV standard. ( 8) Connecting Connect the camcorder to the video input source using one of the analog connections -connection types 4 or 5 ( 65)- shown in the previous section Connection Diagrams. Recording Load a blank tape in the camcorder and load the recorded (source) tape or disc in the connected device. NOTES We recommend powering the camcorder using the compact power adapter. When recording to a VCR using an analog connection -connection types 4 or 5 ( 65)-, the quality of the edited tape will be lower than that of the original. When recording to a digital video recorder using the HDV/DV terminal -connection type 2 ( 65)-: - If the picture does not appear, disconnect the DV cable and restore the connection after a short while or turn the camcorder off and then on again. FUNC. ( 21) 1 Press FUNC. . 2 Select ( ) [ REC PAUSE] and press ( ). 3 Select ( ) [EXECUTE] and press ( ). 4 Connected device: Start the playback. In record pause mode and while recording you can check the picture on the camcorder's screen.
-
 1
1 -
2
-
3
-
4
-
5
-
6
-
7
-
8
-
9
-
10
-
11
-
12
-
13
-
14
-
15
-
16
-
17
-
18
-
19
-
20
-
21
-
22
-
23
-
24
-
25
-
26
-
27
-
28
-
29
-
30
-
31
-
32
-
33
-
34
-
35
-
36
-
37
-
38
-
39
-
40
-
41
-
42
-
43
-
44
-
45
-
46
-
47
-
48
-
49
-
50
-
51
-
52
-
53
-
54
-
55
-
56
-
57
-
58
-
59
-
60
-
61
-
62
-
63
-
64
-
 65
65 -
 66
66 -
 67
67 -
 68
68 -
 69
69 -
 70
70 -
 71
71 -
 72
72 -
 73
73 -
 74
74 -
 75
75 -
76
-
77
-
78
-
79
-
80
-
81
-
82
-
83
-
84
-
85
-
86
-
87
-
88
-
89
-
90
-
91
-
92
-
93
-
94
-
95
-
96
-
97
-
98
-
99
-
100
-
101
-
102
-
103
-
104
 |
 |
