Canon N2000 User Guide - Page 30
guide to the holes for the size of the paper., guide to the paper size mark.
 |
View all Canon N2000 manuals
Add to My Manuals
Save this manual to your list of manuals |
Page 30 highlights
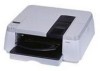
2 Remove the cassette cover. 3 Pinch the lever on the length guide so it moves freely and move the guide to the holes for the size of the paper. Marks for standard paper sizes are provided on the length guide. Move the guide to the desired mark. 4 Pinch the lever on the width guide so it moves freely and move the guide to the paper size mark. The width guide can be set and locked every 0.5 mm (0.02 in.). Set the width guide slightly larger than the desired paper size. 2-8 Print Media You Can Use
-
 1
1 -
2
-
3
-
4
-
5
-
6
-
7
-
8
-
9
-
10
-
11
-
12
-
13
-
14
-
15
-
16
-
17
-
18
-
19
-
20
-
21
-
22
-
23
-
24
-
 25
25 -
 26
26 -
 27
27 -
 28
28 -
 29
29 -
 30
30 -
 31
31 -
 32
32 -
 33
33 -
 34
34 -
 35
35 -
36
-
37
-
38
-
39
-
40
-
41
-
42
-
43
-
44
-
45
-
46
-
47
-
48
-
49
-
50
-
51
-
52
-
53
-
54
-
55
-
56
-
57
-
58
-
59
-
60
-
61
-
62
-
63
-
64
-
65
-
66
-
67
-
68
-
69
-
70
-
71
-
72
-
73
-
74
-
75
-
76
-
77
-
78
-
79
-
80
-
81
-
82
-
83
-
84
-
85
-
86
-
87
-
88
-
89
-
90
-
91
-
92
-
93
-
94
-
95
-
96
-
97
-
98
-
99
-
100
-
101
-
102
-
103
-
104
-
105
-
106
-
107
-
108
-
109
-
110
-
111
-
112
-
113
-
114
-
115
-
116
-
117
-
118
-
119
-
120
-
121
-
122
-
123
-
124
-
125
-
126
 |
 |

Print Media You Can Use
2-8
2
Remove the cassette cover.
3
Pinch the lever on the length guide so it moves freely and move the
guide to the holes for the size of the paper.
Marks for standard paper sizes are provided on the length guide. Move the
guide to the desired mark.
4
Pinch the lever on the width guide so it moves freely and move the
guide to the paper size mark.
The width guide can be set and locked every 0.5 mm (0.02 in.). Set the width
guide slightly larger than the desired paper size.