Canon PowerShot G1 X Mark II User Guide - Page 110
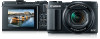
Rearrange menu items, as, needed.
 |
View all Canon PowerShot G1 X Mark II manuals
Add to My Manuals
Save this manual to your list of manuals |
Page 110 highlights
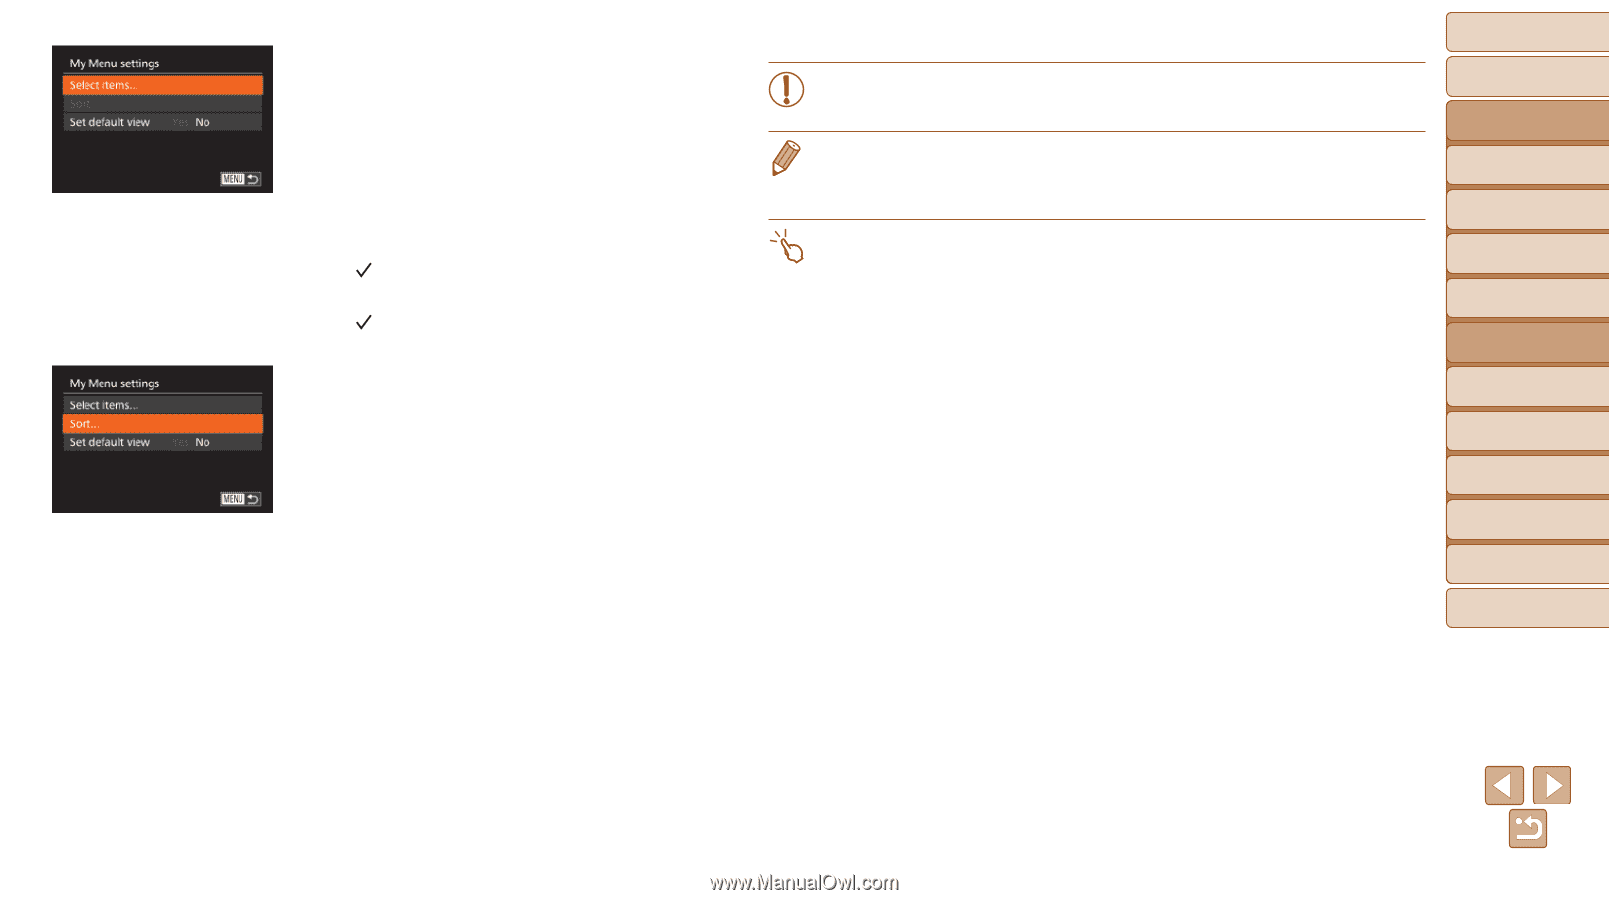
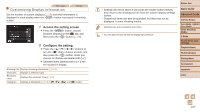
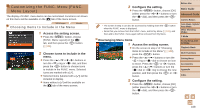
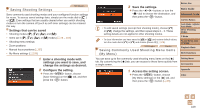
2 Configure the setting. zzPress the buttons or turn the dial to choose [Select items], and then press the button. zzChoose up to five menu items to save (either press the buttons or turn the dial), and then press the button. zz[ ] is displayed. zzTo cancel saving, press the button. [ ] is no longer displayed. zzPress the button. 3 Rearrange menu items, as needed. zzPress the buttons or turn the dial to choose [Sort], and then press the button. zzChoose a menu item to move (either press the buttons or turn the dial), and then press the button. zzPress the buttons or turn the dial to change the order, and then press the button. zzPress the button. • Grayed-out items in step 2 can also be specified, but they may not be available in some shooting modes. • To make My Menu immediately accessible by pressing the button in Shooting mode, choose [Set default view] and press the buttons to choose [Yes]. • On the [Select items] screen for saving or clearing items, you can also touch items to select them. • On the [Sort] screen, you can also drag items to change the display order. Before Use Basic Guide Advanced Guide Camera Basics Auto Mode / Hybrid Auto Mode Other Shooting Modes P Mode Tv, Av, M, C1, and C2 Mode Playback Mode Wi-Fi Functions Setting Menu Accessories Appendix Index 110
-
 1
1 -
2
-
3
-
4
-
5
-
6
-
7
-
8
-
9
-
10
-
11
-
12
-
13
-
14
-
15
-
16
-
17
-
18
-
19
-
20
-
21
-
22
-
23
-
24
-
25
-
26
-
27
-
28
-
29
-
30
-
31
-
32
-
33
-
34
-
35
-
36
-
37
-
38
-
39
-
40
-
41
-
42
-
43
-
44
-
45
-
46
-
47
-
48
-
49
-
50
-
51
-
52
-
53
-
54
-
55
-
56
-
57
-
58
-
59
-
60
-
61
-
62
-
63
-
64
-
65
-
66
-
67
-
68
-
69
-
70
-
71
-
72
-
73
-
74
-
75
-
76
-
77
-
78
-
79
-
80
-
81
-
82
-
83
-
84
-
85
-
86
-
87
-
88
-
89
-
90
-
91
-
92
-
93
-
94
-
95
-
96
-
97
-
98
-
99
-
100
-
101
-
102
-
103
-
104
-
 105
105 -
 106
106 -
 107
107 -
 108
108 -
 109
109 -
 110
110 -
 111
111 -
 112
112 -
 113
113 -
 114
114 -
 115
115 -
116
-
117
-
118
-
119
-
120
-
121
-
122
-
123
-
124
-
125
-
126
-
127
-
128
-
129
-
130
-
131
-
132
-
133
-
134
-
135
-
136
-
137
-
138
-
139
-
140
-
141
-
142
-
143
-
144
-
145
-
146
-
147
-
148
-
149
-
150
-
151
-
152
-
153
-
154
-
155
-
156
-
157
-
158
-
159
-
160
-
161
-
162
-
163
-
164
-
165
-
166
-
167
-
168
-
169
-
170
-
171
-
172
-
173
-
174
-
175
-
176
-
177
-
178
-
179
-
180
-
181
-
182
-
183
-
184
-
185
-
186
-
187
-
188
-
189
-
190
-
191
-
192
-
193
-
194
-
195
-
196
-
197
-
198
-
199
-
200
-
201
-
202
-
203
-
204
-
205
-
206
-
207
-
208
-
209
-
210
-
211
-
212
-
213
-
214
-
215
-
216
-
217
-
218
-
219
-
220
-
221
-
222
-
223
-
224
-
225
-
226
-
227
-
228
-
229
-
230
-
231
-
232
-
233
-
234
-
235
-
236
-
237
-
238
-
239
-
240
 |
 |