Canon S60 PowerShot S60 Camera User Guide - Page 36
Select [Review] using
 |
UPC - 013803041620
View all Canon S60 manuals
Add to My Manuals
Save this manual to your list of manuals |
Page 36 highlights
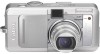
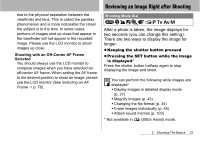
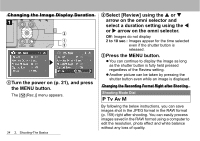
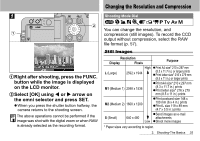
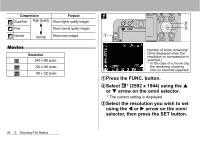
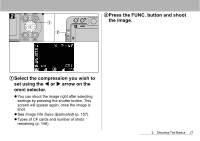
Changing the Image Display Duration b a c aTurn the power on (p. 21), and press the MENU button. The [ (Rec.)] menu appears. bSelect [Review] using the S or T arrow on the omni selector and select a duration setting using the W or X arrow on the omni selector. Off: Images do not display 2 to 10 sec.: Images appear for the time selected even if the shutter button is released. cPress the MENU button. z You can continue to display the image as long as the shutter button is fully held pressed regardless of the Review setting. z Another picture can be taken by pressing the shutter button even while an image is displayed. Changing the Recording Format Right after Shooting Shooting Mode Dial 34 2. Shooting-The Basics By following the below instructions, you can save images shot in the JPEG format in the RAW format (p. 159) right after shooting. You can easily process images saved in the RAW format using a computer to edit the resolution, photo effect and white balance without any loss of quality.
-
 1
1 -
2
-
3
-
4
-
5
-
6
-
7
-
8
-
9
-
10
-
11
-
12
-
13
-
14
-
15
-
16
-
17
-
18
-
19
-
20
-
21
-
22
-
23
-
24
-
25
-
26
-
27
-
28
-
29
-
30
-
 31
31 -
 32
32 -
 33
33 -
 34
34 -
 35
35 -
 36
36 -
 37
37 -
 38
38 -
 39
39 -
 40
40 -
 41
41 -
42
-
43
-
44
-
45
-
46
-
47
-
48
-
49
-
50
-
51
-
52
-
53
-
54
-
55
-
56
-
57
-
58
-
59
-
60
-
61
-
62
-
63
-
64
-
65
-
66
-
67
-
68
-
69
-
70
-
71
-
72
-
73
-
74
-
75
-
76
-
77
-
78
-
79
-
80
-
81
-
82
-
83
-
84
-
85
-
86
-
87
-
88
-
89
-
90
-
91
-
92
-
93
-
94
-
95
-
96
-
97
-
98
-
99
-
100
-
101
-
102
-
103
-
104
-
105
-
106
-
107
-
108
-
109
-
110
-
111
-
112
-
113
-
114
-
115
-
116
-
117
-
118
-
119
-
120
-
121
-
122
-
123
-
124
-
125
-
126
-
127
-
128
-
129
-
130
-
131
-
132
-
133
-
134
-
135
-
136
-
137
-
138
-
139
-
140
-
141
-
142
-
143
-
144
-
145
-
146
-
147
-
148
-
149
-
150
-
151
-
152
-
153
-
154
-
155
-
156
-
157
-
158
-
159
-
160
-
161
-
162
-
163
-
164
-
165
-
166
-
167
-
168
-
169
-
170
-
171
-
172
-
173
-
174
-
175
 |
 |
