Canon SELPHY CP780 SELPHY CP780 Printer User Guide - Page 11
Installing the color ink cassette and the Paper Cassette, Connecting SELPHY
 |
View all Canon SELPHY CP780 manuals
Add to My Manuals
Save this manual to your list of manuals |
Page 11 highlights
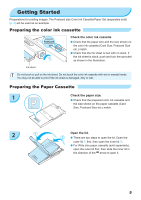
Installing the color ink cassette and the Paper Cassette 1 Open the covers. Open the covers for the color ink cassette and paper cassette compartments. 2 3 Connecting SELPHY 1 Insert the color ink cassette. Insert the color ink cassette as shown in the illustration until it clicks and locks. Close the compartment cover. Insert the paper cassette. Make sure that the outer lid is open. (p. 10) Insert the paper cassette as shown in the illustration all the way into the compartment. Plug the cord into SELPHY. Fully insert the adapter plug into SELPHY. 2 Connect the power cord. Connect the power cord to the compact power adapter, then plug the other end into a power outlet. Do not handle the power cords with wet hands. 11
-
 1
1 -
2
-
3
-
4
-
5
-
 6
6 -
 7
7 -
 8
8 -
 9
9 -
 10
10 -
 11
11 -
 12
12 -
 13
13 -
 14
14 -
 15
15 -
 16
16 -
17
-
18
-
19
-
20
-
21
-
22
-
23
-
24
-
25
-
26
-
27
-
28
-
29
-
30
-
31
-
32
-
33
-
34
-
35
-
36
 |
 |
11
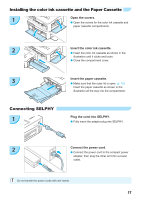
Do not handle the power cords with wet hands.
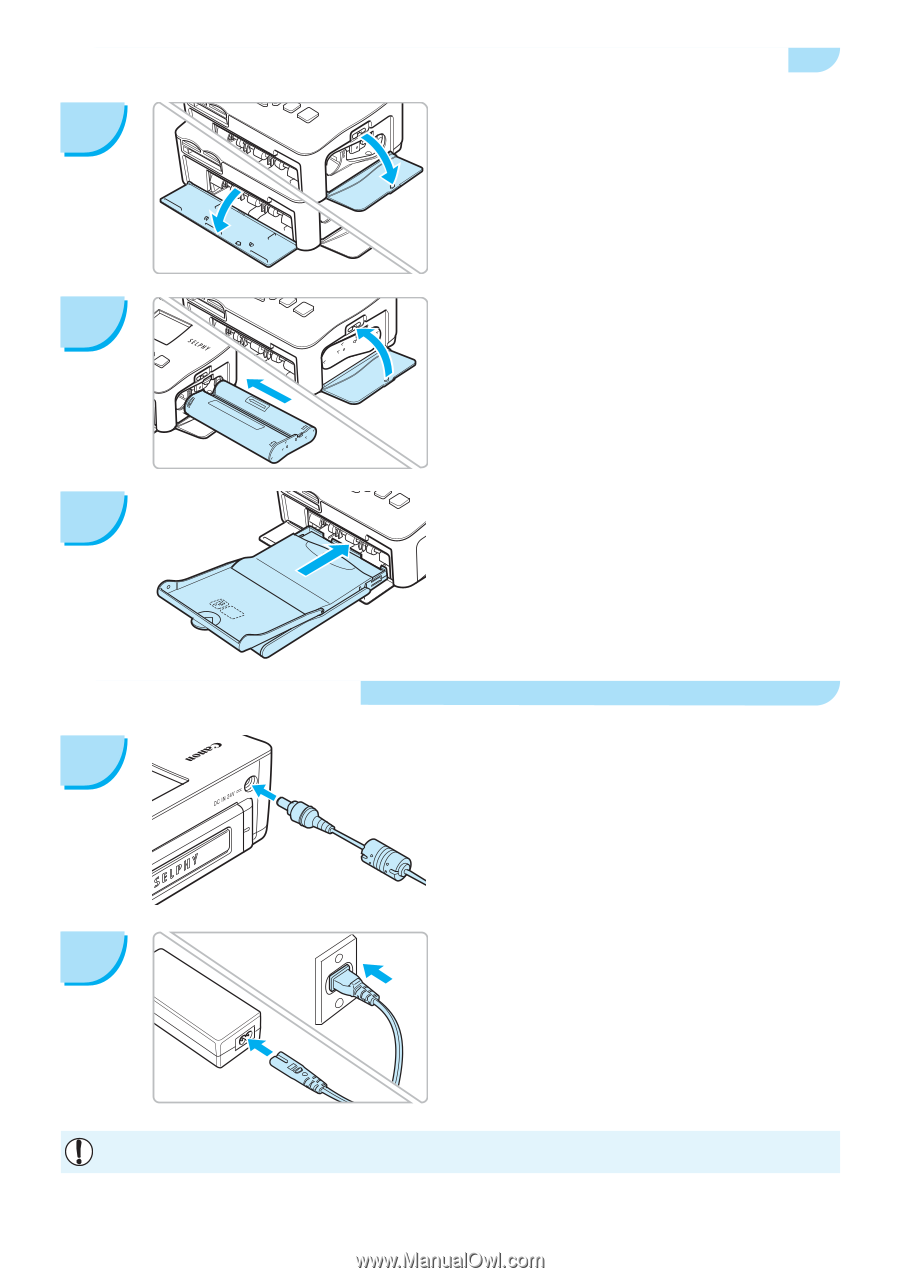
Installing the color ink cassette and the Paper Cassette
1
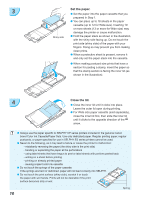
Open the covers.
Open the covers for the color ink cassette and
paper cassette compartments.
2
Insert the color ink cassette.
Insert the color ink cassette as shown in the
illustration until it clicks and locks.
Close the compartment cover.
3
Insert the paper cassette.
Make sure that the outer lid is open.
(p. 10)
Insert the paper cassette as shown in the
illustration all the way into the compartment.
1
Plug the cord into SELPHY.
Fully insert the adapter plug into SELPHY.
Connect the power cord.
Connect the power cord to the compact power
adapter, then plug the other end into a power
outlet.
2
Connecting SELPHY