Canon SELPHY CP780 SELPHY CP780 Printer User Guide - Page 20
Setting Various Functions
 |
View all Canon SELPHY CP780 manuals
Add to My Manuals
Save this manual to your list of manuals |
Page 20 highlights
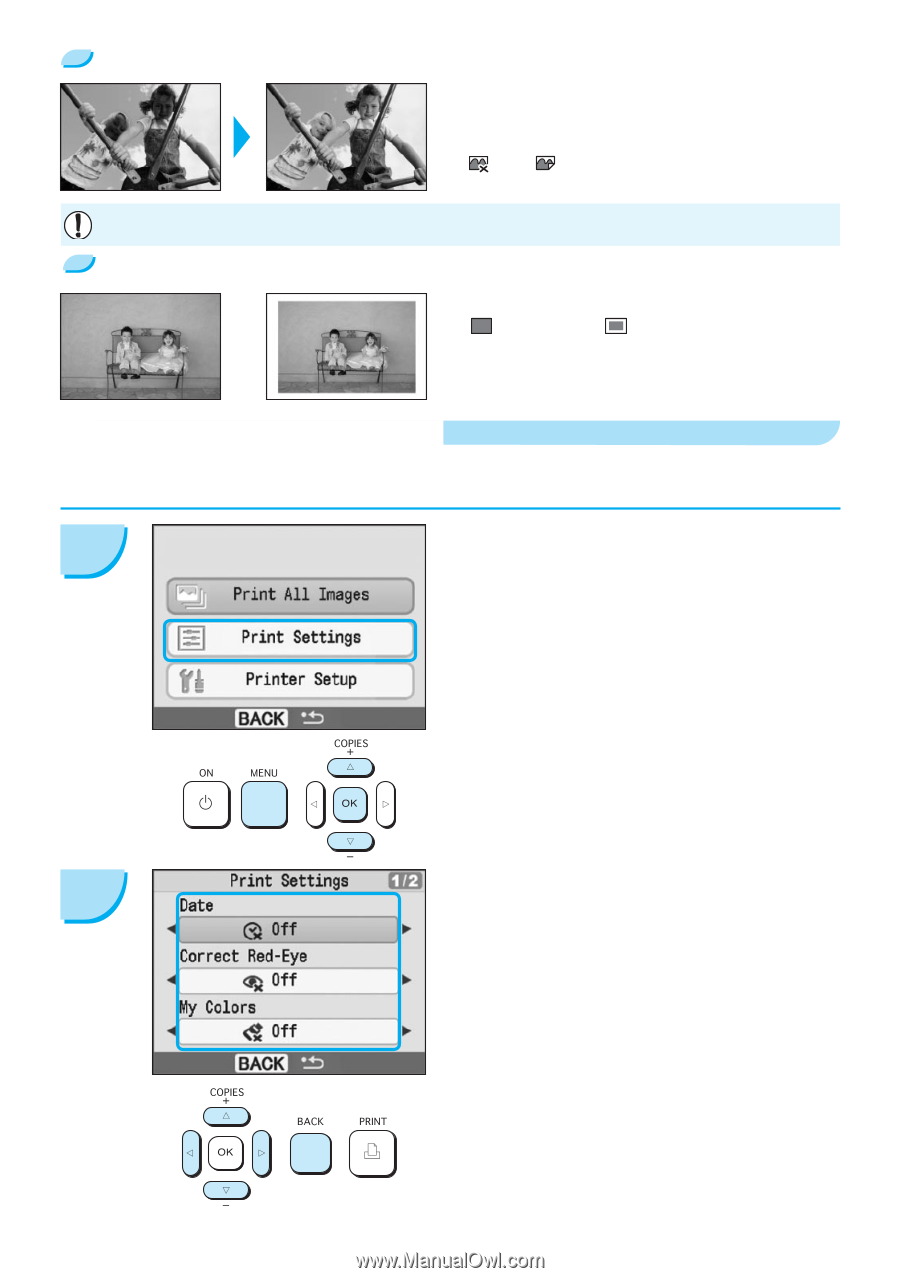
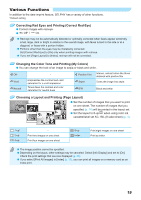
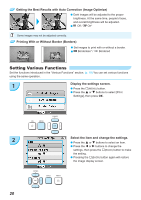
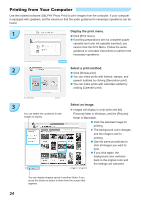
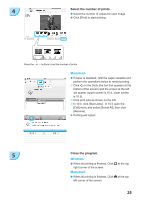
Getting the Best Results with Auto Correction (Image Optimize) Dark images will be adjusted to the proper brightness. At the same time, people's faces, and overall brightness will be adjusted. Off / On* Some images may not be adjusted correctly. Printing With or Without Border (Borders) Set images to print with or without a border. Borderless* / Bordered Setting Various Functions Set the functions introduced in the "Various Functions" section. (p. 19) You can set various functions using the same operation. 1 Display the settings screen. Press the m(MENU) button. Press the u or d buttons to select [Print Settings], then press o. 2 20 Select the item and change the settings. Press the u or d buttons to select an item. Press the l or r buttons to change the settings, then press the m(BACK) button to make the setting. Pressing the m(BACK) button again will restore the image display screen.
-
 1
1 -
2
-
3
-
4
-
5
-
6
-
7
-
8
-
9
-
10
-
11
-
12
-
13
-
14
-
 15
15 -
 16
16 -
 17
17 -
 18
18 -
 19
19 -
 20
20 -
 21
21 -
 22
22 -
 23
23 -
 24
24 -
 25
25 -
26
-
27
-
28
-
29
-
30
-
31
-
32
-
33
-
34
-
35
-
36
 |
 |