Canon VB-M720F Network Camera VB-H43/VB-H630VE/VB-H630D/VB-H730F/VB-M42/VB-M62 - Page 29
Set the Password, Date and Time, Camera Name and Video, Password Setting, Date and Time Settings
 |
View all Canon VB-M720F manuals
Add to My Manuals
Save this manual to your list of manuals |
Page 29 highlights
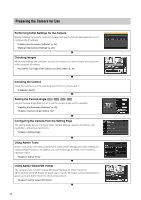
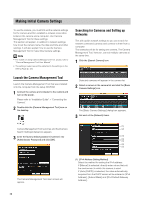
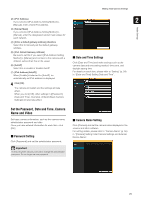
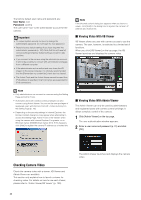
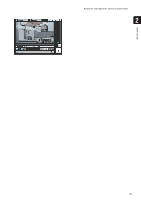
Making Initial Camera Settings (2) [IPv4 Address] If you selected [IPv4 Address Setting Method] > 2 [Manual], enter a fixed IPv4 address. Initial Settings (3) [Subnet Mask] If you selected [IPv4 Address Setting Method] > [Manual], enter the designated subnet mask values for each network. (4) [Enter a default gateway address] checkbox Select this to manually set the default gateway address. (5) [IPv4 Default Gateway Address] Be sure to set this if you select [IPv4 Address Setting Method] > [Manual] and connect to the camera with a different subnet than that of the viewer. (6) [AutoIP] Select this to enable or disable AutoIP. (7) [IPv4 Address (AutoIP)] When [Enable] is selected for [AutoIP], an automatically set IPv4 address is displayed. „ Date and Time Settings Click [Date and Time] and make settings such as the camera date and time setting method, time zone, and daylight saving time. For details on each item, please refer to "Setting" (p. 54) in "[Date and Time] Setting Date and Time". 4 Click [OK]. The camera will restart and the settings will take effect. When you click [OK], other settings in ([Password], [Date and Time], [Camera], [Video]) [Basic Camera Settings] will also take effect. Set the Password, Date and Time, Camera Name and Video Set basic camera information, such as the camera name, administrator password and date. Once you have entered information for each item, click [OK]. „ Password Setting Click [Password] and set the administrator password. Important To ensure system security, be sure to change the administrator password. Do not forget the new password. „ Camera Name Setting Click [Camera] and set the camera name displayed in the viewers and other software. For setting details, please refer to "Camera Name" (p. 56) in "[Camera] Setting Initial Camera Settings and External Device Name". 29
-
 1
1 -
2
-
3
-
4
-
5
-
6
-
7
-
8
-
9
-
10
-
11
-
12
-
13
-
14
-
15
-
16
-
17
-
18
-
19
-
20
-
21
-
22
-
23
-
 24
24 -
 25
25 -
 26
26 -
 27
27 -
 28
28 -
 29
29 -
 30
30 -
 31
31 -
 32
32 -
 33
33 -
 34
34 -
35
-
36
-
37
-
38
-
39
-
40
-
41
-
42
-
43
-
44
-
45
-
46
-
47
-
48
-
49
-
50
-
51
-
52
-
53
-
54
-
55
-
56
-
57
-
58
-
59
-
60
-
61
-
62
-
63
-
64
-
65
-
66
-
67
-
68
-
69
-
70
-
71
-
72
-
73
-
74
-
75
-
76
-
77
-
78
-
79
-
80
-
81
-
82
-
83
-
84
-
85
-
86
-
87
-
88
-
89
-
90
-
91
-
92
-
93
-
94
-
95
-
96
-
97
-
98
-
99
-
100
-
101
-
102
-
103
-
104
-
105
-
106
-
107
-
108
-
109
-
110
-
111
-
112
-
113
-
114
-
115
-
116
-
117
-
118
-
119
-
120
-
121
-
122
-
123
-
124
-
125
-
126
-
127
-
128
-
129
-
130
-
131
-
132
-
133
-
134
-
135
-
136
-
137
-
138
-
139
-
140
-
141
-
142
-
143
-
144
-
145
-
146
-
147
-
148
-
149
-
150
-
151
-
152
-
153
-
154
-
155
-
156
-
157
-
158
-
159
-
160
-
161
-
162
-
163
-
164
-
165
-
166
-
167
-
168
-
169
-
170
-
171
-
172
-
173
-
174
-
175
-
176
-
177
-
178
-
179
-
180
-
181
-
182
-
183
-
184
-
185
-
186
-
187
-
188
-
189
-
190
-
191
-
192
-
193
-
194
-
195
 |
 |
