Canon VIXIA HF R400 Instruction Manual - Page 119
Copying Recordings to an External Video Recorder - problems
 |
View all Canon VIXIA HF R400 manuals
Add to My Manuals
Save this manual to your list of manuals |
Page 119 highlights
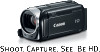
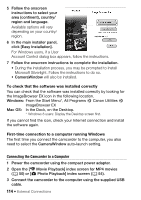
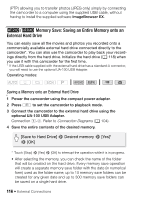
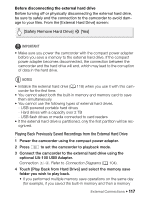
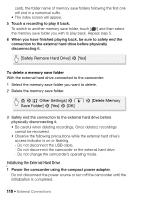
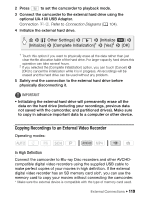
2 Press to set the camcorder to playback mode. 3 Connect the camcorder to the external hard drive using the optional UA-100 USB Adapter. Connection #-2. Refer to Connection Diagrams (A 104). 4 Initialize the external hard drive. > [ Other Settings] > q > [Initialize '] > [Initialize] > [Complete Initialization]1 > [Yes]2 > [OK] 1 Touch this option if you want to physically erase all the data rather than just clear the file allocation table of the hard drive. For large-capacity hard drives this operation can take several hours. 2 If you selected the [Complete Initialization] option, you can touch [Cancel] > [OK] to cancel the initialization while it is in progress. All recordings will be erased and the hard drive can be used without any problem. 5 Safely end the connection to the external hard drive before physically disconnecting it. IMPORTANT • Initializing the external hard drive will permanently erase all the data on the hard drive (including your recordings, previous data not saved with the camcorder, and partitioned drives). Make sure to copy in advance important data to a computer or other device. Copying Recordings to an External Video Recorder Operating modes: SCN In High Definition Connect the camcorder to Blu-ray Disc recorders and other AVCHDcompatible digital video recorders using the supplied USB cable to make perfect copies of your movies in high definition. If the external digital video recorder has an SD memory card slot*, you can use the memory card to copy your movies without connecting the camcorder. * Make sure the external device is compatible with the type of memory card used. External Connections Š 119
-
 1
1 -
2
-
3
-
4
-
5
-
6
-
7
-
8
-
9
-
10
-
11
-
12
-
13
-
14
-
15
-
16
-
17
-
18
-
19
-
20
-
21
-
22
-
23
-
24
-
25
-
26
-
27
-
28
-
29
-
30
-
31
-
32
-
33
-
34
-
35
-
36
-
37
-
38
-
39
-
40
-
41
-
42
-
43
-
44
-
45
-
46
-
47
-
48
-
49
-
50
-
51
-
52
-
53
-
54
-
55
-
56
-
57
-
58
-
59
-
60
-
61
-
62
-
63
-
64
-
65
-
66
-
67
-
68
-
69
-
70
-
71
-
72
-
73
-
74
-
75
-
76
-
77
-
78
-
79
-
80
-
81
-
82
-
83
-
84
-
85
-
86
-
87
-
88
-
89
-
90
-
91
-
92
-
93
-
94
-
95
-
96
-
97
-
98
-
99
-
100
-
101
-
102
-
103
-
104
-
105
-
106
-
107
-
108
-
109
-
110
-
111
-
112
-
113
-
 114
114 -
 115
115 -
 116
116 -
 117
117 -
 118
118 -
 119
119 -
 120
120 -
 121
121 -
 122
122 -
 123
123 -
 124
124 -
125
-
126
-
127
-
128
-
129
-
130
-
131
-
132
-
133
-
134
-
135
-
136
-
137
-
138
-
139
-
140
-
141
-
142
-
143
-
144
-
145
-
146
-
147
-
148
-
149
-
150
-
151
-
152
-
153
-
154
-
155
-
156
-
157
-
158
-
159
-
160
-
161
-
162
-
163
-
164
-
165
-
166
-
167
-
168
-
169
-
170
-
171
-
172
-
173
-
174
-
175
-
176
-
177
-
178
-
179
-
180
-
181
-
182
-
183
-
184
-
185
-
186
-
187
-
188
-
189
-
190
-
191
-
192
-
193
-
194
-
195
-
196
 |
 |
