Canon imagePROGRAF iPF6450 Calibration Guide - Page 14
Step 2: Set the custom paper name, Name in, Printer Driver, Step 3: Paper Source Settings, Roll
 |
View all Canon imagePROGRAF iPF6450 manuals
Add to My Manuals
Save this manual to your list of manuals |
Page 14 highlights
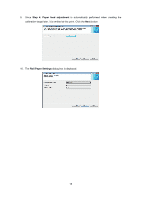
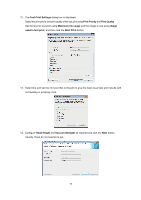
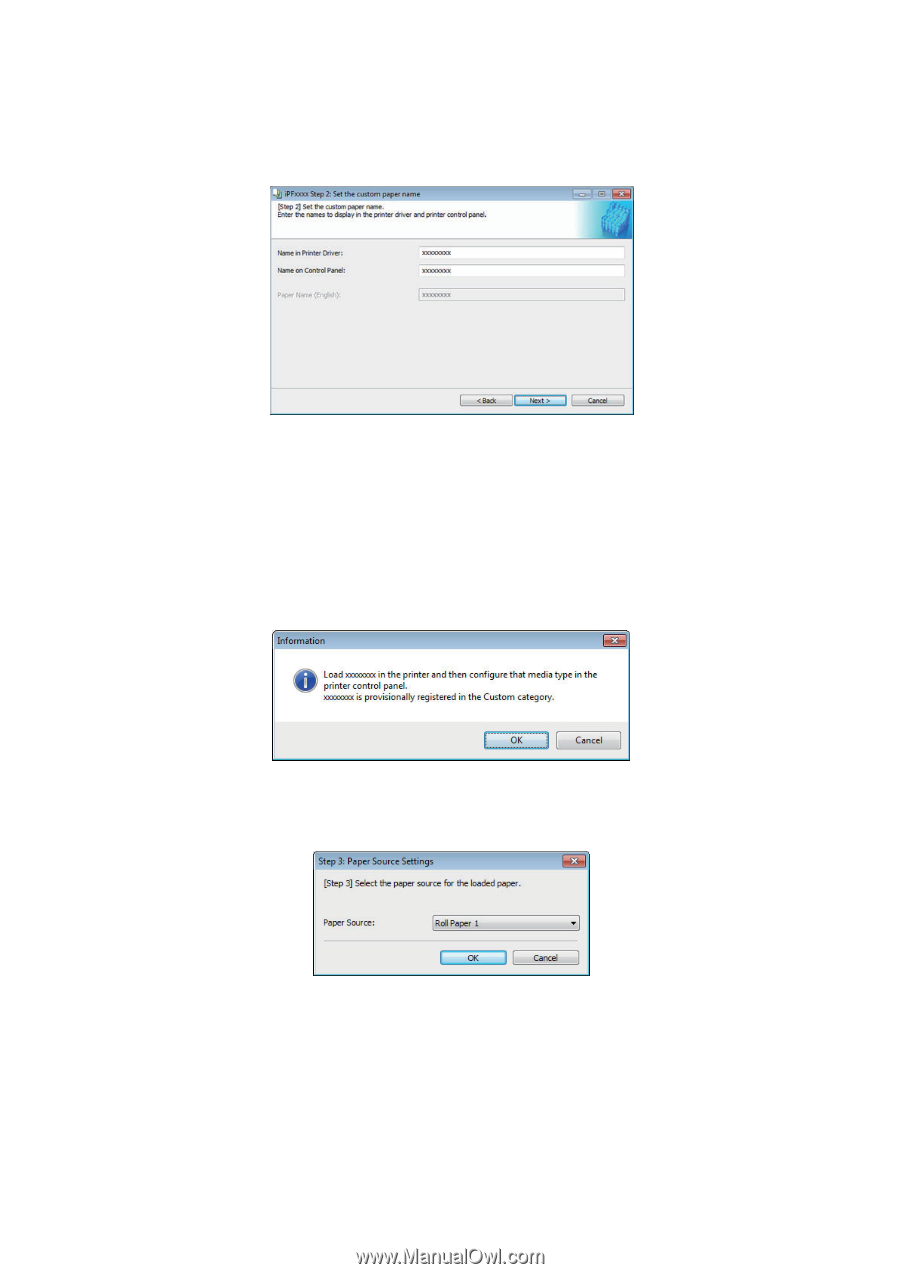
6. The Step 2: Set the custom paper name dialog box is displayed. Enter an arbitrary name to display in the printer control panel and printer driver, and then click the Next button. Depending on the selected standard paper, you might not be able to enter the Name in Printer Driver and add the created custom paper to the printer driver as-is. In this case, create the custom paper information by changing the standard paper to another paper. To use the custom paper in the printer driver, create it by changing the standard paper to another paper. 7. Load the custom paper in the printer and then click the OK button. 8. The Step 3: Paper Source Settings dialog box is displayed. Select Roll Paper 1 and click the OK button. 14
-
 1
1 -
2
-
3
-
4
-
5
-
6
-
7
-
8
-
 9
9 -
 10
10 -
 11
11 -
 12
12 -
 13
13 -
 14
14 -
 15
15 -
 16
16 -
 17
17 -
 18
18 -
 19
19 -
20
-
21
-
22
-
23
-
24
-
25
-
26
-
27
-
28
-
29
-
30
-
31
-
32
-
33
-
34
-
35
 |
 |
14
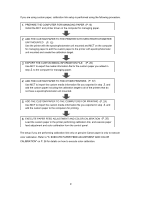
6.
The
Step 2: Set the custom paper name
dialog box is displayed.
Enter an arbitrary name to display in the printer control panel and printer driver, and then
click the
Next
button.
Depending on the selected standard paper, you might not be able to enter the
Name in
Printer Driver
and add the created custom paper to the printer driver as-is. In this case,
create the custom paper information by changing the standard paper to another paper. To
use the custom paper in the printer driver, create it by changing the standard paper to
another paper.
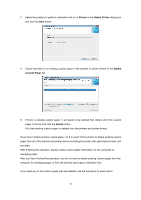
7.
Load the custom paper in the printer and then click the
OK
button.
8.
The
Step 3: Paper Source Settings
dialog box is displayed.
Select
Roll Paper 1
and click the
OK
button.