Canon imagePROGRAF iPF6450 Calibration Guide - Page 17
Test Print Settings, Print Priority, Print Quality, Maximum ink usage, Image, used in test print,
 |
View all Canon imagePROGRAF iPF6450 manuals
Add to My Manuals
Save this manual to your list of manuals |
Page 17 highlights
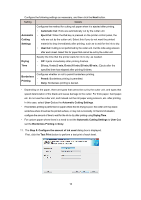
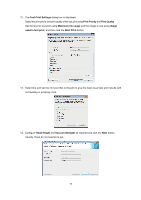
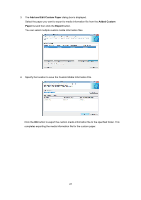
12. The Test Print Settings dialog box is displayed. Select the print priority and print quality of the test print using Print Priority and Print Quality. Set the level to test print using Maximum ink usage and the image to use using Image used in test print, and then click the Start Print button. 13. Determine and set the ink level that is thought to give the best visual test print results with no bleeding or scraping of ink. 14. Configure Head Height and Vacuum Strength as required and click the Next button. Usually, these do not need to be set. 17
-
 1
1 -
2
-
3
-
4
-
5
-
6
-
7
-
8
-
9
-
10
-
11
-
 12
12 -
 13
13 -
 14
14 -
 15
15 -
 16
16 -
 17
17 -
 18
18 -
 19
19 -
 20
20 -
 21
21 -
 22
22 -
23
-
24
-
25
-
26
-
27
-
28
-
29
-
30
-
31
-
32
-
33
-
34
-
35
 |
 |

17
12. The
Test Print Settings
dialog box is displayed.
Select the print priority and print quality of the test print using
Print Priority
and
Print Quality
.
Set the level to test print using
Maximum ink usage
and the image to use using
Image
used in test print
, and then click the
Start Print
button.
13. Determine and set the ink level that is thought to give the best visual test print results with
no bleeding or scraping of ink.
14. Configure
Head Height
and
Vacuum Strength
as required and click the
Next
button.
Usually, these do not need to be set.