Casio CLASSPad300 User Guide - Page 88
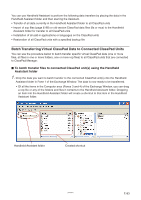
Batch Transferring xcp File or Old Version ClassPad Image Files fls or
 |
UPC - 079767161071
View all Casio CLASSPad300 manuals
Add to My Manuals
Save this manual to your list of manuals |
Page 88 highlights
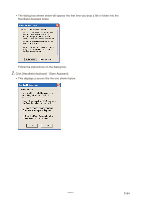
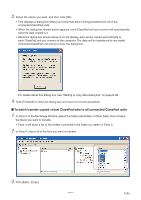
4. Click [Handheld Assistant] - [Paste to ClassPads]. • This displays the Handheld Assistant dialog box. • From this point, perform the same steps starting from step 3 under "To batch transfer files to connected ClassPad unit(s) using the Handheld Assistant folder" on page E-83. Deleting Shortcuts from the Handheld Assistant Folder ■ To delete shortcuts from the Handheld Assistant folder 1. In Pane 1, click the Handheld Assistant folder. • This will display all the shortcuts contained on the Handheld Assistant folder in Pane 2. 2. Select the shortcuts you want to delete. 3. Right-click any one of the selected shortcuts, and then select [Delete] on the shortcut menu that appears. • This deletes all of the shortcuts you selected in step 2. ■ To delete all shortcuts from the Handheld Assistant folder Click [Handheld Assistant] - [Clear Contents]. Batch Transferring xcp File or Old Version ClassPad Image Files (fls or mcs) to All Connected ClassPad Units You can use the following procedures to transfer one or more xcp, fls, or mcs file to all or connected ClassPad units. ■ To transfer one xcp, fls, or mcs file to all connected ClassPad units 1. Click [Handheld Assistant] - [Import to ClassPads]. • This displays the Open dialog box. 2. Select the xcp, fls, or mcs file you want to transfer, and then click [Open]. • This displays the Handheld Assistant dialog box. • From this point, perform the same steps starting from step 3 under "To batch transfer files to connected ClassPad unit(s) using the Handheld Assistant folder" on page E-83. 20060301 E-86
-
 1
1 -
2
-
3
-
4
-
5
-
6
-
7
-
8
-
9
-
10
-
11
-
12
-
13
-
14
-
15
-
16
-
17
-
18
-
19
-
20
-
21
-
22
-
23
-
24
-
25
-
26
-
27
-
28
-
29
-
30
-
31
-
32
-
33
-
34
-
35
-
36
-
37
-
38
-
39
-
40
-
41
-
42
-
43
-
44
-
45
-
46
-
47
-
48
-
49
-
50
-
51
-
52
-
53
-
54
-
55
-
56
-
57
-
58
-
59
-
60
-
61
-
62
-
63
-
64
-
65
-
66
-
67
-
68
-
69
-
70
-
71
-
72
-
73
-
74
-
75
-
76
-
77
-
78
-
79
-
80
-
81
-
82
-
 83
83 -
 84
84 -
 85
85 -
 86
86 -
 87
87 -
 88
88 -
 89
89 -
 90
90 -
 91
91 -
 92
92 -
 93
93 -
94
-
95
-
96
-
97
-
98
-
99
-
100
-
101
-
102
-
103
-
104
-
105
-
106
-
107
-
108
-
109
-
110
-
111
-
112
-
113
 |
 |
