Casio EX-F1 Owners Manual - Page 94
Installing the Lens Hood or a Lens Filter, Installing the Lens Hood
 |
UPC - 079767623401
View all Casio EX-F1 manuals
Add to My Manuals
Save this manual to your list of manuals |
Page 94 highlights
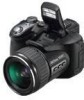
. External Flash Precautions • After recording an image, check it on the monitor screen. If it is not what you expected, use the controls on the external flash unit to adjust flash intensity, and adjust the aperture and ISO sensitivity settings on the camera. Note that you cannot control external flash unit intensity using camera settings. • Close up images often tend to be overexposed. If you are having overexposure problems, try adjusting the aperture and ISO sensitivity settings of the external flash unit and the camera. You can also try using the camera's built in flash to correct for overexposure. • Camera aperture (F) values are based on the widest optical zoom (1X). Using telephoto can cause slight lens darkness. Adjust the aperture and ISO sensitivity settings of the external flash unit and the camera as required when using optical zoom. • If you do not plan to use the external flash, detach it from the camera and select some setting other than ¢ (External Flash) as the flash mode. The built-in flash will not operate properly while an external flash is attached. Installing the Lens Hood or a Lens Filter Use the procedures in this section to install the lens hood that comes with the camera or a commercially available filter. Installing the Lens Hood Installing the lens hood that comes with the camera shuts out unwanted light when shooting in very strong sunlight or against backlighting, which helps to reduce the chance of ghosting and flaring. When installing the lens hood, align the guide mark on the hood with the guide mark on the camera lens, and press the hood until you hear it click into place. To remove the lens hood, press the buttons on the left and right and pull it towards you. Lens hood Guide marks Buttons The lens hood can be attached backwards when transporting the camera. 94 Advanced Settings
-
 1
1 -
2
-
3
-
4
-
5
-
6
-
7
-
8
-
9
-
10
-
11
-
12
-
13
-
14
-
15
-
16
-
17
-
18
-
19
-
20
-
21
-
22
-
23
-
24
-
25
-
26
-
27
-
28
-
29
-
30
-
31
-
32
-
33
-
34
-
35
-
36
-
37
-
38
-
39
-
40
-
41
-
42
-
43
-
44
-
45
-
46
-
47
-
48
-
49
-
50
-
51
-
52
-
53
-
54
-
55
-
56
-
57
-
58
-
59
-
60
-
61
-
62
-
63
-
64
-
65
-
66
-
67
-
68
-
69
-
70
-
71
-
72
-
73
-
74
-
75
-
76
-
77
-
78
-
79
-
80
-
81
-
82
-
83
-
84
-
85
-
86
-
87
-
88
-
 89
89 -
 90
90 -
 91
91 -
 92
92 -
 93
93 -
 94
94 -
 95
95 -
 96
96 -
 97
97 -
 98
98 -
 99
99 -
100
-
101
-
102
-
103
-
104
-
105
-
106
-
107
-
108
-
109
-
110
-
111
-
112
-
113
-
114
-
115
-
116
-
117
-
118
-
119
-
120
-
121
-
122
-
123
-
124
-
125
-
126
-
127
-
128
-
129
-
130
-
131
-
132
-
133
-
134
-
135
-
136
-
137
-
138
-
139
-
140
-
141
-
142
-
143
-
144
-
145
-
146
-
147
-
148
-
149
-
150
-
151
-
152
-
153
-
154
-
155
-
156
-
157
-
158
-
159
-
160
-
161
-
162
-
163
-
164
-
165
-
166
-
167
-
168
-
169
-
170
-
171
-
172
-
173
-
174
-
175
-
176
-
177
-
178
-
179
-
180
-
181
-
182
-
183
-
184
-
185
 |
 |
