Casio EX-Z30 Owners Manual - Page 147
then press [SET]., On the print menu
 |
View all Casio EX-Z30 manuals
Add to My Manuals
Save this manual to your list of manuals |
Page 147 highlights
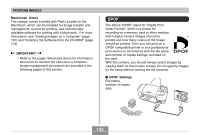
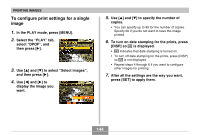
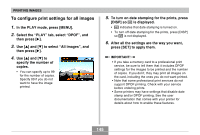
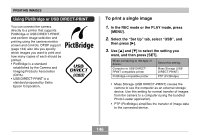
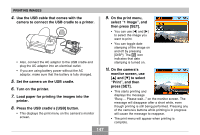
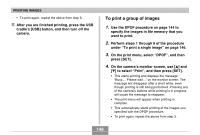
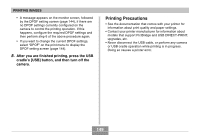
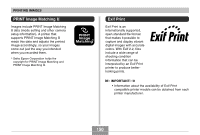
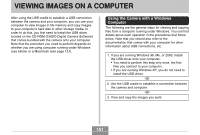
PRINTING IMAGES 4. Use the USB cable that comes with the camera to connect the USB cradle to a printer. USB • Also, connect the AC adaptor to the USB cradle and plug the AC adaptor into an electrical outlet. • If you are using battery power without the AC adaptor, make sure that the battery is fully charged. 5. Set the camera on the USB cradle. 6. Turn on the printer. 7. Load paper for printing the images into the printer. 8. Press the USB cradle's [USB] button. • This displays the print menu on the camera's monitor screen. 9. On the print menu, select "1 Image", and then press [SET]. • You can use [̇] and [̈] to select the image you want to print. • You can toggle date stamping of the image on and off by pressing [DISP]. The 12 1 icon indicates that date stamping is turned on. 10. On the camera's monitor screen, use [̆] and [̄] to select "Print", and then press [SET]. • This starts printing and displays the message "Busy.... Please wait..." on the monitor screen. The message will disappear after a short while, even though printing is still being performed. Pressing any of the camera's buttons while printing is in progress will cause the message to reappear. • The print menu will appear when printing is complete. 147
-
 1
1 -
2
-
3
-
4
-
5
-
6
-
7
-
8
-
9
-
10
-
11
-
12
-
13
-
14
-
15
-
16
-
17
-
18
-
19
-
20
-
21
-
22
-
23
-
24
-
25
-
26
-
27
-
28
-
29
-
30
-
31
-
32
-
33
-
34
-
35
-
36
-
37
-
38
-
39
-
40
-
41
-
42
-
43
-
44
-
45
-
46
-
47
-
48
-
49
-
50
-
51
-
52
-
53
-
54
-
55
-
56
-
57
-
58
-
59
-
60
-
61
-
62
-
63
-
64
-
65
-
66
-
67
-
68
-
69
-
70
-
71
-
72
-
73
-
74
-
75
-
76
-
77
-
78
-
79
-
80
-
81
-
82
-
83
-
84
-
85
-
86
-
87
-
88
-
89
-
90
-
91
-
92
-
93
-
94
-
95
-
96
-
97
-
98
-
99
-
100
-
101
-
102
-
103
-
104
-
105
-
106
-
107
-
108
-
109
-
110
-
111
-
112
-
113
-
114
-
115
-
116
-
117
-
118
-
119
-
120
-
121
-
122
-
123
-
124
-
125
-
126
-
127
-
128
-
129
-
130
-
131
-
132
-
133
-
134
-
135
-
136
-
137
-
138
-
139
-
140
-
141
-
 142
142 -
 143
143 -
 144
144 -
 145
145 -
 146
146 -
 147
147 -
 148
148 -
 149
149 -
 150
150 -
 151
151 -
 152
152 -
153
-
154
-
155
-
156
-
157
-
158
-
159
-
160
-
161
-
162
-
163
-
164
-
165
-
166
-
167
-
168
-
169
-
170
-
171
-
172
-
173
-
174
-
175
-
176
-
177
-
178
-
179
-
180
-
181
-
182
-
183
-
184
-
185
-
186
-
187
-
188
-
189
-
190
-
191
-
192
-
193
-
194
-
195
-
196
-
197
-
198
 |
 |
