Casio PX330 User Guide - Page 25
English
 |
View all Casio PX330 manuals
Add to My Manuals
Save this manual to your list of manuals |
Page 25 highlights
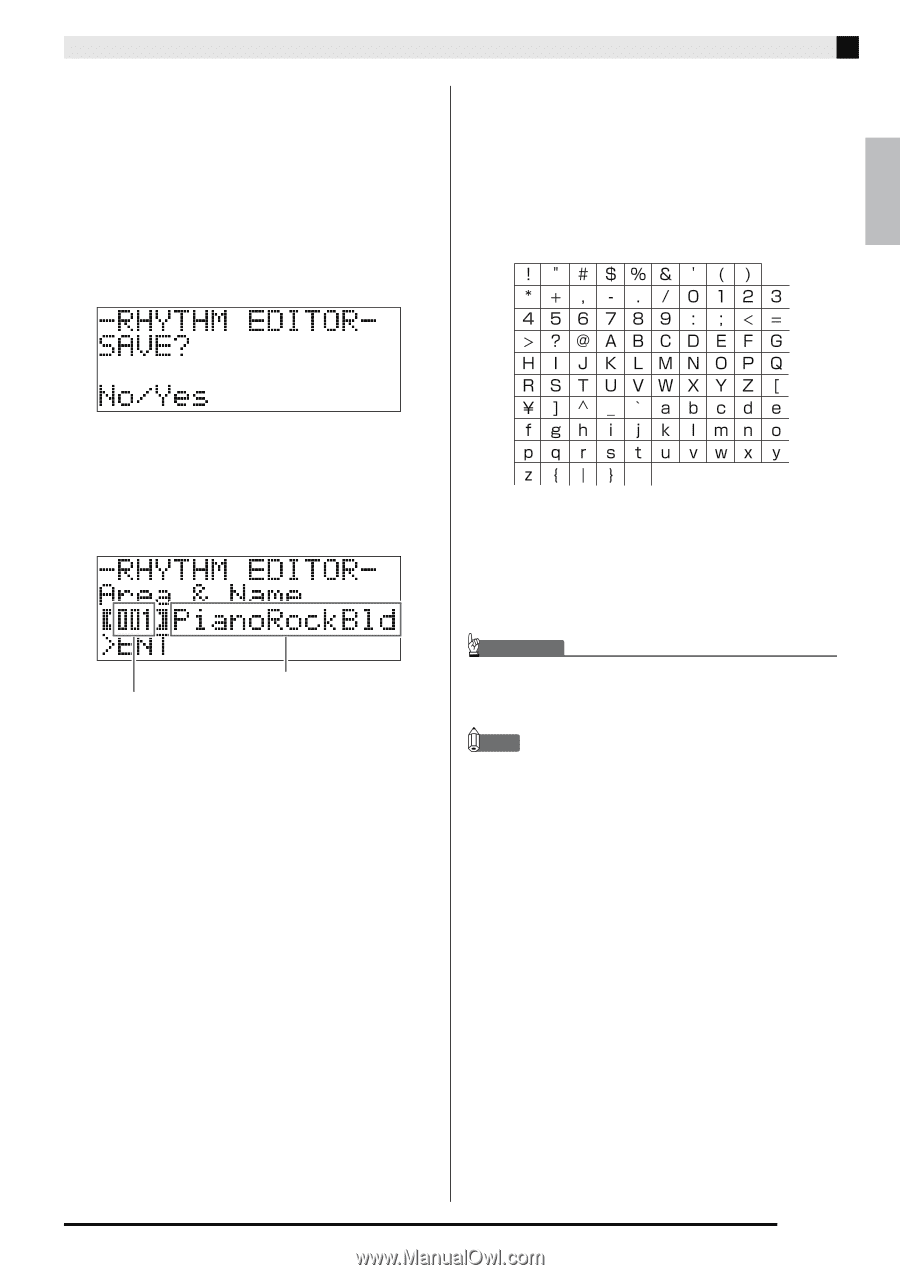
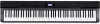
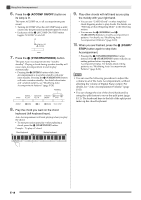
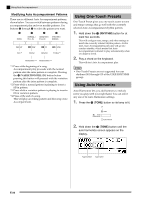
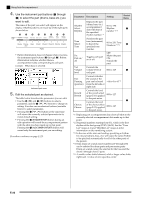
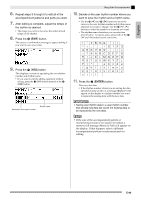
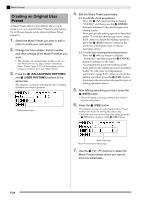
English 6. Repeat steps 3 through 5 to edit all of the accompaniment patterns and parts you want. 7. After editing is complete, adjust the tempo of the rhythm as desired. • The tempo you set here becomes the initial default tempo of the rhythm. 8. Press the cs (EXIT) button. This causes a confirmation message to appear asking if you want to save your edits. Using Auto Accompaniment 10. Decide on the user rhythm number where you want to save the rhythm and a rhythm name. • Use the ct (u) and dk (i) buttons to move the cursor to the user rhythm number and rhythm name character you want to change. Use the bt (w, q) buttons to select the number or character you want. • The rhythm name characters you can select are shown below. To input a space, press both of the bt (w and q) buttons at the same time. 9. Press the bt (YES) button. This displays a screen for specifying the user rhythm number and rhythm name. • If you want to exit the editing operation without saving, press the bt (NO) button instead of the bt (YES) button. Destination user rhythm number Rhythm name 11. Press the dl (ENTER) button. This saves the data. • If the rhythm number where you are saving the data already has data saved to it, a message (Replace?) will appear on the display to confirm whether you want to replace the existing data with the new data. IMPORTANT! • Saving user rhythm data to a user rhythm number that already has data will cause the existing data to be replaced by the new data. NOTE • If the size of the accompaniment pattern or instrument part data is too large to be edited, a memory full message (Memory Full) will appear on the display. If that happens, select a different accompaniment pattern or instrument part for editing. E-23
-
 1
1 -
2
-
3
-
4
-
5
-
6
-
7
-
8
-
9
-
10
-
11
-
12
-
13
-
14
-
15
-
16
-
17
-
18
-
19
-
 20
20 -
 21
21 -
 22
22 -
 23
23 -
 24
24 -
 25
25 -
 26
26 -
 27
27 -
 28
28 -
 29
29 -
 30
30 -
31
-
32
-
33
-
34
-
35
-
36
-
37
-
38
-
39
-
40
-
41
-
42
-
43
-
44
-
45
-
46
-
47
-
48
-
49
-
50
-
51
-
52
-
53
-
54
-
55
-
56
-
57
-
58
-
59
-
60
-
61
-
62
-
63
-
64
-
65
-
66
-
67
-
68
-
69
-
70
-
71
-
72
 |
 |