Casio XJ-460 Owners Manual - Page 20
To operate the computer with the remote controller - xga
 |
View all Casio XJ-460 manuals
Add to My Manuals
Save this manual to your list of manuals |
Page 20 highlights
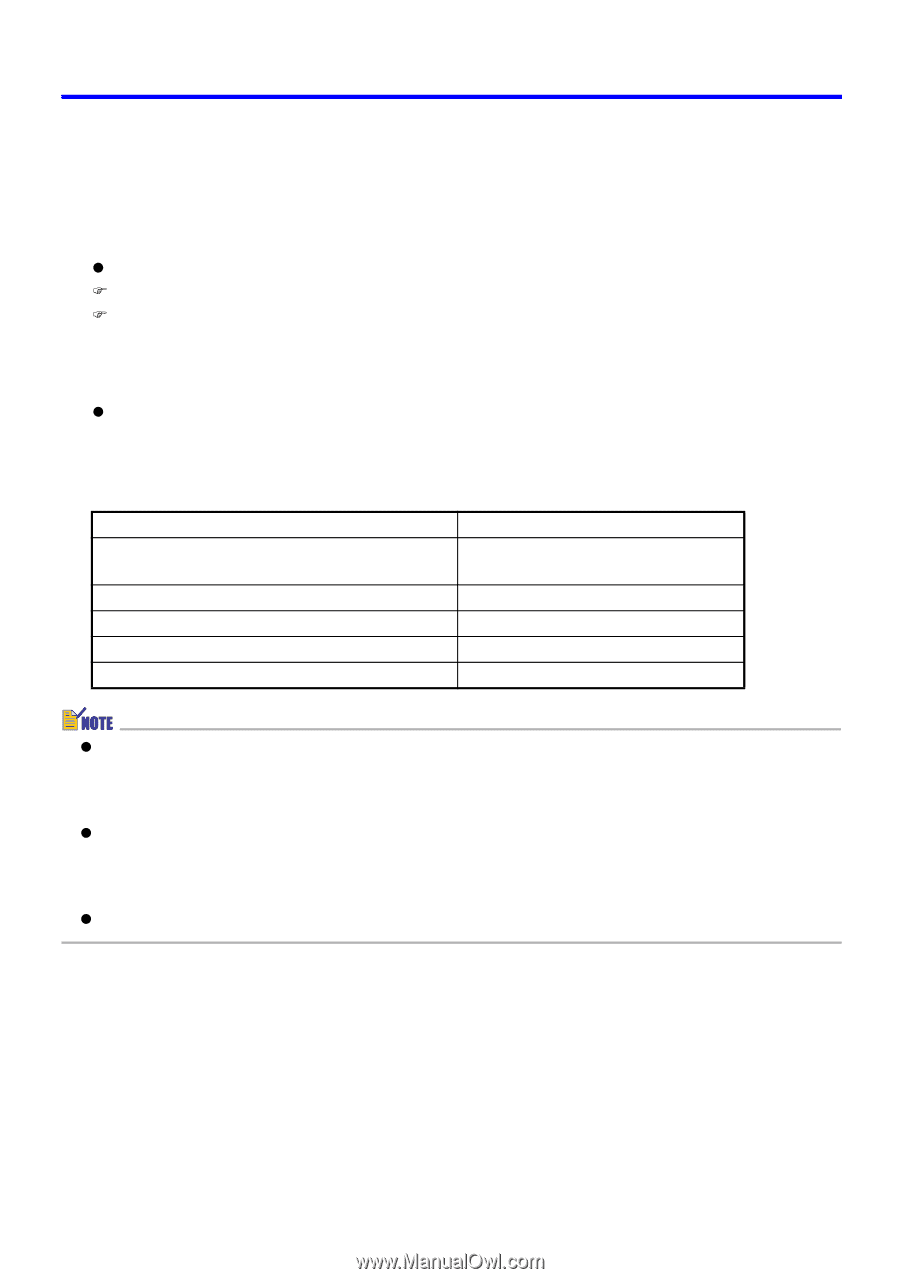
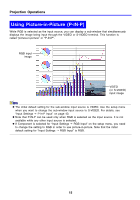
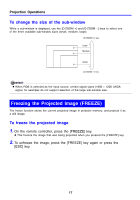
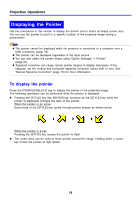
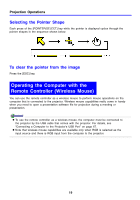
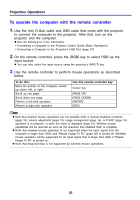
Projection Operations To operate the computer with the remote controller 1. Use the mini D-Sub cable and USB cable that come with the projector to connect the computer to the projector. After that, turn on the projector and the computer. z See the following for more information. ) Connecting a Computer to the Projector (User's Guide (Basic Operation)) ) Connecting a Computer to the Projector's USB Port (page 67) 2. On the remote controller, press the [RGB] key to select RGB as the input source. z You can also select the input source using the projector's [INPUT] key. 3. Use the remote controller to perform mouse operations as described below. To do this: Move the pointer on the computer screen up, down, left, or right Scroll up one page Scroll down one page Perform a left-click operation Perform a right-click operation Use this remote controller key: Cursor key [PAGE UP] [PAGE DOWN] [ENTER] [ESC] z Note that wireless mouse operations are not possible while a manual keystone correction (page 10), volume adjustment (page 13), image enlargement (page 14), or P-IN-P (page 15) operation is in progress, or while the menu is displayed (page 21). Wireless mouse capabilities will be restored as soon as the operation that disabled them is complete. z Note that wireless mouse operation is not supported when the input signal from the computer is larger than XGA, and "Resize Image To Fit" (page 38) is turned off. Wireless mouse operation will be supported for an input signal that is larger than XGA if "Resize Image To Fit" is turned on. z Note that drag-and-drop is not supported by wireless mouse operations. 20
-
 1
1 -
2
-
3
-
4
-
5
-
6
-
7
-
8
-
9
-
10
-
11
-
12
-
13
-
14
-
 15
15 -
 16
16 -
 17
17 -
 18
18 -
 19
19 -
 20
20 -
 21
21 -
 22
22 -
 23
23 -
 24
24 -
 25
25 -
26
-
27
-
28
-
29
-
30
-
31
-
32
-
33
-
34
-
35
-
36
-
37
-
38
-
39
-
40
-
41
-
42
-
43
-
44
-
45
-
46
-
47
-
48
-
49
-
50
-
51
-
52
-
53
-
54
-
55
-
56
-
57
-
58
-
59
-
60
-
61
-
62
-
63
-
64
-
65
-
66
-
67
-
68
-
69
-
70
-
71
-
72
-
73
-
74
-
75
-
76
-
77
-
78
 |
 |