Cub Cadet LTX 1045 Operation Manual - Page 91
Maintenance - air filter
 |
View all Cub Cadet LTX 1045 manuals
Add to My Manuals
Save this manual to your list of manuals |
Page 91 highlights
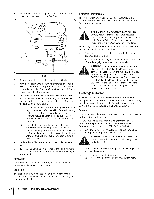
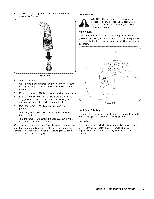
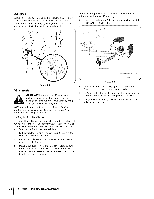
Maintenance& Adjustments 6 MaintenanceSchedule Clean Hood/Dash Louvers Before Eachuse Every 10 Hours ,/ Every 25 Hours Every 50 Hours Every I00 Hours Prior toStoring ,/ Check EngineOil Level CheckAir Filter for Dirty, Loose or Damaged Parts Clean and Re-oil Air Filter's Foam Predeaner V/ Replace Air Filter Element Change EngineOil and Replace Oil Filter Clean Battery Terminals y/ y/ Lube Front A×ies and Rims _" _" Clean Engine Cooling Fins _" _" Lube Front Deck Wheels V/ V/ Lube Deck Spindles _ Lube Pedal Pivot Points _" _" Check Spark Plug Condition & Gap _" _" Replace Fuel Filter _" Maintenance Changingthe Engine Oil WARNING! Before performing any maintenance or repairs, disengage PTO, set parking brake, stop engine and remove key to prevent unintended starting. Engine Refer to the Kohler Owner's Manual for all engine maintenance procedures and instructions. NOTE: Maintenance, repair, or replacement of the emission control devices and systems which are being done at owner's expense may be performed by any engine repair establishment or individual. Warranty repairs must be performed by a Cub Cadet Dealer. engine, muffler and surrounding metal surfaces will _ beAhRoNt INaGnd! caInf thcaeuseengibnuernshatso btheeenskrienc. enEtlxyercirsuen, the • caution to avoid burns. NOTE:The oil filter should be changed at every oil change interval. To complete an oil change, proceed as follows: 1. Run the engine for a few minutes to allow the oil in the crankcase to warm up. Warm oil will flow more freely and carry away more of the engine sediment which may have settled at the bottom of the crankcase. Use care to avoid burns from hot oil. 2. Open the tractor's hood and locate the oil drain port on the left side of the engine. 19
-
 1
1 -
2
-
3
-
4
-
5
-
6
-
7
-
8
-
9
-
10
-
11
-
12
-
13
-
14
-
15
-
16
-
17
-
18
-
19
-
20
-
21
-
22
-
23
-
24
-
25
-
26
-
27
-
28
-
29
-
30
-
31
-
32
-
33
-
34
-
35
-
36
-
37
-
38
-
39
-
40
-
41
-
42
-
43
-
44
-
45
-
46
-
47
-
48
-
49
-
50
-
51
-
52
-
53
-
54
-
55
-
56
-
57
-
58
-
59
-
60
-
61
-
62
-
63
-
64
-
65
-
66
-
67
-
68
-
69
-
70
-
71
-
72
-
73
-
74
-
75
-
76
-
77
-
78
-
79
-
80
-
81
-
82
-
83
-
84
-
85
-
 86
86 -
 87
87 -
 88
88 -
 89
89 -
 90
90 -
 91
91 -
 92
92 -
 93
93 -
 94
94 -
 95
95 -
 96
96 -
97
-
98
-
99
-
100
-
101
-
102
-
103
-
104
-
105
-
106
-
107
-
108
-
109
-
110
-
111
-
112
-
113
-
114
-
115
-
116
-
117
-
118
-
119
-
120
-
121
-
122
-
123
-
124
-
125
-
126
-
127
-
128
-
129
-
130
-
131
-
132
-
133
-
134
-
135
-
136
-
137
-
138
-
139
-
140
-
141
-
142
-
143
-
144
 |
 |
